Back
Troubleshooting - WebSphere Portal V6 Enterprise Scale Deployment
- Overview
- IBM's Serviceability Tools Strategy
- Self service resources
- Monitoring Techniques
- Portal Update Strategy
- Appendix A. Deployment Automation Options
Overview
This page describes portal problem determination methods for WebSphere Portal and WebSphere Application Server (WAS).
WPSconfig.sh task failure
WebSphere Portal uses configuration tasks to configure Portal to LDAPs, databases, etc. The configuration tasks are a series of ANT scripts that are invoked by running the WPSconfig.sh script from ...
portal_root/config
When invoking a configuration task you are simply invoking a parent task, for example...
WPSconfig.bat database-transfer
...that is made up of a series of sub-tasks.
Failures during the configuration tasks are common and this information is intended to help you understand how the tasks work and how we can begin problem determination when a configuration task fails.
WPSconfig reads values defined in...
For Portal 6.0 these are...
- wpconfig.properties
- wpconfig_dbdomain.properties
- wpconfig_dbtype.properties
- wpconfig_sourceDb.properties
...where are located in...
portal_root/config
We can edit these files with...
- Text editor
- portal_root/config/helpers
- portal_root/config/wizard
WPSconfig.sh task output is written to...
portal_root/log/ConfigTrace.log
This log is never overwritten and is appended to each time another configuration task is executed.
Analyze Failures with Configuration Tasks
You have executed a WPSconfig.sh task and have received a BUILD FAILED message. problem determination?
-
Review the ConfigTrace.log to determine the nature and timing of the failure. Scroll to the bottom of the file to review the most recent failure. At the bottom of the log, you should see something similar to this:
wmm.XDbName=wps6TCP
work.dir=/usr/WebSphere/PortalServer/config/work
wps.classes.dir=/usr/WebSphere/PortalServer/bin
ws.ext.dirs=/usr/WebSphere/AppServer/java/lib;/usr/WebSphere/AppServer/classes;...
wsadminConnType=NONE
---- End dump of properties ---

BUILD FAILED file:../config/actions/jcr_cfg.xml:1787: Java returned: 1

Total time: 13 minutes 26 seconds
BUILD FAILED indicates that the task has NOT completed successfully.
The line...
file:../config/actions/jcr_cfg.xml:1787: Java returned: 1
...tells us the specific location of the ANT xml file name and line number (1787) where the failure occurred.
You should be at the bottom of the ConfigTrace.log and looking at the BUILD FAILED message as noted above. To continue with problem determination you should now scroll up the ConfigTrace.log until you reach the beginning of the property dump section. Directly above the ---- Begin dump of properties ---- is where the specific problem has occurred and problem determination can begin, for example:
Target started: action-configure-content-security
action-configure-content-security:
[xmlaccess] EJPXB0006I: Connecting to URL http://localhost:10038/wps/config/
[xmlaccess] EJPXB0002I: Reading input file /usr/WebSphere/PortalServer/config/work/ContentAdminGroupsPAC.xmlError
404: Initialization of one or more services failed.


xmlaccess] EJPXB0015E: Server response indicates an error.
[xmlaccess] EJPXB0015E: Server response indicates an error.
[xmlaccess] EJPXB0006I: Connecting to URL http://localhost:10038/wps/config/
[xmlaccess] EJPXB0002I: Reading input file /usr/WebSphere/PortalServer/config/work/ContentUserGroupsPAC.xmlError
404: Initialization of one or more services failed.
[xmlaccess] EJPXB0015E: Server response indicates an error.
[xmlaccess] EJPXB0015E: Server response indicates an error.Wed Aug 23 13:01:24 PDT 2006
Target started: action-init-accesscontrol
action-init-accesscontrol:

 [echo] Calling ContentModelInitializer Target finished: action-init-accesscontrol Target finished: action-configure-content-security Target finished: enable-security-ldap---- Begin dump of properties ----
Here we can see specific details about when the error occurred (what sub-task) and some error codes that may provide clues on the nature of the error.
Notice the action-configure-content-security. This tells us what sub-task the error occurred.
The lines under action-configure-content-security shows us what actions were being attempted by the sub-task. In this case, we can see that a xmlaccess command is attempted.
- After identifying the relevant error, begin problem analysis. Sometimes failures lead to previous sub-tasks that indicate the root cause. In many cases, WPSconfig.sh tasks contain sub-tasks that stop and start WebSphere_Portal. Many times the root cause of a WPSconfig.sh task failure can be traced back to a Portal startup problem that occurred during the WPSconfig.sh task. The example below will show such a scenario.
- The ConfigTrace.log shows this specific error:
[xmlaccess] EJPXB0006I: Connecting to URL http://localhost:10038/wps/config/
[xmlaccess] EJPXB0002I: Reading input file /usr/WebSphere/PortalServer/config/work/ContentAdminGroupsPAC.xmlError 404: Initialization of one or more services failed.
[xmlaccess] EJPXB0015E: Server response indicates an error.
Here we can see that xmlaccess is attempting to contact Portal via the URLhttp://localhost:10038/wps/config/, however, the attempt results in:
Error 404: Initialization of one or more services failed.
[xmlaccess] EJPXB0015E: Server response indicates an error.
- Knowing that xmlaccess requires Portal to be started, the error gives you clues that Portal has not started properly. Review of the previous sub-task shows this below:
start-portal-server:
[logmsg] 2006.08.23 12:57:08.332 start-portal-server
[logmsg]   EJPCA3163I: Starting Server "WebSphere_Portal"

[echo] 'WebSphere_Portal' seems to be stopped.
[echo] Starting 'WebSphere_Portal'
[exec] ADMU0116I: Tool information is being logged in file [exec]

/ibm/WebSphere1/profiles/wp_profile/logs/WebSphere_Portal/startServer.log
[exec] ADMU0128I: Starting tool with the wp_profile profile
[exec] ADMU3100I: Reading configuration for server: WebSphere_Portal
[exec] ADMU3200I: Server launched. Waiting for initialization status.
[exec] ADMU3000I: Server WebSphere_Portal open for e-business; process id

is 2764
Target finished: start-portal-serverWed Aug 23 13:00:16 PDT 2006
Target started: action-check-cm
action-check-cm:
Target finished: action-check-cmWed Aug 23 13:00:16 PDT 2006
Target started: action-configure-content-security
action-configure-content-security:
[xmlaccess] EJPXB0006I: Connecting to URL http://localhost:10038/wps/config/
[xmlaccess] EJPXB0002I: Reading input file /usr/WebSphere/PortalServer/config/work/ContentAdminGroupsPAC.xmlError 404: Initialization of one or more services failed.
[xmlaccess] EJPXB0015E: Server response indicates an error.
[xmlaccess] EJPXB0015E: Server response indicates an error.
[xmlaccess] EJPXB0006I: Connecting to URL http://localhost:10038/wps/config/
[xmlaccess] EJPXB0002I: Reading input file /usr/WebSphere/PortalServer/config/work/ContentUserGroupsPAC.xmlError 404: Initialization of one or more services failed.
[xmlaccess] EJPXB0015E: Server response indicates an error.
[xmlaccess] EJPXB0015E: Server response indicates an error.Wed Aug 23 13:01:24 PDT 2006
Target started: action-init-accesscontrol
action-init-accesscontrol:


[echo] Calling ContentModelInitializer
Target finished: action-init-accesscontrol
Target finished: action-configure-content-security
Target finished: enable-security-ldap
As we can see, the sub-task reports that WebSphere_Portal started and is opened for e-business. However, you should review the SystemOut.log to see if any startup problems actually occurred. We can match the timestamp from above to the SystemOut.log to ensure you are reviewing the correct startup:
start-portal-server:
[logmsg] 2006.08.23 12:57:08.332 start-portal-server
[logmsg]   EJPCA3163I: Starting Server "WebSphere_Portal"
The corresponding WebSphere_Portal startup from...
portal_root/log/SystemOut.log
...shows the following:
[8/23/06 12:58:46:736 PDT] 0000000a CacheServiceI I DYNA1001I: WebSphere Dynamic Cache instance named ws/com.ibm.wps.ac.ApplicationRoleChildrenCache initialized successfully. [8/23/06 12:58:46:736 PDT] 0000000a CacheServiceI I DYNA1001I: WebSphere Dynamic Cache instance named ws/com.ibm.wps.ac.ContainedRolesCache initialized successfully.
[8/23/06 12:58:47:080 PDT] 0000000a Servlet E com.ibm.wps.engine.Servlet init EJPFD0016E: Initialization of service failed.com.ibm.wps.ac.DomainAdministratorNotFoundException: EJPSB0107E: Exception occurred while retrieving the identity of the domain adminuser/admingroup cn=r9wpsadmin. at com.ibm.wps.ac.impl.AccessControlDataManagementServiceImpl.convertDNtoObjectID( AccessControlDataManagementServiceImpl.java:728) at com.ibm.wps.ac.impl.AccessControlDataManagementServiceImpl.initializeDomainConf ig(AccessControlDataManagementServiceImpl.java:662) at com.ibm.wps.ac.impl.AccessControlDataManagementServiceImpl.reinit(AccessControl DataManagementServiceImpl.java:599) at com.ibm.wps.ac.impl.AccessControlDataManagementServiceImpl.init(AccessControlDa taManagementServiceImpl.java:361) at com.ibm.wps.services.ServiceManager.createService(Unknown Source)
The startup errors above are the root cause of the WPSconfig.sh task failure. Specifically the EJPSB0107E error code.
-
After determining the root cause, we can begin searching for a solution to the EJPSB0107E error code using the IBM Support Assistant
-
If the above problem determination approach does not reveal anything, we can use a more advanced method by reviewing the actual xml configuration file...
portal_root/config/actions/jcr_cfg.xml
...which shows the following lines of code.
<property name="JcrDbLibrary"
          value="${${jcr.DbType}.DbLibrary}"/>

<echo message="Calling ContentModelInitializer" />

<java classname="com.ibm.content.init.ContentModelInitializer"
      fork="yes"
      failonerror="yes"
      dir="${WpsInstallLocation}/shared/app"
      output="${WpsInstallLocation}/log/cmInit.log">

<jvmarg value="-Dfile.encoding=${file.encoding}" />
<jvmarg value="${jvmArgForZos}" />

<sysproperty key="db2j.system.home"
             value="${WpsInstallLocation}/cloudscape" />

<arg value="-userName" />
<arg value="${PortalAdminId}" />
<arg value="-password" />
<arg value="${PortalAdminPwd}" />
<arg value="-url" />
<arg value="http://${WpsHostName}:${WpsHostPort}/contentapi/init" />
<arg value="-admingroup" />
<arg value="${WpsContentAdministrators}" />
Line 1787 points us to another log file named cmInit.log. Review of this log shows the following:
Aug 23, 2006 1:01:25 PM
com.ibm.content.init.ContentModelInitializer main INFO: Initializing Nodes and Node Types entry -
userName = cn=r9wpsadmin, strUrl = http://e0909psfay002.aa.ad.epa.gov:10038/contentapi/init
Making remote connection... Returning NULL Finished connection.  Response code: 401 Exception in thread "main"
com.ibm.content.exception.ServiceException: EJPVJ0036E: Initialization failed. at
com.ibm.content.init.ContentModelInitializer.remoteInitialize(ContentModelIniti alizer.java:829) at
com.ibm.content.init.ContentModelInitializer.main(ContentModelInitializer.java: 674)
Notice the variables that are included in the code, example:
${${jcr.DbType}.DbLibrary}
${PortalAdminId}
These variables indicate the corresponding properties that are being used from the wpconfig property files. We can use this mehtod to determine the property that is incorrect in the wpconfig property files.
Portal Install failure
Installation order for a typical, standalone, installation...
- WAS base is installed and upgraded to version 6.0.2.9
- WPS base is installed and upgraded to version 6.0.1.1 (optional)
- Required WebSphere Application interim fixes are applied
- Required WebSphere Process server interim fixes are applied (if Process Server was installed)
- Application Server/Process Server profile is created
- WebSphere Portal 6.0 is installed
- Configuration tasks are executed that include setting up the Cloudscape database, and enabling security.
Installation order for a custom installation (standalone or managed)...
- WebSphere Portal 6.0 is installed
- Configuration tasks are executed that include creating the Application Server profile (if standalone), setting up the Cloudscape database, and enabling security.
In a custom installation, WAS must already be installed and at the required version level for WebSphere Portal. The custom installation also gives you an option to install to a managed node. This will install Portal into a pre-exiting profile on a node that has been federated into a Deployment Manager. If you select this option, the WebSphere Portal installer will not create a WAS profile because the WAS profile is already required to exist on the federated node.
Installation logs used for problem determination can be found in the system defined temp directory and in
portal_root/log
The following table discusses some of the more important log files and their locations:
Log Location Contains installmessages.txt /tmp Messages that are generated during installation. The messages in this file are translated for the language that is specified during installation. wpinstalllog.txt /tmp /portal_root/log Trace information that is generated by the installation program. LocalizerTrace.archive5.log /portal_root/log Portal archive install/fixup messages. ConfigTrace.log /portal_root/log Additional information for configuration tasks executed during installation. log.txt /tmp /app_server_root/log Trace information generated during the installation of WAS.
Analyze wpinstalllog.txt
The file...
portal_root/log wpinstalllog.txt
...contains trace information that is generated by the installation program for every piece of the installation.
The wpinstalllog.txt file for a typical installation can logically be divided into these sections:
- Validation
- WAS installation
- WPS installation
- WAS fixes installation
- Profile creation
- WebSphere Portal installation
- Enabling WAS Security - Configure BPE
- Stop and Start WebSphere_Portal server
Validation
You should be at the top of the file and scrolling down. The first several lines will be similar to the following:
(Oct 30, 2006 3:01:19 PM), MultiPlatform.install,
com.ibm.wps.install.DeleteFilesAction, dbg,
Not found:/tmp/wpsinstalllog.txt(Oct 30, 2006 3:01:19 PM), MultiPlatform.install,
com.ibm.wps.install.DeleteFilesAction, dbg,
Not found:/tmp/log.txt(Oct 30, 2006 3:01:19 PM), MultiPlatform.install,
com.ibm.wps.install.DeleteFilesAction, dbg,
Not found:/tmp/wpulimit.sh(Oct 30, 2006 3:01:19 PM), MultiPlatform.install,
com.ibm.wps.install.SetTitleAction, msg2, About to set wizard title to:
    WebSphere Portal v6.0 Installer(Oct 30, 2006 3:01:19 PM), MultiPlatform.install,
com.ibm.wps.install.LogCommandLineArgs, msg1, Command line parameters:
    -Wconfig.arguments=-DskipWTP=true -W defaults.cdLocation=/shared/WPS60/aix/W-Setup/
The format of each line is the same throughout the entire log. Look at the first line:
(Oct 30, 2006 3:01:19 PM), MultiPlatform.install,
com.ibm.wps.install.DeleteFilesAction, dbg, Not found: /tmp/wpsinstalllog.txt
Each section of the line is separated by commas (,). The first section is the date and time. The second section names the process running. The third section shows you what component of the process is being executed at that time. The final section shows you the exact action being taken. In the above example, the Portal installer is cleaning up old log files and cannot find the wpsinstalllog.txt file, so no action is taken.
From the above example, this line is very important for debugging purposes:
com.ibm.wps.install.LogCommandLineArgs, msg1, Command line parameters: -W config.arguments=-DskipWTP=true -W defaults.cdLocation=/shared/WPS60/aix/W-Setup/
This tells you what command line parameters were used when the installation program was executed.
Scrolling on down the log, you will see several lines similar to the following:
com.ibm.wps.install.LogEntryAction, msg1, Logging: archiveInstall.choice=archive
These Logging statements print out various environment variables and variables used during installation. For troubleshooting and debugging purposes, these can be ignored.
Continue to scroll down the log. You will find several PortalValidationAction statements similar to the following:
com.ibm.wps.install.PortalValidationAction, msg2, VersionInfo object: wpsmp 6.0.0.0
com.ibm.wps.install.PortalValidationAction, msg2, Created PortalValidation object using default rules files
com.ibm.wps.install.PortalValidationAction, msg2, Detected no versions of WAS installed
com.ibm.wps.install.PortalValidationAction, msg1, Space required for WAS = 1650000 KB
com.ibm.wps.install.PortalValidationAction, msg1, Space required for WAS = 1611 MB
com.ibm.wps.install.PortalValidationAction, msg1, Space required for WPS = 1550000 KB
com.ibm.wps.install.PortalValidationAction, msg1, Space required for WPS = 1513 MB
com.ibm.wps.install.PortalValidationAction, msg1, Space required for IHS = 30000 KB
com.ibm.wps.install.PortalValidationAction, msg1, Space required for TEMPWASFP = 600000 KB
com.ibm.wps.install.PortalValidationAction, msg2, useValidation=true
com.ibm.wps.install.PortalValidationAction, msg1, Checking prereqs..
com.ibm.wps.install.PortalValidationAction, msg1, PortalValidation version info for OS: Windows 2003 SP1
com.ibm.wps.install.PortalValidationAction, msg2, osCurrent: true
These lines contain several valuable pieces of information.
- Detects any currently installed versions of WAS
- Lists space requirements for WAS (in KB and MB)
- Lists space requirements for Process Server (in KB and MB)
- Lists space requirements for IHS and Temp directories
- Validates the operating system
The next important set of lines from the wpinstalllog.txt comes from the DiskSpaceValidator component:
com.ibm.wps.install.DiskSpaceValidator, msg1, DiskSpaceValidator: Starting check.
Product: WAS, Destination: /usr/WebSphere/AppServer
com.ibm.wps.install.DiskSpaceValidator, msg1,
checkDiskSpace: Checking disk space for product: WAS,
destination: /usr/WebSphere/AppServer
com.ibm.wps.install.DiskSpaceValidator, msg1,
checkDiskSpace: partition =
com.ibm.wps.install.DiskSpaceValidator, msg1, checking writability,
parent=/
com.ibm.wps.install.DiskSpaceValidator, msg1, checkDiskSpace: destination is writeable
com.ibm.wps.install.DiskSpaceValidator, msg1, checkDiskSpace: free space available = 14711930
com.ibm.wps.install.DiskSpaceValidator, msg1, checkDiskSpace: adding partition for first time
com.ibm.wps.install.DiskSpaceValidator, msg1, checkDiskSpace: Space required = 1650000
com.ibm.wps.install.DiskSpaceValidator, msg1, checkDiskSpace: Remaining available space: 13061930
com.ibm.wps.install.DiskSpaceValidator, msg1, checkDiskSpace: Success
com.ibm.wps.install.DiskSpaceValidator, msg1, checkDiskSpace: Checking temp disk space for product: TEMPWASFP, destination: /tmp
com.ibm.wps.install.DiskSpaceValidator, msg1, checkDiskSpace: partition =
com.ibm.wps.install.DiskSpaceValidator, msg1, checking writability, parent=/tmp
com.ibm.wps.install.DiskSpaceValidator, msg1, checkDiskSpace: destination is writeable
com.ibm.wps.install.DiskSpaceValidator, msg1, checkDiskSpace: free space available = 14711930
com.ibm.wps.install.DiskSpaceValidator, msg1, checkDiskSpace: re-calc partition required space: product installed on same partition = WAS
com.ibm.wps.install.DiskSpaceValidator, msg1, checkDiskSpace: re-calc partition required space = 1650000
com.ibm.wps.install.DiskSpaceValidator, msg1, checkDiskSpace: Actual calculated Free Space available = 13061930
com.ibm.wps.install.DiskSpaceValidator, msg1, checkDiskSpace: Pre-recorded Free Space available = 13061930
com.ibm.wps.install.DiskSpaceValidator, msg1, checkDiskSpace: Space required = 600000
com.ibm.wps.install.DiskSpaceValidator, msg1, checkDiskSpace: Remaining available space: 12461930
com.ibm.wps.install.DiskSpaceValidator, msg1, checkDiskSpace: Success
com.ibm.wps.install.DiskSpaceValidator, msg1, DiskSpaceValidator: check successful
The DiskSpaceValidator checks the remaining free space on the system and determines if you meet the requirements for the WAS installation. Notice the last two lines:
com.ibm.wps.install.DiskSpaceValidator, msg1, checkDiskSpace: Success
com.ibm.wps.install.DiskSpaceValidator, msg1, DiskSpaceValidator: check successful
This will tell you if you have successfully met the requirements.
Not all operating systems supported by WebSphere Portal are supported by WPS. Because of that, the next noteworthy line makes this check:
com.ibm.wps.install.WbiSupportedOsCondition, msg2, Detected WBI supported OS = true
This will tell you whether or not the operating system is supported by Process Server.
Scrolling down further, you will come to the DetectPortBlockAction component for the WAS and it will look similar to:
com.ibm.wps.install.DetectPortBlockAction, msg1, Detect ports for server1
com.ibm.wps.install.DetectPortBlockAction, msg1, Logging values...
com.ibm.wps.install.DetectPortBlockAction, msg1,    startingPort    = 10000
com.ibm.wps.install.DetectPortBlockAction, msg1,    endingPort      = 10024
com.ibm.wps.install.DetectPortBlockAction, msg1,    endingPortPlusOne  = 10025
com.ibm.wps.install.DetectPortBlockAction, msg1,    startingPortToScan = 10000
com.ibm.wps.install.DetectPortBlockAction, msg1,    endingPortToScan   = 65000
com.ibm.wps.install.DetectPortBlockAction, msg1,    portBlockSize   = 25
com.ibm.wps.install.DetectPortBlockAction, msg1, Found port block at: 10000 - 10024
com.ibm.wps.install.DetectPortBlockAction, msg1, Logging values...
com.ibm.wps.install.DetectPortBlockAction, msg1,    startingPort    = 10000
com.ibm.wps.install.DetectPortBlockAction, msg1,    endingPort      = 10024
com.ibm.wps.install.DetectPortBlockAction, msg1,    endingPortPlusOne  = 10025
com.ibm.wps.install.DetectPortBlockAction, msg1,    startingPortToScan = 10000
com.ibm.wps.install.DetectPortBlockAction, msg1,    endingPortToScan   = 65000
com.ibm.wps.install.DetectPortBlockAction, msg1,    portBlockSize   = 25
com.ibm.wps.install.DetectPortBlockAction, msg1, profileParam: -startingPort 10000
Here we can see what ports are being set aside for use with WAS.
As you continue to scroll down, you will come to the PortalLocationValidator section. This section is very important as it reveals several key variables for the Portal installation. That section will look similar to the following:
com.ibm.wps.install.PortalLocationValidator, msg2, Checking Portal destination: /usr/WebSphere//PortalServer
com.ibm.wps.install.PortalLocationValidator, msg2, Number of currently/previously installed Portals:0
com.ibm.wps.install.PortalLocationValidator, msg2, Number of currently/previously installed Portals:0
com.ibm.wps.install.PortalLocationValidator, msg1, PortalLocationValidator: Starting check.  Product: WPS, Destination: /usr/WebSphere//PortalServer
com.ibm.wps.install.PortalLocationValidator, msg1, checkDiskSpace: Checking disk space for product: WPS, destination: /usr/WebSphere//PortalServer
com.ibm.wps.install.PortalLocationValidator, msg1, checkDiskSpace: partition = /
com.ibm.wps.install.PortalLocationValidator, msg1, checking writability, parent=/
com.ibm.wps.install.PortalLocationValidator, msg1, checkDiskSpace: destination is writeable
com.ibm.wps.install.PortalLocationValidator, msg1, checkDiskSpace: free space available = 14711595
com.ibm.wps.install.PortalLocationValidator, msg1, checkDiskSpace: re-calc partition required space: product installed on same partition = TEMPWASFP
com.ibm.wps.install.PortalLocationValidator, msg1, checkDiskSpace: re-calc partition required space = 600000
com.ibm.wps.install.PortalLocationValidator, msg1, checkDiskSpace: re-calc partition required space: product installed on same partition = WAS
com.ibm.wps.install.PortalLocationValidator, msg1, checkDiskSpace: re-calc partition required space = 2250000
com.ibm.wps.install.PortalLocationValidator, msg1, checkDiskSpace: Actual calculated Free Space available = 12461595
com.ibm.wps.install.PortalLocationValidator, msg1, checkDiskSpace: Pre-recorded Free Space available = 12461930
com.ibm.wps.install.PortalLocationValidator, msg1, checkDiskSpace: Change detected updating pre-recorded value = 12461595
com.ibm.wps.install.PortalLocationValidator, msg1, checkDiskSpace: Space required = 1550000
com.ibm.wps.install.PortalLocationValidator, msg1, checkDiskSpace: Remaining available space: 10911595
com.ibm.wps.install.PortalLocationValidator, msg1, checkDiskSpace: Success
com.ibm.wps.install.PortalLocationValidator, msg1, PortalLocationValidator: DiskSpaceValidator: check successful
com.ibm.wps.install.PortalLocationValidator, msg1, PortalLocationValidator: check successful
Three important checks are made here:
- Checks to see if there are any previously installed instances of Portal
- Checks installation location to ensure it is valid
- Checks disk space for location to ensure it meets Portal requirements.
The last three lines will tell you if you have met all of these requirements:
com.ibm.wps.install.PortalLocationValidator, msg1, checkDiskSpace: Success
com.ibm.wps.install.PortalLocationValidator, msg1, PortalLocationValidator: DiskSpaceValidator: check successful
com.ibm.wps.install.PortalLocationValidator, msg1, PortalLocationValidator: check successful
The installer also runs the DetectPortBlockAction component again, this time for WebSphere Portal. It will resemble the previous example of DetectPortBlockAction.
WAS Installation
After validation has completed, the actual installation will begin. The first step of installation is WAS. In the wpinstalllog.txt, you will see the following:
com.ibm.wps.install.ExternalCommandAction, msg2, Beginning install step: Installing WAS.  This step will take several minutes.
com.ibm.wps.install.ExternalCommandAction, msg2, Executing command:
    "/shared/WPS60/aix/W-1/aix/ia32/ifpackage/WAS/Install.exe"
        -silent
        -options "/usr/WebSphere//PortalServer/package/was60responsefile.nd.txt"
        -is:silent

com.ibm.wps.install.ExternalCommandAction, msg2, Working directory:
com.ibm.wps.install.ExternalCommandAction$CancelWatcher, msg2, Created Cancelwatcher
com.ibm.wps.install.ExternalCommandAction$ProgressWatcherRunner, msg2, Created ProgressWatcherRunner, ProgressWatcher class:
com.ibm.wps.install.LogProgressWatcher
com.ibm.wps.install.ExternalCommandAction$OutputWatcher, msg2, Created StdOut OutputWatcher
com.ibm.wps.install.ExternalCommandAction$OutputWatcher, msg2, Created StdErr OutputWatcher
com.ibm.wps.install.ExternalCommandAction, msg2, Return code = 0
com.ibm.wps.install.ExternalCommandAction, msg2, Executing command: completed

com.ibm.wps.install.ExternalCommandAction, msg2, Completed install step:
Installing WAS.
This step will take several minutes.
com.ibm.wps.install.ScanFileAction, msg1, fileName=/usr/WebSphere/AppServer/logs/log.txt
There are several important items to discuss from this section:
- Note that this section begins with this line:
Beginning install step: Installing WAS.
And ends with:
Completed install step: Installing WAS.
- This line shows us exactly how the WAS installer was executed:
Executing command:
"/shared/WPS60/aix/W-1/aix/ia32/ifpackage/WAS/Install.exe"
    -silent
    -options
    "/usr/WebSphere//PortalServer/package/was60responsefile.nd.txt"
    -is:silent
When the installation finishes, you see this line:
Return code = 0
0 means that no errors were encountered. Anything else here means the installation failed.
- Finally, this line shows us where the installation was logged:
fileName=/usr/WebSphere/AppServer/logs/log.txt
In the event of any failures, you would check this log to determine the cause.
WPS Installation
After WAS installation has completed, the installer moves on to install WPS. Scrolling down the wpinstalllog.txt, we can see that with the following lines:
com.ibm.wps.install.ExternalCommandAction, msg2,
Beginning install step:
Installing WPS.
This step will take several minutes.
com.ibm.wps.install.ExternalCommandAction, msg2, Executing command:

"/shared/WPS60/aix/W-2/aix/ia32/WBI/Install.exe"
    -silent
    -options "/usr/WebSphere//PortalServer/package/wps60.bpc.responsefile.txt"
    -W unsupportedJDKFoundSeq.active=false  -is:silent


com.ibm.wps.install.ExternalCommandAction, msg2,
Working directory: "/shared/WPS60/aix/W-2/aix/ia32/WBI"
com.ibm.wps.install.ExternalCommandAction$CancelWatcher, msg2,
Created Cancelwatcher
com.ibm.wps.install.ExternalCommandAction$ProgressWatcherRunner, msg2,
Created ProgressWatcherRunner, ProgressWatcher class:
com.ibm.wps.install.LogProgressWatcher
com.ibm.wps.install.ExternalCommandAction$OutputWatcher, msg2,
Created StdOut OutputWatcher
com.ibm.wps.install.ExternalCommandAction$OutputWatcher, msg2,
Created StdErr OutputWatcher
com.ibm.wps.install.ExternalCommandAction, msg2, Return code = 0
com.ibm.wps.install.ExternalCommandAction, msg2, Executing command: completed
com.ibm.wps.install.ExternalCommandAction, msg2, Completed install step:
Installing WPS. This step will take several minutes.

com.ibm.wps.install.ScanFileAction, msg1,
fileName=/usr/WebSphere/AppServer/logs/wbi/log.txt
We can make the same observations from here as you did for the WAS installation. We can see:
- Where the installation begins and ends
- The exact command executed to install WPS
- The return code
- The file where the installation was logged
WAS Fixes Installation
The next section of the installation will install the required WAS interim fixes. That section will look similar to:
com.ibm.wps.install.ExternalCommandAction, msg2, Beginning install step: Installing WAS Fixes
com.ibm.wps.install.ExternalCommandAction, msg2, Executing command: cmd /c ""/usr/WebSphere//PortalServer/package/was6fixes.bat""

com.ibm.wps.install.ExternalCommandAction, msg2, Working directory:
com.ibm.wps.install.ExternalCommandAction$CancelWatcher, msg2, Created Cancelwatcher
com.ibm.wps.install.ExternalCommandAction$OutputWatcher, msg2, Created StdOut OutputWatcher
com.ibm.wps.install.ExternalCommandAction$OutputWatcher, msg2, Created StdErr OutputWatcher
com.ibm.wps.install.ExternalCommandAction$OutputWatcher, msg2, StdOut:
com.ibm.wps.install.ExternalCommandAction$OutputWatcher, msg2, StdOut:
/tmp/wplaunch>"/usr/WebSphere/AppServer/updateinstaller/update"
    -is:javahome "/usr/WebSphere/AppServer/updateinstaller/java"
    -W maintenance.package="/usr/WebSphere/AppServer/updateinstaller/maintenance/6.0.1.0-WS
    -WBI-IFIY82199.pak"
    -silent
com.ibm.wps.install.ExternalCommandAction, msg2, Return code = 0
com.ibm.wps.install.ExternalCommandAction, msg2, Executing command: completed
com.ibm.wps.install.ExternalCommandAction, msg2, Completed install step: Installing WAS Fixes

com.ibm.wps.install.ScanFileAction, msg1,

fileName=/usr/WebSphere/AppServer/logs/update/6.0.1.0-WS-WBI-IFIY82199.install/updat elog.txt
Like the previous two sections, we can make several important observations here. We can see:
- Where the installation begins and ends
- The exact command being used to install the fixes
- The return code
- The file where the installation is logged
Profile Creation
After WAS and WPS have been installed and upgraded, the next section you come to in wpinstalllog.txt is profile creation:
com.ibm.wps.install.LogProgressRendererSwingImpl,
msg1, Log file is:
$LONGPATH($N($W(was.location)/logs/wasprofile/wasprofile_create_$W(detectProfileAction.profileName).log))com.ibm.wps.install.ExternalCommandAction,
msg2,
Beginning install step:Installing WAS Profile.  This step will take several minutes.
com.ibm.wps.install.ExternalCommandAction, msg2, Executing command:
"/usr/WebSphere/AppServer/bin/manageprofiles.bat"
    -create
    -profileName "wp_profile"
    -profilePath "/ibm/WebSphere/profiles/wp_profile"
    -templatePath "/usr/WebSphere/AppServer/profileTemplates/default.bfm"
    -federateLater "true"
    -nodeName "nodename"
    -cellName "cellname"
    -hostName "hostname.ibm.com"
    -startingPort 10000
    -winserviceCheck false
    -dbJDBCClasspath "null"
    -dbType "null"
    -ceiSampleJmsUser "wpadmin"
    -ceiSampleJmsPwd "PASSWORD_REMOVED"
    -ceiSampleServerName "server1"
    -ceiDbProduct "CLOUDSCAPE_V51_1"
    -ceiDbName ""
    -ceiDbUser "wpadmin"
    -ceiDbPwd "PASSWORD_REMOVED"
    -ceiDbSysUser "wpadmin"
    -ceiDbSysPwd "PASSWORD_REMOVED"
    -ceiDbJdbcDriverClasspath ""
    -ceiDbJdbcDriverType ""
    -ceiDbServerName ""
    -ceiDbServerPort ""
    -ceiDbNodeName ""
    -ceiDbExecuteScripts ""
    -configureScaSecurity "true"
    -scaSecurityUserId "wasadmin"
    -scaSecurityPassword "PASSWORD_REMOVED"


com.ibm.wps.install.ExternalCommandAction, msg2, Working directory:
com.ibm.wps.install.ExternalCommandAction$CancelWatcher, msg2, Created Cancelwatcher
com.ibm.wps.install.ExternalCommandAction$ProgressWatcherRunner, msg2, Created ProgressWatcherRunner, ProgressWatcher class:
com.ibm.wps.install.LogProgressWatcher
com.ibm.wps.install.ExternalCommandAction$OutputWatcher, msg2, Created StdOut OutputWatcher
com.ibm.wps.install.ExternalCommandAction$OutputWatcher, msg2, Created StdErr OutputWatcher
com.ibm.wps.install.ExternalCommandAction$OutputWatcher, msg2, StdOut: INSTCONFSUCCESS: Success: The profile now exists.
com.ibm.wps.install.ExternalCommandAction$OutputWatcher, msg2, StdOut: INSTCONFSUCCESS: Profile augmentation succeeded.
com.ibm.wps.install.ExternalCommandAction$OutputWatcher, msg2, StdOut: INSTCONFSUCCESS: Profile augmentation succeeded.
com.ibm.wps.install.ExternalCommandAction, msg2, Return code = 0
com.ibm.wps.install.ExternalCommandAction, msg2, Executing command: completed
com.ibm.wps.install.ExternalCommandAction, msg2, Completed install step:
Installing WAS Profile.  This step will take several minutes.
This section is slighty different from the previous sections. We can still see markers for the beginning and end of the profile creation. We can still see the command being executed. We can still see the return code returned from the profile creation. However, the log file line comes at the beginning rather than the end.
com.ibm.wps.install.LogProgressRendererSwingImpl,
msg1,
Log file is:
$LONGPATH($N($W(was.location)/logs/wasprofile/wasprofile_create_$W(detectProfileAction.profileName).log))
If there are any problems with the profile creation, check that log.
WebSphere Portal Installation
The WebSphere Portal installation and configuration begins and continues from this point on. There are numerous logging statements written here. Most of these statements are only for information purposes and are not relevant for troubleshooting and debugging. They are outside the scope of this document. A majority of the WebSphere Portal installation and configuration debugging statements are written to LocalizerTrace.archive5.log.
Enabling WAS Security
If you continue to scroll down wpinstalllog.txt you will come to the next section for enabling security. This section is headed with the following lines:
com.ibm.wps.install.ExternalCommandAction, msg2,
Beginning install step: Enabling WAS Security
com.ibm.wps.install.ExternalCommandAction, msg2,
Executing command: cmd /c ""/usr/WebSphere//PortalServer/config/WPSconfig.bat" enable-security-wmmur-db-initial
    -DPortalAdminPwd=PASSWORD_REMOVED
    -DWasPassword=PASSWORD_REMOVED
    -DLTPAPassword=PASSWORD_REMOVED
    -DskipWTP=true"
Notice the command that is executed. It is a WPSconfig.sh command executing the task enable-security-wmmur-db-initial. Because this is a WPSconfig.sh command, the information from this security task will be logged to ConfigTrace.log in the...
portal_root/log
Knowing this, in the event of any failures here, we can check this log for valuable information.
From this point, if you continue to scroll down the wpinstalllog.txt, you will see that the output of the task is also written here in wpinstalllog.txt and continues for several lines. Eventually, you will come to lines similar to this:
com.ibm.wps.install.ExternalCommandAction$OutputWatcher, msg2, StdOut: BUILD SUCCESSFUL

com.ibm.wps.install.ExternalCommandAction$OutputWatcher, msg2, StdOut: Total time: 12 minutes 36 seconds
com.ibm.wps.install.ExternalCommandAction, msg2, Return code = 0
com.ibm.wps.install.ExternalCommandAction, msg2, Executing command: completed
com.ibm.wps.install.ExternalCommandAction, msg2, Completed install step: Enabling WAS Security

com.ibm.wps.install.ScanFileAction, msg1,

fileName=/usr/WebSphere//PortalServer/log/ConfigTrace.log
Here we can note the following important items:
- BUILD SUCCESSFUL indicates that the configuration task was successful and no errors were encountered
- Return code = 0 also indicates no errors were encountered.
- fileName=/usr/WebSphere//PortalServer/log/ConfigTrace.log shows us where this information was logged to in the event of an error.
Business Process Choreographer configured
The WPSconfig.sh task setup-bpe sets up the Business Process Choreographer. .
The first couple of lines from this section will look similar to this:
com.ibm.wps.install.ExternalCommandAction, msg2, Beginning install step: Running setup-bpe
com.ibm.wps.install.ExternalCommandAction, msg2, Executing command: cmd /c ""/usr/WebSphere//PortalServer/config/WPSconfig.bat" setup-bpe
    -DPortalAdminPwd=PASSWORD_REMOVED
    -DWasPassword=PASSWORD_REMOVED
    -Dbpe.jmsBFMRunAsPwd=PASSWORD_REMOVED
    -Dbpe.jmsHTMRunAsPwd=PASSWORD_REMOVED
    -Dbpe.mqPwd=PASSWORD_REMOVED
    -DskipWTP=true"
If you continue to scroll past this in the wpinstalllog.txt, you will see that the output of the task is written here. Evenutally you will come to this:
com.ibm.wps.install.ExternalCommandAction$OutputWatcher, msg2,
StdOut: BUILD SUCCESSFUL

com.ibm.wps.install.ExternalCommandAction$OutputWatcher, msg2,
StdOut: Total time: 10 minutes 20 seconds
com.ibm.wps.install.ExternalCommandAction, msg2, Return code = 0
com.ibm.wps.install.ExternalCommandAction, msg2, Executing command: completed
com.ibm.wps.install.ExternalCommandAction, msg2, Completed install step: Running setup-bpe
com.ibm.wps.install.ScanFileAction, msg1,

fileName=/usr/WebSphere//PortalServer/log/ConfigTrace.log
Again you see BUILD SUCCESSFUL, the return code, and the location of the log.
Stop and Start WebSphere Portal Server
The final two actions in the WebSphere Portal installation are to stop and start the WebSphere Portal server, using WPSconfig.sh again. First, you will come to the stop server:
com.ibm.wps.install.ExternalCommandAction, msg2,
Beginning install step: Stopping WAS
com.ibm.wps.install.ExternalCommandAction, msg2,
Executing command:
cmd /c ""/usr/WebSphere//PortalServer/config/WPSconfig.bat" stop-admin-server"
We can make the same notes here as before. WPSconfig.sh is executing the task stop-admin-server. Scrolling forward once again the contents are written to the wpinstalllog.txt. Eventually you come to:
com.ibm.wps.install.ExternalCommandAction$OutputWatcher, msg2, StdOut: BUILD SUCCESSFUL
com.ibm.wps.install.ExternalCommandAction$OutputWatcher, msg2, StdOut: Total time: 43 seconds
com.ibm.wps.install.ExternalCommandAction, msg2, Return code = 0
com.ibm.wps.install.ExternalCommandAction, msg2, Executing command: completed
com.ibm.wps.install.ExternalCommandAction, msg2, Completed install step: Stopping WAS
You should see BUILD SUCCESSFUL here. Immediately after this, you will see:
com.ibm.wps.install.ExternalCommandAction, msg2,
Beginning install step: Starting WebSphere Portal
com.ibm.wps.install.ExternalCommandAction, msg2,
Executing command:
cmd /c ""/usr/WebSphere//PortalServer/config/WPSconfig.bat" start-portal-server"
The WPSconfig.sh tool executes the start-portal-server task. The output is printed out to the wpinstalllog.txt and if you scroll down you will eventually come to:
com.ibm.wps.install.ExternalCommandAction$OutputWatcher, msg2,
StdOut: BUILD SUCCESSFUL
com.ibm.wps.install.ExternalCommandAction$OutputWatcher, msg2,
StdOut: Total time: 12 minutes 6 seconds
com.ibm.wps.install.ExternalCommandAction, msg2, Return code = 0
com.ibm.wps.install.ExternalCommandAction, msg2, Executing command: completed
com.ibm.wps.install.ExternalCommandAction, msg2, Completed install step:
Starting WebSphere Portal
You should see BUILD SUCCESSFUL here to indicate the server startup completed with no errors.
Analyze Failures with Portal Installation
You have launched the installation of WebSphere Portal. During installation, the following message appears on screen:

How do you being problem determination?
-
The error message tells you where begin troubleshooting. Review the LocalizeTrace.archive5.log file. When opening the LocalizeTrace.archive5.log file, you should scroll to the bottom of the file to see where the failure occurred. At the bottom of the log you may see something similar to this:
BUILD FAILEDfile:../config/includes/fixup_was_cfg.xml:177: Java returned: 105
Total time: 2 minutes 37 seconds
This is very similar to what you may find in a ConfigTrace.log as discussed in section 9.1.1. There are a few important items to note however:
- The BUILD FAILED indicates that the task running during installation has not completed successfully. In many cases, this will require an uninstall and then reinstall.
- The linefile:../config/includes/fixup_was_cfg.xml:177: Java returned: 105 usually does NOT contain any initial meaningful infomation about the failure, but does contain valuable information needed for deeper problem determination if required.
- Unlike the ConfigTrace.log file, the LocalizerTrace.archive5.log does not include a properties dump.
At this point you should be at the bottom of the LocalizerTrace.archive5.log and looking at the BUILD FAILED messages as noted above. To continue problem determination you should now scroll up the LocalizerTrace.archive5.log until you see where the specific problem has occurred. For example,
[wsadmin] Found ServerTemplate defaultProcessServer
[wsadmin] Attrs -------------------------------------------------------------
[wsadmin] -name WebSphere_Portal -genUniquePorts -templateName defaultProcessServer
[wsadmin] WASX7017E: Exception received while running file
"/opt/IBM/WebSphere/PortalServer/config/gather/was/fixup_was_cfg.jacl";
exception information:
com.ibm.websphere.management.cmdframework.CommandValidationException:
ADMG0253E: Matching template defaultProcessServer could not be found.

BUILD FAILED
file:../config/includes/fixup_was_cfg.xml:177: Java returned: 105
If you scroll up a bit further we can see the sub-task in which the error occurred.
action-consolidated-was-cfg: Tue Oct 31 20:12:30 EST 2006

[wsadmin] WASX7357I: By request, this scripting client is not connected to any server process. Certain configuration and application operations will be available in local mode.

[wsadmin] WASX7303I: The following options are passed to the scripting environment and are available as argument that is stored in the argv variable: "
[opt/IBM/WebSphere/PortalServer]"
Notice the action-consolidated-was-cfg. This tells you the name of the sub-task that failed. The lines under action-consolidated-was-cfg shows us what actions were being attempted by the sub-task. In this case, we can see that a wsadmin command is being attempted.
- The LocalizeTrace.archive5.log shows this specific error:
[wsadmin] WASX7017E: Exception received while running file     "/opt/IBM/WebSphere/PortalServer/config/gather/was/fixup_was_cfg.jacl";exception information:
com.ibm.websphere.management.cmdframework.CommandValidationException:
ADMG0253E:Matching template defaultProcessServer could not be found.
Here we can see that wsadmin is attempting to execute a jacl file and it fails with the following error:
ADMG0253E:Matching template defaultProcessServer could not be found.
- The wsadmin tool generates its own log called wsadmin.traceout. This log can be found in the wsas_profile_root/log directory. Knowing this, you may find additional information about the failure in that log. For example, if you examine the wsadmin.traceout for the previous failure, you will find:
[10/31/06 20:13:03:619 EST] 0000000a AbstractShell A
WASX7091I: Executing script: "/opt/IBM/WebSphere/PortalServer/config/gather/was/fixup_was_cfg.jacl"
[10/31/06 20:13:14:281 EST] 0000000a AbstractShell E
WASX7120E: Diagnostic information from exception with text
    "com.ibm.websphere.management.cmdframework.CommandValidationException:
ADMG0253E:Matching template defaultProcessServer could not be found. " follows:
com.ibm.websphere.management.cmdframework.CommandValidationException:
ADMG0253E:Matching template defaultProcessServer could not be found.
    at com.ibm.wsspi.management.commands.server.CreateServer.validate(CreateServer.jav a:352)
    at com.ibm.ws.management.commands.server.CreateApplicationServer.validate(CreateAp plicationServer.java:100)
    at com.ibm.websphere.management.cmdframework.provider.AbstractTaskCommand.execute( AbstractTaskCommand.java:526)
    at com.ibm.ws.scripting.adminCommand.AdminCmdController.executeCmd(AdminCmdControl ler.java:1209)
Unfortunately in this example, the only new information you get from the wsadmin.traceout is a stacktrace associated with the error. From this, we can determine that the error in the wsadmin.traceout is the cause of the failure. Specifically the ADMG0253E error code.
-
After determining the root cause we can begin searching for a solution to the ADMG0253E error code using the IBM Support Assistant
Portal Upgrade failure
Definition of a Portal upgrade failure
WebSphere Portal uses an update installer to apply maintenance fixes or fixpacks to the Portal environment. Failures during upgrades are common. This section is intended to help you understand how the upgrade works and how we can troubleshoot an upgrade failure.
A WebSphere Portal interim fix upgrade consists of a single JAR file (for example, PK32501.jar). An interim fix is meant to update a specific component of Portal and usually does not require any additional configuration.
A Portal fixpack upgrade consists of a single JAR file as well (for example, WP_PTF_6001.jar). A fixpack is meant to update several components and features of Portal and requires additional configuration once the components have been upgraded. Failures during upgrades commonly occur during this additional configuration.
With fixpack upgrades in WebSphere Portal 5.1.0.x, you were required to first run the Portal Update Installer (PUI) to update the Portal components and then manually run a configuration task to configure Portal with these newly updated components. In WebSphere Portal 6.0.x, the PUI has been enhanced to take care of both the component upgrade and the additional configuration automatically for you.
The relevant logs for the PUI are located in the...
portal_root/version/log
Analyze Failures with the Portal Update Installer
You attempt to upgrade WebSphere Portal to version 6.0.0.1 using the Portal Update Installer GUI. The upgrade fails with the following message: problem determination?
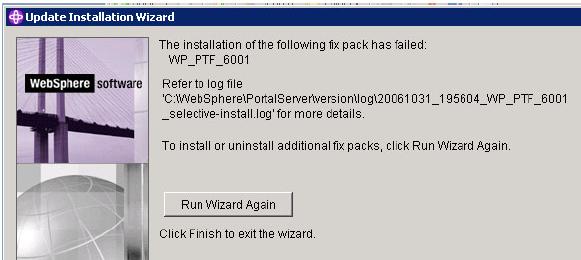
-
From the error message, you are referred to a log:...
portal_root/version/log/20061031_195604_WP_PTF_6001_selective-install.log
Since the name of the log will not be the same across all environments, this log will be referred to as <timestamp>_WP_PTF_6001_selective-install.log.
Review the <timestamp>_WP_PTF_6001_selective-install.log to determine the cause of the failure. Once you open you the log, you should scroll to the bottom of the file and start from there to find the error message. At the bottom you may see something like this:
PTF Results:

=========================================================
    Time Stamp (End): 2006-10-31T14:15:43-05:00
    PTF Result: failed

    PTF Result Message:
=========================================================

WUPD0218E: Fix pack installation failure: The component wp.ptf.config failed to install.

=========================================================
Notification:  Completing fix pack 'WP_PTF_6001'
In this case, the wp.ptf.config component has failed to install. If you scroll up a little further, you will see more information about the failure:
WUPD0248E: Fix pack update failure: The processing of fix pack WP_PTF_6001, component wp.ptf.config failed. See the log file /usr/WebSphere//PortalServer/version/log/20061031_184235_WP_PTF_6001_wp.ptf.config _install.log for processing details.
This line points you to a log file for the wp.ptf.config component: <timestamp>_WP_PTF_6001_wp.ptf.config_install.log. When you open this log file, you should once again scroll to bottom. There we can see the following:
2006-10-31T15:27:25-05:00 Result:
[wsadmin] WASX7017E: Exception receivedwhile running file
"/usr/WebSphere/PortalServer/config/was/wp_SetTargetMappings.jacl";exception information:
com.ibm.websphere.management.exception.ConfigServiceException2006-10-31T15:27:25-05:00 Result:
[wsadmin] com.ibm.ws.sm.workspace.WorkSpaceException2006-10-31T15:27:25-05:00 Result:
[wsadmin] java.io.IOException: java.io.IOException:
The system cannot find the specified file, either the filename is too long on Windows system or
run out of file descriptor on UNIX platform.
java.io.FileNotFoundException:
/ibm/WebSphere/profiles/wp_profile/wstemp/Script10ea00c683a/workspace/cells/nodename/applications/BPEContainer_nodename_WebSphere_Portal.ear/deployments/BPEContainer_nodename_WebSphere_Portal/compensate_ejb.jar/META-INF/ibm-ejb-jar-ext-pme.xmi.workspace_save
(The system cannot find the file specified)2006-10-31T15:27:25-05:00
Result: 2006-10-31T15:27:25-05:00 Result:
[wsadmin] WASX7309W:
No "save" was performed before the script "/usr/WebSphere/PortalServer/config/was/wp_SetTargetMappings.jacl" exited;
configuration changes will not be saved.2006-10-31T15:27:25-05:00 Result: StdErr:


2006-10-31T15:27:25-05:00 Result: StdErr: BUILD FAILED 2006-10-31T15:27:25-05:00
Result: StdErr: file:../config/includes/wp_ptf_6001.xml:1646: Java returned: 105


2006-10-31T15:27:25-05:00 Result: StdErr:2006-10-31T15:27:25-05:00
Result: StdErr: Total time: 30 minutes 45 seconds2006-10-31T15:27:25-05:00 Error 112
    -- Return code (1) differs from theexpected code (0).2006-10-31T15:27:25-05:00
Validating platform for (Linux, Solaris, SunOS,
AIX, HP-UX, s390)2006-10-31T15:27:25-05:00
platform check is negative.2006-10-31T15:27:25-05:00
Validating platform for (OS/400)2006-10-31T15:27:25-05:00
platform check is negative.2006-10-31T15:27:25-05:00
Product File Update is not active; skipping update step.2006-10-31T15:27:25-05:00
Input Jar File :/tmp/1/ptfs/WP_PTF_6001/components/wp.ptf.config/update.jar2006-10-31T15:27:25-05:00
Target Directory : /usr/WebSphere//PortalServer2006-10-31T15:27:25-05:00
Backup Jar File :
/usr/WebSphere//PortalServer/version/backup/20061031_195612_WP_PTF_6001_wp.ptf.config_undo.jar2006-10-31T15:27:25-05:00
Warnings Issued  : 02006-10-31T15:27:25-05:00
Log File :
/usr/WebSphere//PortalServer/version/log/20061031_195612_WP_PTF_6001_wp.ptf.config_install.log2006-10-31T15:27:25-05:00 2006-10-31T15:27:25-05:00
Errors were noted: 12006-10-31T15:27:25-05:00 Extractor functionality may be compromised!
Starting from the bottom of this file, you move up and search for the error message. Then see the following set of lines:
2006-10-31T15:27:25-05:00
Result: StdErr: BUILD FAILED2006-10-31T15:27:25-05:00
Result: StdErr:file:../config/includes/wp_ptf_6001.xml:1646: Java returned: 105

2006-10-31T15:27:25-05:00
Result: StdErr:2006-10-31T15:27:25-05:00
Result: StdErr: Total time: 30 minutes 45 seconds2006-10-31T15:27:25-05:00 Error 112
    -- Return code (1) differs from theexpected code (0).
The BUILD FAILED message is very similar to what you may see from a Configuration Task failure as described in section 9.1.1. Scrolling up a bit further reveals to us why you received a BUILD FAILED message:
2006-10-31T15:27:25-05:00 Result:
[wsadmin] java.io.IOException: java.io.IOException:
The system cannot find the specified file,
either the filename is too long on Windows system or run out of file
descriptor on UNIX platform.
java.io.FileNotFoundException:
/ibm/WebSphere/profiles/wp_profile/wstemp/Script10ea00c683a/workspace/cells/nodename/applications/BPEContainer_nodename_WebSphere_Portal.ear/deployments/BPE Container_nodename_WebSphere_Portal/compensate_ejb.jar/META-INF/ibm-ejb-jar-ext-pme.xmi.workspace_save
(The system cannot find the file specified)
-
After identifying the relevant error, begin problem analysis.
1. The <timestamp>_WP_PTF_6001_wp.ptf.config_install.log shows the specific error:
2006-10-31T15:27:25-05:00 Result:
[wsadmin] java.io.IOException: java.io.IOException: The system cannot find the specified file, either the filename is too long on Windows system or run out of file descriptor on UNIX platform. java.io.FileNotFoundException:

/ibm/WebSphere/profiles/wp_profile/wstemp/Script10ea00c683a/workspace/cells/n odename/applications/BPEContainer_nodename_WebSphere_Portal.ear/deployments/BPE Container_nodename_WebSphere_Portal/compensate_ejb.jar/META-INF/ibm-ejb-jar-ext-pme.xmi.workspace_save
(The system cannot find the file specified)
There are a few items to note from this error:
- The 2006-10-31T15:27:25 tells us the time this error occurred.
- The [wsadmin] tells you that the update installer is using the wsadmin tool.
- The java.io.FileNotFoundException line tells you the type of error you have received.
- There is no error code associated with this error.
2. The wsadmin tool generates its own log called wsadmin.traceout. This log file can be found in the wsas_profile_root/log directory. Knowing this, you may find additional information about the failure in the wsadmin.traceout. Open this log and scroll to the bottom. In the example above, you will find the following error:
Note: In the following error message, the stacktrace associated with the error message has been omitted to save space.
[10/31/06 15:27:09:688 EST] 0000000a AbstractShell E
WASX7120E: Diagnostic information from exception with text
"com.ibm.websphere.management.exception.ConfigServiceException
com.ibm.ws.sm.workspace.WorkSpaceException
com.ibm.ws.sm.workspace.WorkSpaceException


java.io.IOException: java.io.IOException:
The system cannot find the specified file, either the filename is too long on Windows system or run out of file descriptor on UNIX platform. java.io.FileNotFoundException:
/ibm/WebSphere/profiles/wp_profile/wstemp/Script10ea00c683a/workspace/cells/nodename/applications/BPEContainer_nodename_WebSphere_Portal.ear/deployments/BPE Container_nodename_WebSphere_Portal/compensate_ejb.jar/META-INF/ibm-ejb-jar-ext-pme.xmi.workspace_save
The system cannot find the file specified " follows:


com.ibm.websphere.management.exception.ConfigServiceException:
WKSP0008E RepositoryException while checking the state of
cells/nodename/applications/BPEContainer_nodename_WebSphere_Portal.ear/deployments/BPEContainer_nodename_WebSphere_Portal/compensate_ejb.jar/META-INF/ibm-ejb-jar-ext-pme.xmi
in the master repository --com.ibm.ws.sm.workspace.WorkSpaceException:
WKSP0016E Error get digest for cells/nodename/applications/BPEContainer_nodename_WebSphere_Portal.ear/deployme nts/BPEContainer_nodename_WebSphere_Portal/compensate_ejb.jar/META-INF/ibm-ejb-jar-ext-pme.xmi.workspace_save --java.io.IOException:
 The system cannot find the specified file, either the filename is too long on Windows system or run out of file descriptor on UNIX platform. java.io.FileNotFoundException:
/ibm/WebSphere/profiles/wp_profile/wstemp/Script10ea00c683a/workspace/cells/n odename/applications/BPEContainer_nodename_WebSphere_Portal.ear/deployments/BPE Container_nodename_WebSphere_Portal/compensate_ejb.jar/META-INF/ibm-ejb-jar-ext-pme.xmi.workspace_save (The system cannot find the file specified)

Caused by:
com.ibm.ws.sm.workspace.WorkSpaceException:
WKSP0008E RepositoryException while checking the state of cells/nodename/applications/BPEContainer_nodename_WebSphere_Portal.ear/deployme nts/BPEContainer_nodename_WebSphere_Portal/compensate_ejb.jar/META-INF/ibm-ejb-jar-ext-pme.xmi in the master repository --com.ibm.ws.sm.workspace.WorkSpaceException:
WKSP0016E Error get digest for cells/nodename/applications/BPEContainer_nodename_WebSphere_Portal.ear/deployme nts/BPEContainer_nodename_WebSphere_Portal/compensate_ejb.jar/META-INF/ibm-ejb-jar-ext-pme.xmi.workspace_save --java.io.IOException:
 The system cannot find the specified file, either the filename is too long on Windows system or run out of file descriptor on UNIX platform. java.io.FileNotFoundException:
/ibm/WebSphere/profiles/wp_profile/wstemp/Script10ea00c683a/workspace/cells/n odename/applications/BPEContainer_nodename_WebSphere_Portal.ear/deployments/BPE Container_nodename_WebSphere_Portal/compensate_ejb.jar/META-INF/ibm-ejb-jar-ext-pme.xmi.workspace_save (The system cannot find the file specified)
There are several key items to note about this error:
- Notice the timestamp from the wsadmin traceout. This is at the same time from the error in the <timestamp>_WP_PTF_6001_wp.ptf.config_install.log
- The same error you saw earlier appears here as well:
ndash; Scrolling down the error further reveals the cause and provides error codes:java.io.IOException: The system cannot find the specified file, either the filename is too long on Windows system or run out of file descriptor on UNIX platform. java.io.FileNotFoundException: /ibm/WebSphere/profiles/wp_profile/wstemp/Script10ea00c683a/workspace/cell s/nodename/applications/BPEContainer_nodename_WebSphere_Portal.ear/deploymen ts/BPEContainer_nodename_WebSphere_Portal/compensate_ejb.jar/META-INF/ibm-ej b-jar-ext-pme.xmi.workspace_save (The system cannot find the file specified)
Caused by:
com.ibm.ws.sm.workspace.WorkSpaceException:
WKSP0008E RepositoryException while checking the state of cells/nodename/applications/BPEContainer_nodename_WebSphere_Portal.ear/deplo yments/BPEContainer_nodename_WebSphere_Portal/compensate_ejb.jar/META-INF/ib m-ejb-jar-ext-pme.xmi in the master repository --com.ibm.ws.sm.workspace.WorkSpaceException:
WKSP0016E Error get digest for cells/nodename/applications/BPEContainer_nodename_WebSphere_Portal.ear/deplo yments/BPEContainer_nodename_WebSphere_Portal/compensate_ejb.jar/META-INF/ib m-ejb-jar-ext-pme.xmi.workspace_save --java.io.IOException:
 The system cannot find the specified file, either the filename is too long on Windows system or run out of file descriptor on UNIX platform. java.io.FileNotFoundException:
 /ibm/WebSphere/profiles/wp_profile/wstemp/Script10ea00c683a/workspace/cell s/nodename/applications/BPEContainer_nodename_WebSphere_Portal.ear/deploymen ts/BPEContainer_nodename_WebSphere_Portal/compensate_ejb.jar/META-INF/ibm-ej b-jar-ext-pme.xmi.workspace_save (The system cannot find the file specified)
These errors are the cause of the upgrade failure. Specifically the WKSP0008E and WKSP0016E error codes.
-
After determining the root cause we can begin searching for a solution to the WKSP0008E and WKSP0016E error code using the IBM Support Assistant
Portal JVM Crash
Definition of a WebSphere Portal crash
WebSphere Portal is considered to have crashed if its process identifier (PID) has disappeared or its PID has changed over time without an intentional stopping of the server such as the "stopServer" command being issued.
To find out what the current PID is for the WebSphere Portal's application server, we can look at the file <server>.PID under
<WAS_install_root>/logs/<server> (for WAS V5.1)
or
<WAS_install_root>/profiles/<profile>/logs/<server> (for WAS V6.0).
Note: If the application server's PID is still running, you are not experiencing a crash but rather a hang, which is beyond the scope of this seciton.
The following diagnostic logs and files are essential to troubleshooting a crash:
1. Javacore (also known as a thread dump). This file is generated when the Java Virtual Machine (JVM) terminates unexpectedly. It is a text file that contains information about the JVM and Java application captured at some point during execution. For example, it would contain information on the operating system, thread, native stack, lock, and memory. As a note, a javacore can also be generated by sending a specific signal command to the JVM.
We can look for the location for javacore within the file native_stderr.log.
The location could be in any of the following:
- The location specified by the IBM_JAVACOREDIR environment variable if it is set.
- <WAS_install_root> (for WAS V5.1) or<WAS_install_root>/profiles/<profile> (for WAS V6.0)
- The location that is specified by the TMPDIR environment variable, if set.
- The /tmp directory or on Microsoft Windows the location that is specified by the by the TEMP environment variable, if configured.
2. Core Dump or User Dump. This file contains a complete dump of the computer's memory, and therefore, it can grow large.
Analyze a Portal crash
You were using Portal when the JVM suddenly crashed. problem determination?
-
Search for a javacore at the locations documented above. If there is a javacore present, proceed to Step 2. If a javacore is not generated, you may need to upgrade the IBM Java SDK with the latest service release because the JVM is probably hung
If no javacore is present, determine if a core file is generated. The core file can be used to investigate crash related issues. As a note, if there were no javacore or core file available, make sure a stopServer command was not issued. The nodeagent can also do a stop with out showing anything in the portal logs.
-
To analyze the javacore that was generated with the crash, look into the TITLE within the file to see what signal trigger the creation of javacore. The signals 1, 0, OUTOFMEMORY, and SIGNONE are usually related to memory issue.
A signal 11 (SIGSEGV) indicates an application server crash. A signal 3 indicates that it was a user-generated javacore.
The javacore signal appears in this section:
NULL
-----------------------------------------------
0SECTION    TITLE subcomponent dump routine
NULL
===============================
1TISIGINFO OUTOFMEMORY received
1TIDATETIME    Date:2006/07/25 at 10:01:56
1TIFILENAME    Javacore filename: /data/work/javacore450680.1153839716.txt
NULL
-----------------------------------------------
or
NULL
-----------------------------------------------
0SECTION    TITLE subcomponent dump routine NULL
===============================
1TISIGINFO signal 11 received 1TIDATETIME
Date: 2006/07/28 at 11:02:35 1TIFILENAME
Javacore filename: /coredump/javacore336050.1154077355.txt NULL
------------------------------------------------
-
Check the Java SDK version from the 1XHFULLVERSION within the javacore. As a note, sometimes it may show up as 1CJAVAVERSION depending on what version of WAS you are using, for example:
1XHFULLVERSION J2RE 1.4.2 IBM AIX build ca1420-20040626
or
1CIJAVAVERSION J2RE 1.4.2 IBM Windows 32 build cn142-20041202
-
Look at the cause of the crash from the line beginning with 1XHSIGRECV. This line shows the library involved in the crash. As a note, sometimes it will show Fault Modules within the javacore.
If the Fault Module or 1XHSIGRECV shows the following:
- The JVM Modules
- Windows: JVM.dll
- AIX: libjvm.a
- Linux: libjvm.so
- The Just In Time (JIT) Modules
- Windows: JITC.dll
- AIX: libjitc.a
- Linux: libjitc.so
Then upgrade the IBM Java SDK as discussed in Step 1 (above) to resolve this problem.
The 1XHSIGRECV and Fault Module entry will look like:
0SECTION    XHPI subcomponent dump routineNULL
==============================
1XHTIME     Fri Jul 28 11:02:35 20061XHSIGRECV SIGSEGV received at 0xd15e58f0
in<WAS_root>/java/jre/bin/libjitc.a. Processing terminated.
or
0SECTION XHPI subcomponent dump routineNULL
==============================1XHEXCPCODE Exception code: C0000005
Access Violation1XHEXCPADDRESS
Fault address: 100D15B0 01:000D05B01XHEXCPMODULE
Fault module: <Java_root>/jre/bin/classic/jvm.dll
Workaround for JIT Problems
For a crash that is related to the Just In Time (JIT) modules, you may not want to upgrade the Java SDK yet, or you may need a workaround while IBM is working on a solution for you. Read below to determine what workaround is most acceptable for the environment. We can work around the problem by either skipping a method or by disabling JIT completely.
- Skipping a method
To determine method caused the JIT to crash, either look at the Current Method in the javacore, or enable COMPILING trace within JITC_COMPILEOPT to isolate the trouble even further.
For more information about the enable COMPILING option, refer to the technote
Selectively disabling JIT options for WAS V3.5, V4.0, V5.0, V5.1 and V6.0. ( http://www-1.ibm.com/support/docview.wss?rs=180&uid=swg21162255 )
To determine what method skip within a javacore, find the Current Thread entry where it shows the method that caused the crash.
It will look similar to the following:
1XMCURTHDINFO Current Thread Details NULL
----------------------
3XMTHREADINFO
"Servlet.Engine.Transports : 2"
(TID:0x10759F18, sys_thread_t:0x39CCF340,
state:R, native ID:0x8F4) prio=5 4XESTACKTRACE at


com.ibm.workplace.wcm.app.ui.portlet.widget.HTMLPopupMenuButtonRenderer.rend er (Unknown Source) 4XESTACKTRACE at
com.ibm.workplace.wcm.app.ui.portlet.widget.HTMLPopupMenuButtonRenderer.rend er(Unknown Source) 4XESTACKTRACE at
com.ibm.psw.wcl.core.ARendererFactory.performRender(ARendererFactory.java(Co mpiled Code))
From the above example, we can see that...
com.ibm.workplace.wcm.app.ui.portlet.widget.HTMLPopupMenuButtonRenderer.render
...caused the crash. To skip that method's JIT compilation and avoid the crash, alter the JVM's command line options to include the following:
JITC_COMPILEOPT=COMPILING:SKIP{ com/ibm/workplace/wcm/app/ui/portlet/widget/renderer/HTMLPopupMenuButtonRend erer}{render}
Note that there are no spaces; it is all entered as one line. We can substitute * for the method if there are different methods within the same package and class that cause the crash.
The JITC_COMPILEOPT options uses a semicolon (;) as a separator on Windows and colon (:) for Unix.
Disable JIT
An alternate way to skip the failing method is to disable JIT entirely. This is the easiest way to work around the issue without having to determine which method to skip. But, be advised that disabling JIT can cause noticeable performance degradation, which may not be an acceptable option for you.
To disable JIT, see...
- Disabling the Just-In-Time (JIT) Compiler in WAS V5.0 and V5.1 Releases
- Disabling the Just-In-Time (JIT) compiler in WAS V6.0
Portal Runtime Failure
Definition of a Portal Runtime failure
Any failure during general operation and administration of WebSphere Portal would be considered a runtime failure. This could include, but is not limited to, the following:
- Unable to login
- Administration tab unavailable
- Portlet deployment failures
- Portlets unavailable
- Page does not display
WebSphere Portal has two runtime JVM log files in portal_root/log...
- SystemOut.log
- SystemErr.log
All runtime information for both Portal and the WebSphere_Portal application server are logged into these files. In addition, WebSphere Portal supports the redirection of its trace and message logging into separate log files.
The redirection is disabled by default. If you enable it, portal creates its own log file. It writes all trace and message logs to this new log file and no longer to the log files of WAS. You enable the redirection into separate log files by setting the log configuration key useAppServerLog to false in the file log.properties. This file is located in...
portal_root/shared/app/config
If tracing is enabled, a third runtime WebSphere Portal log file is generated that will contain additional messages and trace information. By default, this file is named trace.log file and is located in...
portal_root/log
Steps to enable tracing and generate this log file will be discussed later.
Analyze Failures during Portal Runtime
Try to login, get error message...
EJPAK0004W: Login failed. Enter a valid user ID and password.
-
Review the SystemOut.log. In most cases, it will be helpful to create a new, clean log and recreate the error. To do this, you should take the following steps:
- Stop the WebSphere_Portal server
- Move SystemOut.log and SystemErr.log to a temporary directory
- Start the WebSphere_Portal server
- Recreate the problem and stop there
This will generate brand new SystemOut.log and SystemErr.log files. New log files can be helpful because they are easier to read and should only contain the error or errors that you are looking for.
At this point you should have SystemOut.log open. Before moving forward with troubleshooting, there are a few important points to note about this file. At the top of the file, you should see something similar to the following:
************ Start Display Current Environment ************
WebSphere Platform 6.0
[ND 6.0.2.9 cf90614.22]
[BPC 6.0.1.1 m0612.02]
running with process name nodename/nodename/WebSphere_Portal and process id 2384
Host Operating System is Windows 2003, version 5.2
Java version = J2RE 1.4.2 IBM Windows 32 build cn142ifx-20060209 (SR4-1) (JIT enabled: jitc), Java Compiler = jitc, Java VM name = Classic VM
was.install.root = /usr/WebSphere/AppServer user.install.root = /ibm/WebSphere/profiles/wp_profile
Java Home = /usr/WebSphere/AppServer/java/jre
ws.ext.dirs = /usr/WebSphere/AppServer/CEI/lib;/usr/WebSphere/AppServer/CEI/client;...
Classpath = /ibm/WebSphere/profiles/wp_profile/properties;/usr/WebSphere/AppServer/properties;...
Java Library path = /usr/WebSphere/AppServer/java/bin;.;/WINNT/system32;...
************* End Display Current Environment *************
This block of text appears in the log at the very top and each time you start the WebSphere_Portal server. It contains information regarding the environment at the time of the server startup.
The lines...
************ Start Display Current Environment ************
...and...
************* End Display Current Environment *************
...bookend the environment variables.
The line...
 WebSphere Platform 6.0

[ND 6.0.2.9 cf90614.22]

[BPC 6.0.1.1 m0612.02]
...tells you what version of WAS and WPS you are using.
The line...
Java version = J2RE 1.4.2 IBM Windows 32 build cn142ifx-20060209 (SR4-1) (JIT enabled: jitc), Java Compiler = jitc, Java VM
...displays what Java Runtime Environment version is running.
After the ************* End Display Current Environment ************* line, diagnostic information for the startup of WebSphere_Portal is displayed. This continues until the line
[11/3/06 10:27:19:891 EST] 0000000a WsServerImpl A WSVR0001I: Server
WebSphere_Portal open for e-business. This line signals that WebSphere_Portal startup has completed and was successful.
To begin troubleshooting, scroll to the bottom of SystemOut.log. Since the last thing you did to Portal was recreate the error, the information you are looking for will have been the last thing logged to this file. At the bottom of the file, you may see something similar to this:
[11/3/06 10:28:35:500 EST] 00000065 CacheServiceI I
DYNA1001I: WebSphere Dynamic Cache instance named ws/com.ibm.wps.propertybroker.common.cluster.ClusterEventManagerImpl.DistributedMa p initialized successfully.
[11/3/06 10:28:35:750 EST] 00000065 ServletWrappe A SRVE0242I:
[wps]
[wps]
[login]: Initialization successful.
[11/3/06 10:28:36:188 EST] 00000065 LTPAServerObj E SECJ0369E: Authentication failed when using LTPA.
The exception is WMM-UR: The password check for user security name "wpadmin" failed. Root cause is: "Invalid password."..

[11/3/06 10:28:36:344 EST] 00000065 Authenticatio E
com.ibm.wps.auth.AuthenticationServlet doLoginWithExceptions WASAuthenticationFailedException occured:
com.ibm.wps.services.authentication.exceptions.WASAuthenticationFailedException:

EJPSD0001E: Authentication against WAS failed for user wpadmin.
The errors highlighted above are the cause of the login failure. Specifically, the SECJ0369E and EJPSD0001E error codes.
-
In the example above, it may be fairly obvious what the cause of the failure is. However, this will not always be the case. If you determine what the root cause of the failure is but are unsure why you are receiving errors, we can begin searching for a solution to the SECJ0369E and EJPSD0001E error codes using the IBM Support Assistant
-
If the above problem determination approach did not resolve the issue, we can use a more advanced troubleshooting method by enabling additonal tracing.
Note: Enabling the trace loggers can affect WebSphere Portal performance. It is
recommended to only enable tracing for debugging purposes. Otherwise, disable tracing.
To enable WebSphere Portal tracing, you should take the following steps:
- Determine what tracing enable. Refer to the following page in the WebSphere Portal Information Center for a list of trace strings for specific WebSphere Portal components: http://publib.boulder.ibm.com/infocenter/wpdoc/v6r0/index.jsp?topic=/com.ibm.wp.ent.doc/ wpf/run_logs.html
- Once you determine what trace strings you will need...
a. Access the WAS Administrative Console by using this URL: http://hostname:port_number/ibm/console
b. Go to the Server > Application servers section.
c. Select the application server of the portal.
d. Click Troubleshooting > Change Log Detail Levels.
e. Specify the required trace settings. For example, this can becom.ibm.wps.command.credentialvault.*=finest
f. Save the updates.
g. Restart the portal.
h. Recreate the issue
i. To disable tracing, specify tracestring: *=info and restart the portal.
Tracing can provide more thorough debugging statements that might make it easier to determine the cause of the failure.
Providing Logs to Support
If you have already contacted support or feel that you may need to collect data to determine the nature of a problem regarding a WebSphere Portal failure, review the following information on how to use the ISA tool to collect logs.
The Automatic Problem Determination (AutoPD) log collection tool has been fully integrated into the IBM Support Assistant (ISA).
The ISA tool provides quick access to support-related information, plus service tools for problem determination and log collection so that we can provide IBM support with the information we need to effectively resolve the problem in a timely fashion. Additional information about ISA can be found at http://www.ibm.com/support/docview.wss?rs=688&uid=swg21235976 as well as the ISA home page at http://www.ibm.com/software/support/isa/ .
Instructions for retrieving, installing and using the ISA tool follow, with additional instructions on providing support with the output of the tool.
1. Retrieving ISA:
- To download ISA directly, go to: https://www14.software.ibm.com/webapp/iwm/web/preLogin.do?source=isa . Note: you'll need an IBM ID (free registration) to sign in.
- After signing in select the most current version of ISA for the WebSphere Portal platform and select "Continue". Accept the license agreement and click "I confirm".
- On the next page, select the download file appropriate for the WebSphere Portal platform and download ISA.
2. Installing ISA and the WebSphere Portal plug-in:
Note: This is a one time procedure only required for initial install and setup of the tool. If you already have the ISA tool installed, upgraded, and configured with the appropriate plugins, then we can skip to Step 3 - Using ISA
– After downloading, unzip/untar the package into its own directory anywhere on the WebSphere Portal server machine. Launch the installer by executing the setup program (setupwin32.exe, setupLinux.sh, etc) that is located in the root directory or
folder.
- After ISA is installed, launch it from the install directory by executing the startisa.sh script (non-Windows) or startisa.cmd script (Windows)
- Once the ISA interface is displayed, you have a yellow message box instructing you to install appropriate plug-ins for the environment. Begin the install of the WebSphere Portal plug-in by clicking the Updater link in the yellow box or the Updater tab on the top right.
- On the Updater interface, you should select the New Products and Tools tab to locate new product plug-ins. Expand the WebSphere folder and scroll down to the appropriate WebSphere Portal plug-in (5.0, 5.1, 6.0) for the product version. Then select the plug-in by clicking the checkbox to the left of the plug-in name.
Note: If you get an error or do not see any new products, you may need to configure ISA to work with the proxy server. To do so, click on...
Preferences | Proxy Settings
...and input the proxy server settings. For more information, visit the ISA FAQ page
- Click the Install button and agree to the installation terms that are displayed on the license screen that appears.
- After the installation of the plug-in is completed, restart the ISA tool. Note: This will not only install the plugins requested, but also check for ISA upgrades and automatically upgrade if required.
3. Using ISA:
- To use the ISA to collect logs for this problem, click on the Service tab and then choose to Collect Data on the left navigation pane.
- Then choose the appropriate version of WebSphere Portal.
- Choose the Portal Configuration Problem from the dropdown and click the Collect button. And later select to only Proceed to Data Collection to simply collect the diagnostic information.
- When the data collection has completed, a message will be displayed indicating where the collected jar file resides on the file system.
4. Providing the output:
– Follow the instructions documented in the technote How to Transfer Files to WebSphere Portal Technical Support
IBM's Serviceability Tools Strategy
The IBM Support Assistant (ISA) tool is the premiere strategic serviceability tool for IBM software. You recommend that all Portal customers take the time to download and install the ISA tool following the instructions in section 9.1.6. In future releases of Portal the ISA tool will be part of the Portal install package.
With ISA, you will be able to get to the information we need . ISA provides this quick access through its concurrent Search tool that spans across the bulk of IBM documentation and returns the results categorized by source for easy review.
In addition to the Search, ISA provides a product information feature that has key product information links that are essential to self-help. These include:
- Product support pages
- Product education roadmaps and the IBM Education Assistant
- Product home pages
- Product recommended updates
- Product troubleshooting guides
- Product newsgroups and forums
Included in ISA is a new Tool workbench that provides you with the problem determination tools that IBM Support uses to resolve issues. Ongoing, different product teams will make more and more tools available for ISA's tools framework in order to enable you to perform problem determination on the desktop.
ISA also provides a Service feature with an automated system and symptom based collector. The system collector gathers general information from the operating system, registry, etc. The symptom based collection provides the unique ability to collect specific information relating to a particular problem that you are having. It can also provide you with the ability to automatically enable tracing that will be helpful to IBM support as part of the data gathering process.
Another aspect of the Service feature is the problem submission tool. This allows you to enter the entitlement information once and have it saved for future sessions. We can then create a problem report for IBM and attach the collector file at the same time. Simple to do and yet extremely helpful for expediting a solution back from IBM.
So whether find information on a software fix, collect key logs, or want to build the skills on a particular product, the IBM Support Assistant can help you get that done.
WebSphere Portal Product Library
http://www-128.ibm.com/developerworks/websphere/zones/portal/proddoc.html
The WebSphere Portal Product Library site contains information on many aspects of WebSphere Portal from version 4.1 to 6.0. We can find references to the following information:
- WebSphere Portal Information Center
- Release Notes
- Hardware and Software Requirements
- Javadoc
- Performance Guides
- Quick Start Guide
- Articles and Tutorials
WebSphere Portal version 6.0 Information Center
http://publib.boulder.ibm.com/infocenter/wpdoc/v6r0/index.jsp
The WebSphere Portal version 6.0 Information Center is a reference guide for everything know about WebSphere Portal. It contains information on how to:
- Install and configure Portal
- Migrate between versions
- Administer Portal
- Integrate Lotus Domino
- Design portlets, pages, themes and skins
- Tune the Portal for better performance
- ...and many other topics
WebSphere Support Pages
These support pages are valuable tools for troubleshooting any issue you may encounter. From this site, we can search for relevant fixes or workarounds for the errors that you receive. In addition, we can obtain the latest updates, fixpacks, flashes, and other information from here.
For example, if you examine the WebSphere Portal Support page, you may see something similar to the following: The section Primary support resources appears on most WebSphere support sites and will look similar to this. At the top of this section, we can see the most up to date Flashes. These flashes contain the most important Portal information such as mandatory fixes, product releases, etc.
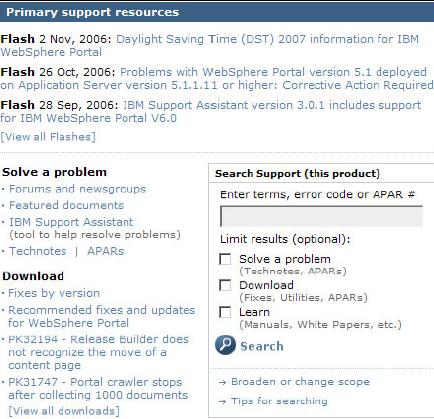
At the bottom left, you see two lists. The first is Solve a problem. Here you will find links to resources that might be helpful in troubleshooting. The next section is Download. Here you will find links to fixes and fixpacks that we can download and apply to the Portal environment.
To the right side, there is a section to search the Portal support site. This is useful if you are trying to:
- Find technotes or solutions for errors you are receiving. For example, we can search for the error code SECJ0369E
- Find specific interim fixes or fixpacks. For example, we can search for PK30928 or Cumulative Fix 4
- Find additional documentation for any topic. For example, we can search for Portal Cluster.
Monitor end user response time
Monitoring end user response time is an external perspective of how the overall Web site performs from an end user view and identifies how long the response time is for an end user. From this perspective, it is important to understand the load and response time on the site. To monitor at this level, many industry monitoring tools, for example, Tivoli Monitoring for Transaction Performance or LoadRunner, support you to inject and monitor synthetic transactions, helping you identify when the Web site experiences a problem.
Monitoring basic health of systems
Monitoring overall system health is fundamentally important to understanding the health of every system involved with the system. This includes Web servers, application servers, databases, back-end systems, and any other systems critical to running the Web site.
WAS provides Performance Monitoring Infrastructure (PMI) data to help monitor the overall health of the WAS environment. PMI provides average statistics on WAS resources, application resources, and system metrics. Some of the more important statistics are:
- Average response time
- Number of requests
- Number of live HTTP sessions
- Web Server thread pools
- The Web and Enterprise JavaBeans (EJB) thread pools
- Database and connection pool size
- Java virtual memory (JVM)–CPU
- I/O
- System Paging
To monitor several of these statistics, WAS provides the Performance Monitoring Infrastructure to obtain the data, and provides the Tivoli Performance Viewer (TPV) in the administrative console to view this data.
See: Monitoring health
Manage application resource usage
Understanding the application flow that satisfies the end user request is important for the in-depth internal understanding of who is using specific resources. WAS provides request metrics to help trace each individual transaction as it flows through the application server, recording the response time at different stages of the transaction flow (for example, request metrics records the response times for the Web server, the Web container, the Enterprise JavaBeans container, and the back-end database). In addition, several IBM development and monitoring tools that are based on the request metrics technology (for example, Tivoli Monitoring for Transaction Performance) are available to help view the transaction flow.
See: Monitoring application flow
Portal Update Strategy
Keeping WebSphere Portal up to date helps ensure that you maintain a more stable environment. By applying routine Portal maintanence we can avoid hitting issues that have already been encountered, documented and fixed.
The following website contains the most recent update strategy for WebSphere Portal. http://www-1.ibm.com/support/docview.wss?uid=swg21248245The above link covers the following information:
- Update Strategy Overview
- Recommended Update Path
- Tentative Release Schedule
- Maintenance Planning
- Delivering Updates
Deployment Automation Options
Deployment automation refers to the use of available tools or technologies to reduce the manual steps required by the portal server installation and configuration process. This chapter discusses various options the large enterprise can leverage to automate the portal deployment to reduce overall deployment time. You first introduce the underlying technologies that can be used to enable automating portal deployment, then you discuss some sample scenarios utilizing these technologies.
Motivation of deployment automation
The enterprise scale portal deployment typically requires a large number of repeating portal server deployments on multiple physical machines. It is desirable to use tools or scripts to automate the repeating deployment steps so that the system administrator doesn't have to repeat the labor extensive work on every machine multiple times. Although requiring extra effort to develop, the automation capability will result in tremendous benefits to the overall deployment process, which include:
- Reduced labor cost because overall shorter time is required for the deployment
- Increased productivity because automated process eliminating a lot of user involvement
- Improved product quality because fewer chances of human errors can be introduced in the process. Spending effort to create automated solution requires time commitement and resources knowledgeable of related technologies, this is no doubt a non-trivial investment that will bring long term benefits overtime. It is suggested you carefully review the solutions presented in this chapter and make long term plans before immediately adopting one or more solutions. Careful planning of an automation process will go a long way to reduce the time to automate the process, and it will also create quality repeatable assets that can be leveraged many times. The main concerns this chapter tries to address to create repeatable quality automation assets include:
- The tool or techonology must be simple to use, it doesn't make sense for the portal administrator to learn a new programming language in order to write this solution.
- The solution must be easy to extend, many enterprises can only afford writing small solution over time, this requires the solution allow incremental development: start simple and grow overtime.
- The solution should be reusable over time, it doesn't make sense to rewrite everything when new releases of WebSphere Portal or Application Server need to be adopted
- The solution should be cross platform, this will maximize the ROI by supporting running the same solution on multiple environments
Implementing some of the suggestions discussed in the chapter may require additional development skills, you recommend you to explore these options to streamline the deployment process. We can find related tutorials on IBM DeveloperWorks website or we can engage IBM Software Services team to help you develop these automation solutions.
Tools and technologies used
The section introduces the most relevant tools or technologies that can be used for automation.In the next section, you will present some real life automation examples of using these technologies.
ANT/Maven
Typically an automation is implemented using one or more scripting tools, for example, batch scripting on MS-DOS, and shell scripting on Unix or Linux. However the main drawback of the these scripting language are 1) it is platform dependent, 2) it is difficult to implement reusable components, and 3) there is very little available integration sample to facilitate routine operation on J2EE application servers, e.g. it is very complex to write a shell script to automate a very typical deployment scenario on a portal server:
- copy the portlet war file to the target file system
- deploy the portlet war file to portal server
- synchronize the portlet files across multiple nodes in a cluster.
- if previous step is successful, add portal pages that have references to the portlet
- if previous step is successful, add a URL mapping context for the newly created page.
Fortunately, there is an alternative in the J2EE world to make this kind of automation easier. That answer is ANT and Maven.
Developed by system administrators and J2EE developers, ANT and Maven are very popular open source (so it is free!) tools for building, packaging and deploying J2EE project. We can download ANT from Apache website: http://ant.apache.org, or use the Portal server bundled ANT package. ANT requires the operations to be written in one or more ANT XML files, the default name of the XML is "build.xml" for ANT. ANT can be extended as the scripting tool to integrate multiple configuration and deployment operations in a portal environment.
ANT and Maven are very similar to each other in terms of the way end user interacts with them, Maven makes up some deficiencies that ANT suffers such as project management. ANT alone is sufficient to serve the automation need, you will demonstrate the examples using ANT for the most part in this section. We can always achieve the similar goal using Maven.
Similar to any other scripting tools, before we can execute ANT, you have to somehow create a script, either write a new one or copy from some examples, to describe how the machine should perform each task, and specify the logic connection between individual tasks. Unlike typical scripting language which requires writing shell commands, in ANT or Maven, the instructions are written in a structured XML file. The file references a target tree in which various task are run.
Before you review any details, let's check an ANT XML example showing an ANT task in action, the sample is used to automate task 3 scenario described earlier in the section, i.e. the scenario to deploy a portal page.
<?xml version="1.0" encoding="UTF-8"?>

<project name="PortalDeploy"
         default="default"
         basedir="..">

<taskdef name="xmlaccess"
         classname="com.ibm.wps.xmlaccess.XmlAccessTask"
         classpath="WPS/bin/wp.xml.client.jar"/>

<-- project properties contains reusable variables
<property name="PageUniqueName"
         value="ITSO.myPage"/><property
         name="targetPortalUser"
         value="wpsadmin"/><property
         name="targetPortalUrl"
         value="http://localhost:9081/wps/config"/>

<-- Target starting the page deployment,
<target name="deploy-page"
         depends="deploy-war"><--"depends" specify the WAR deployment must be successful first

<xmlaccess

<-- xmlaccess is a built in ANT task to call xmlaccess command
    user="${targetPortalUser}"
    password="${targetPortalPwd}"
    url="${targetPortalUrl}"
    srcfile="${PageUniqueName}.source.xml"
    destfile="${PageUniqueName}.target.xml" />

</target> </project>
In this example, first you see some definition of a custom task "xmlaccess", xmlaccess is a custom ANT task developed by IBM to facilitate XMLaccess command invoking in ANT. Any task not built in to standard ANT must be declared using "taskdef". Then you see definitions of variables and their default value, finally you see the deploy-page task was defined to import an xmlaccess file that describes a page to the portal server. At runtime, when system administrator executes the "deploy-page" task (the actual deploy-war task is not listed here), because of the "depends" clause, ANT always invoke "deploy-war" task first to make sure all the references portlet WAR files have been deployed first. If for some reason deploy-war task failed, deploy-page task will not execute.
After you have created the ANT xml file and save it as build.xml, we can execute the task in the command line as the following, (use ant.sh to replace ant.bat on Unix, remember the same ANT will run on both all the OS that Java runs).
ant.bat -DtargetPortalPwd=wpsadmin deploy-page
In addtion to use standard ANT command, we can also use a customized ANT command -WPSconfig.sh as the following, you will go through more details on how to prepare ANT script in order tu use WPSconfig.sh in section A.3.3. In a nutshell, we can invoke WPSconfig.sh just like how you normally invoke ANT, i.e. the example above can also be invoked as the following:
WPSconfig.bat -DtargetPortalPwd=wpsadmin deploy-page
Important: Notice here we can specify the password in command line instead of storing it in the XML file for security reason. "deploy-page" is the task name to be invoked, if a task not specified in the command, ANT will automatically invoke a task named "default".
As we can see from the example, when you write new ANT XML script, the unit operation of ANT is "task", defined as "target" in ANT XML. One target can invoke one or more targets to form a single entry point for the complex tasks. Consequently, there are two types of ANT task,
- unit level ANT task that does actual operation, e.g. xmlaccess task to import a file, copy task to copy files etc,
- composite ANT task that integrates other unit level ANT task or other composite ANT tasks to complete a more complex job
There are many built-in ANT tasks available to perform the unit level tasks, we can refer to http://ant.apache.org/manual for available general purpose unit level tasks. Additionally for the tasks that are specific to WAS and WebSphere Portal, there are available using the ANT WP extension. Only in some rare cases, you may need to write ANT custom tasks to perform customized unit level tasks.
The unit level tasks are the fundamental building blocks of automation. Once you have all unit level ANT tasks identified, we can create composite ANT task to aggregate pieces together. In the composite ANT task definition, we can implement the dependency via "depends" clause. You suggest you adopt a top-down approach to break the complex deployment process into simpler tasks, which can further simplified until it reaches the unit level task. Ideally, you want to build multiple levels of tasks so that each task itself doesn't contain overwhelmingly large number of actions, smaller composite task promotes reusability and is easier to test. As you move along the process of building XML to automate the deployment operations, you will realize the XML is more like a tree model, the top level node contains the high level user interface, the bottom level node contains the unit level task.
The diagram below (Figure 8-4) shows the top-down approach you used to create the XML structure in the previous example. You first break down the portal deployment into two sub tasks, deploy portlet and then deploy pages. Then you further break portlet deployment into unit level tasks: file copy action to move WAR file, xmlaccess to deploy WAR, then WAS command to activate portlet.

In order to leverage WebSphere Portal provided ANT task extension,(e.g. wsadmin ANT task and XMLaccess ANT task) or use existing WAS specific ANT task (e.g. synchronizing multiple portal nodes in a cluster) use portal server bundled ANT package -WPSconfig. WPSconfig.sh/bat is WebSphere Portal provided add-on extension of standard ANT package to simplify portal deployment process. WPSconfig.sh is the ANT front-end user interface has all the portal extensions automatically loaded. WPSconfig.sh is referred to as a "Configuration Task" in Portal infocenter. Portal administrator should be very familiar with WPSconfig.sh tool, as it is the standard tool to configure various portal server settings (e.g. create virtual portals and configure portal security).
Notice: WAS also provide an integrated ANT interface -ws_ant, it only contains WAS specific extensions. wpsconfig is a superset of ws_ant. You should always use wpsconfig
as the ANT interface as it provides access to the built-in custom tasks used for both WAS
and WP.
Existing WAS/WP specific ANT tasks covers many standard server operations such as the following:
- xmlaccess task to import or export portal server configuration
- Install and uninstall applications
- Start and stop servers in a base configuration
- Run wsadmin (administrative scripts or commands)
- Run the Enterprise JavaBeans (EJB) deployment tool
In addition to use WPSconfig.sh to execute existing portal configuration tasks, the system administrator can write custom task definitions that will be loaded so that the task can be executed from WPSconfig.sh. WPSconfig.sh automatically retrieves custom task definition XML from $WPS_HOME/config/includes/.
WPSconfig.sh is executed the same way as standard ANT.
./WPSconfig.sh -Dproperty1=value1 -Dproperty2=value2 task-name1 task-name2
Similar to ANT, WPSconfig.sh should be executed with a list of tasks. Reusable variable values should be specified in a properties files wpconfig.properties. In addition to the property values specified in properties file, it allows user overwriting default parameter values by specifying them as the command line options, this provides a handy way to test the ANT script without modifying the XML or properties files.
WSAdmin and Jython
ANT does not directly interact with WAS's system management infrastructure. To use scripting interface to perform administrative operations, use wsadmin, the powerful, non-graphical command interpreter environment enabling the to administrate application servers in a scripting language.
Out of the box, WAS administrator can leverage the administrative console to manage and control WAS in a GUI. The GUI is easy to use, but it is simply unmanageable if you have to repeat the same WAS configuration change using GUI on large scale (>10) application servers deployments. It is very difficult to automate the GUI operations. The ideal way of automation is to create reusable scripts and then system administrator run the script on each application server. Additionally, once you have individual script as the building block to automate unit level operation, we can use ANT to "glue" multiple functions together to achieve high level automation.
WSadmin is the command line environment equivalent to the administrative console GUI for system administrator to perform the system management operations. The scripting capability allows using either Jython or Jacl to automate of WAS-related configuration tasks and controlling (start and stop). Since the WAS v5.1 release, the WebSphere administration scripting tool (wsadmin) supported both Jacl (Java TCL) and Jython (Java Python) as the scripting languages. When selecting a scripting language, Jython is the strategic direction as the administration scripting language for WAS because Jython is more intuitive to object oriented (such as Java) developers and future enhancements of the scripting language is focused on the use of Jython.
Jython is a pure java implementation of Python, an object oriented scripting programming language. Software developer familiar with object oriented programming will find it is intuitive to use Jython. It is seamless integrated with WAS system management. You don't need any additional java libraries in order to execute Jython script that interacts with WAS.
The recommended development approach for a first time Jython/Jacl script developer is to start with trying the individual command in the interpreter environment provided by wsadmin. In the interpreter environment, wsadmin immediately responds to the command so you get feedback on the input without the typical long cycle of code -save - test -code. So we can spend more time coding.
Let's use one frequently used task as the example to see wsadmin in actions: the scenario is that you want to change portal JVM heap size to 1024. Of course we can achieve the goal by looking the at the WAS admin console, but doing the same thing over and over at every portal node is a lot of tedious work, in stead, you will see how we can achieve the goal in wsadmin using Jython.
- Start wsadmin in interactive mode.
/ibm/WebSphere/profiles/wp_profile/bin>wsadmin -conntype NONE -lang jython
- Then we need to locate the WAS configuration object that stores the JVM settings WAS stores object in a herarchical tree, we can always get the handle of the configuration object using AdminConfig interface. In the case, you use the route Server -> JVM
wsadmin>server1 =AdminConfig.getid('/Cell:wpsiut/Node:wpsiut/Server:WebSphere_Portal/')
wsadmin>print server1WebSphere_Portal(cells/wpsiut/nodes/wpsiut/servers/WebSphere_Portal|server.xml#Server_1154005406891)
wsadmin>jvm = AdminConfig.list('JavaVirtualMachine', server1)sadmin>print jvm(cells/wpsiut/nodes/wpsiut/servers/WebSphere_Portal|server.xml#JavaVirtualMachine_1154005406906)
- Now that you get the object of JVM, we can go ahead to modify it
wsadmin>AdminConfig.modify(jvm, [maximumHeapSize', '1024']]) ''
- Empty quote means success, now let's save the change.
wsadmin>AdminConfig.save()''
- Again, empty quote means save is successful. Now that you have verified the procedure works, we can create a new Jython script, name it updateWasHeap.py, and the copy and paste the commands you used during step 2-4.
#updateWasHeap.pyserver1 = AdminConfig.getid('/Cell:wpsiut/Node:wpsiut/Server:WebSphere_Portal/')jvm = AdminConfig.list('JavaVirtualMachine', server1)AdminConfig.modify(jvm,
[maximumHeapSize', '1024']])AdminConfig.save() - Congratulations!, You have just written the first Jython automation script. We can run this script on any portal server node as the following:
wsadmin.bat -conntype NONE -lang jython -f updateWasHeap.py
There are sample Jython scripts for almost all the typical management operations so you don't have to reinvent the wheels everytime. The chances are that you will spend more time to modify existing script than write new scripts. We can get many sample scripts out of WAS infocenter following this link:
http://publib.boulder.ibm.com/infocenter/wasinfo/v6r0/topic/com.ibm.websphere.base.doc/info/aes/ae/txml_configserver.html
As we can see, WSadmin scripting using Jython is an ideal method to replace the repeating steps that are required in the portal deployment procedures, such as modifying WebSphere_Portal app server configuration for basic performance tuning, redeploying wps.ear and synchronizing all portal nodes in a cluster. With these scripting, we can further leverage System Management tools such as Tivoli Provisioning Manager to automatically push the change in the enterprise without manual work.
A full introduction to WAS scripting tool is beyond the scope of this book, we can find detailed tutorials for WAS scripting tool in redbook: WAS V6 System Management & Configuration Handbook. http://www.redbooks.ibm.com/abstracts/SG246451.html?Open
InstallFactory
In certain situations, you may want to install WAS separately before you install WebSphere Portal Server. For example, you want to install a different version of WAS than the version shipped with WP V6.0. Instead of using portal server embedded WAS install media to install both WAS and Portal server. Typically in this situation, there is a lot of steps to follow, after the WAS install, manually install WAS fixpacks and maybe individual fixes afterwards, after then you may also want to make customizations to the application server install instance, e.g. install a custom EJBs to connect to backend service, adding datasource definition for the custom application data etc. This work multiply many times (one on each node) means a lot of labor extensive manual work to the system administrator, and remember this is just the preparation for portal server install.
Fortunately, WebSphere Installfactory tooling was introduced in WAS 6.0.2 or newer to allow you take a snapshot of the customized WAS instance, then create a custom install image using the snapshot so that we can deploy the rest of WAS nodes with the snapshot. This new capability allows you to build the customized WAS install image, referred as CIP(customized installation package) in WAS infocenter, so that administrator can deploy a WAS with specific fixpack/efix/configuration in one single step. This makes it possible for system administrator to customize the WAS install image with the required WAS fix level and configuration update (change session timeout value etc) on the default WAS application server (server1). Once the custom image is created using installfactory, Administrator can deploy the customized WAS using the new image in one single step instead of repeating the steps on every machine.
The key enabling feature here is configuration archive. A configuration archive (CAR) file captures the configuration of a stand-alone application server profile for later restoration. The CAR can help clone the original profile to another machine or system. The configuration archive can contain any configuration updates made to the app server, include installed EAR, server updates etc. For more information about configuration archive, refer to infocenter
http://publib.boulder.ibm.com/infocenter/wasinfo/v6r0/topic/com.ibm.websphere.nd.d oc/info/ae/ae/cins_if_config_archive.html
or IBM Education Assistant:
ftp://ftp.software.ibm.com/software/eod/was/6.0/SystemManagement/WASv6_SM_Configur ation_Archives.pdf
Important: .WAS InstallFactory only supports the configuration updates on a single node mode, it won't support the configuration changes that related to distributed environment, such as the WAS server with security enabled using LDAP server, or a WAS node that has been federated.
Installfactory provides the long term strategy that WebSphere family products use to simplify the install procedure to tailor customer need. The installfactory makes it possible to "clone" a configured WAS install so that the future installed WAS contains the exact same maintenance level and configuration update. Unfortunately, WebSphere Portal has not implemented InstallFactory in V6. As a long term direction, WebSphere Portal may fully implement WPS install factory in future releases.
Because of the large amount of time required to install and configure portal server, it is tempting to have a similar "clone" solution to replicate the existing portal install to new Portal server. The closest Portal "clone" solution may be achieved via portal instance copy and localization, i.e. copy an completely configured portal server and move it to a 2nd box, run a set of localization script to fix up the incorrect reference to hostname/ip/portal unique ID etc so that it can run on the local portal server. Although possible in theory, the clone solution is not tested fully in the product, and there is no product level support for this portal clone solution, in another word, the portal instance deployed in this matter will not be supported in case there is any problem. However, if you are interested in this portal clone solution, engage IBM Software Services team. IBM Software Service team has engaged with customers to make multiple successful portal server clone and provided support on a per customer basis during portal server V5 time frame.
Sample scenarios of automation
This sections provide four sample scenarios to illustrate how to use the tools and technologies in previous section to automate various steps of the deployment process. The steps you will automate comes from previous chapters
InstallFactory to build custom WAS install image
WAS installfactory was a new tooling feature added since WAS 6.0.2. It provides the "clone" function for you to limit the pain of preparing the WAS stack to the first time install experience, and once the custom install image is created, we can deploy the full WAS stack in one step. This full custom install image includes the following:
- WAS Base
- WAS maintenance (refresh pack, fixpack and ifixes)
- WAS profile (this is achieved via WAS configuration archive functions)*
- Applications installed to the default profile*
*These two parts can be achieved by either using configuration archive or using additional profile creation scripts (jython).
To create custom install image using WAS install factory for the first time, we need to prepare the WAS stack in the way as documented in the install doc. Notice the following,
- Install factory image is not cross platform, it must be created on the OS that the install image is targeted to support, i.e. we can only create AIX install image on AIX box.
- Install factory can only contain one profile saved as "configuration archive", in order to generate configuration archive, run the following wsadmin command
- DO NOT install portal before creating the WAS install factory image.
- The custom install image cannot be modified. Once custom install image is created, recreate the template image again if you want to change configuration in the template. There is no way to update the install template image directly.
./wsadmin.bat –conntype none –c '$AdminTask exportWasprofile {-archive /defaultprofile.car}'
Once the WAS stack is complete, Run WAS install factory tooling. First we need to download install factory
Follow the instruction to unzip it to any folder that the current logged on user has write access, if the current user cannot write to the current folder, InstallFactory will throws Java OutofMemory exception and exits abnormally.
WAS installfactory was packaged as Eclipse plugin and it supports both GUI mode and CLI mode. CLI mode is easier to execute as it doesn't require X client connection. To use CLI, create the configuration XML BuildDefinition.xml and specify the input value in the file. The easiest way is to modify the sample Installfactory build XML to reflect the correct media location, Installfactory must have write access to the output directory and read access to the following directories:
- Full WAS that was installed completely as the pre-req
- Install media of base WAS install image
- Maintenance package files downloaded to local directory.
- Configuration archive file (defaultprofile.car in the example) generated by wsadmin command
First, specify output director in the XML, assume the target directory is /was_staging_area/if
<buildOptions> <targetLocation>/was6_staging_area/if</targetLocation>
Specify refreshpack directory and filename in the XML, in this example, you specified the XML to use configuration archive defaultproflie.car:
<sourceMaintenanceInstallPackages installOrder="1"
    maintenanceType="refreshPack">

<rootFolder>
<rootFolder permissions="644">/opt/WebSphere60/AppServer/updateinstaller/maintenance</rootFolder>

<fileNamePattern

isRegEx="false">6.0-WS-WAS-AixPPC32-RP0000002.pak</fileNamePattern>
Specify configuration archive location in the XML
<configurationInfo> <profileCreationActions>
<configurationArchive executionOrder="1"
fatalErrorWhenExecutionFailed="true">
<rootFolder>
<whichFolderToUse>literalRootProvided</whichFolderToUse>


<rootFolder>/was6_staging_area</rootFolder>

  </rootFolder>

  <relativeFolder>.</relativeFolder>

  <fileNamePattern
isRegEx="false">defaultprofile.car</fileNamePattern>  </configurationArchive></profileCreationActions>  </configurationInfo>
After complete the XML update, (see appendix 1 for a complete list of this XML that were used on p055pdc), launch the installfactory program CLI:
Ifcli.sh –buildDef BuildDefinition.xml
The process takes about 40 minutes to complete. After the creation process finish, the out folder structure should look like the following
/$OUTPUT_DIR/ifpackageCopyright.txt
JDKWAScomponentmapsdocsframeworkinstalllafileslibmaintenance.xmlmedia.infreadmereadme.htmlrepositoryrepository.zipresponsefile.nd.txtresponsefile.pct.NDdmgrProfile.txtresponsefile.pct.NDmanagedProfile.txtresponsefile.pct.NDstandAloneProfile.txtsetup.jarcustom
Now that you have created the custom WAS install image, we can use it just like any regular WAS install image to deploy WAS, the only exception is now after the install it contains customizations you have made on the snapshot WAS instance.
The following shows how to use the command line interface to invoke the created install image for new WAS install. Here response file is used to provide all necessary user input (as usual, we can modify the response file comes with WAS install image)
# nohup ./install -options /opt/WebSphere60/responsefile.nd.txt -silent 2>&1 >/opt/WebSphere60/install.nd.out &
After the install completes on the new machine, it is suggested to verify the WAS version info using the versionInfo tool provided by WAS.
# /opt/WebSphere60/AppServer/bin/versionInfo.sh -maintenancePackages Installed Product

Name    IBM WAS - ND Version     6.0.2.3
ID ND Build Level    cf30542.05 Build Date  10/18/05
Installed Maintenance Package

Maintenance Package ID   6.0.2-WS-WASND-FR000003-2006-02-22_18_52_40
Description    This is the install factory install image.
Build Date  2005/01/20 Installed Maintenance Package

Maintenance Package ID   PK11623
Description    NPE in FileTransferClient for standalone client.
Build Date  2005/09/29
The results above shows the installed image contains all the customizations you have made to a standard WAS instance. The custom install package has been successfully created.
wsadmin to automate application server configuration change
WebSphere Portal in essence is a custom application server runs on top of WAS, it utilizes WAS provided services to provide enterprise level information integration. Not surprisingly, a lot of portal operations related to portal deployment must be performed with WAS provided tools - wsadmin, section A2.2 has introduces the wsadmin tooling and methodology to develop script to automate server configuration changes (the example shown earlier was for changing portal server heap size).
In this section, you will demonstrate how to extend the earlier example to implement a more complete performance tuning script that we can run on each server. This section assumes you have visited section 5 for basic performance tuning concept and section A2.2 and is familiar with the basic concept of using wsadmin scripting interface and development methods, i.e. start scripting with using the command in wsadmin interpreter environment, after verified the script working, then integrate them together into a script file. The final script can be invoked using wsadmin command -f option, i.e., wsadmin -f your.script
Having introduces Jython in the previous section, in this section you will demonstrate how to implement the similar function in Jacl. You will see Jacl scripting is very similar to Jython scripting. User can always achieve the same functions using either tool
In summary, the application server setting changes that you wanted to automate include the following (assume this is windows)
JVM setting:Initial and maximum heap size: 1280 JVM setting:Session timeout: 10 minutes AppServer setting:Minimum and Maximum Thread pool size: 50 AppServer setting:Enable pass by reference: true.
In jacl, you always need to get a handle of the WAS configuration object that you want to modify before we can access any attributes of that object, this is very similar to Jython. If the object is embedded in another object, recursively navigate the structure until you reach the desired configuration object. For example, heap size and session timeout setting are attributes of JVM setting object. JVM setting object is embedded under application server setting object, go through Application Server -> JavaVirtualMachine to get the handle of JVM setting object. This is shown below:
set wps
[AdminConfig getid /Cell:cellName/Node:nodeName/Server:WebSphere_Portal/] set jvm
[AdminConfig list JavaVirtualMachine $wps]
Once you get the handle of JVM setting object, we can modify the attributes,
$AdminConfig modify $jvm {{ initialHeapSize 1280}}$AdminConfig modify $jvm
{{ maximumHeapSize 1280}}
Similarly, we can traverse the hierarchy to get access to the configuration object WebContainer -SessionManager - TuningParams, which stores the session timeout attribute (invalidationTimeout). Once you get the handle of TuningParams, we can modify the attributes,
set wc
[AdminConfig list WebContainer $wps]set sm
[AdminConfig list SessionManager $wc]set tp
[AdminConfig list TuningParams $sm]$AdminConfig modify $tp {{invalidationTimeout 10}}
Use the same method, we can enable "Pass by Reference" attribute of ORB service:
set orb
[AdminConfig list ObjectRequestBroker $wps]$AdminConfig modify $orb {{noLocalCopies true}}
After the changes have been made, save to commit the changes.
$AdminConfig save
Once you have committed the change, we can launch WAS admin console GUI to verify these changes.
The power of the scripting effort is more visible if we can add some programming logic to the script to handle more general cases. For example, typically you will have multiple WebSphere_Portal app server instances managed by a single deployment manager. Now we can use wsadmin to connect to the dmgr, in the script add a loop to go through all the nodes and get a list of all portal application servers in the cell, then modify all the app servers in the cell in a single step. This will reduce the workload dramatically compare to the otherwise labor extensive manual work to go through WAS admin console for each portal server.
The loop to go through all portal server nodes is as the following. First we need to get a list of servers, and store it into variable "servers".
set cell
[AdminConfig getid /Cell:mycell_name/] set servers
[AdminConfig list Server $cell]
Then we can loop through all entries in the list:
foreach serverName $servers {  set searchIndex
[string first portal $serverName ]  if {$searchIndex !=-1} {
Put all these pieces together, the listing below shows a complete script to automate the WAS server performance tuning step.
#update this before runningset cellName=mycell_name
#First get a list of all serversset cell
[AdminConfig getid /Cell:mycell_name/]set servers
[AdminConfig list Server $cell]

foreach serverName $servers {#we only process the server if the server name starts with "portal"set searchIndex
[string first portal $serverName ]

if {$searchIndex !=-1} { #update JVM settingset wps
[AdminConfig getid /Cell:cellName/Node:nodeName/Server:WebSphere_Portal/]set jvm
[AdminConfig list JavaVirtualMachine $wps]$AdminConfig modify $jvm {{ initialHeapSize 1280}}$AdminConfig modify $jvm {{ maximumHeapSize 1280}}


#update session timeoutset wc
[AdminConfig list WebContainer $wps]set sm
[AdminConfig list SessionManager $wc]set tp
[AdminConfig list TuningParams $sm]$AdminConfig modify $tp {{invalidationTimeout 10}}

#update ORB service propertyset orb
[AdminConfig list ObjectRequestBroker $wps]$AdminConfig modify $orb {{noLocalCopies true}}

else { puts "nothing to do for this server" }
}
Save this script as updateWASPerf.jacl, and we can run this script as the following:
wsadmin -f updateWASPerf.jacl
References to available wsadmin task scripts using either Jython or Jacl to create new scripts to automate WAS change can be found on WebSphere Infocenter http://publib.boulder.ibm.com/infocenter/wasinfo/v6r0/topic/com.ibm.websphere.base.doc/info/aes/ae/txml_reference.html. In addition to search the online resources for help, we can always engage IBM Software Services (ISSL) team to help you write custom scripts to improve productivities of portal administrators.
ANT script to automate portal server operations
The value of ANT is to allow you integrate multiple tasks to create a single entry point of a complex work. Ideally, after you have create the ANT task, all do to complete the complex portal deployment operation is something like this:
ant.bat deploy-portal
or
ant.sh deploy-portal
In this section, you will demonstrate how to use ANT to automate complex operation scenario so that we can create such simple high level interface. Let's use a typical portal update scenario that invovles deploy a new portlet war file in to a portal server, at a high level, we can use the top down approach to break up the deployment process into the following three steps
- run xmlaccess to export portlet configuration from source server
- copy portlet WAR file from staging directory to WP/installableApps directory
- run xmlaccess to import the exported portlet configuration xml to target portal
You will create ANT tasks in the ANT script itso.deploy.xml to automate these three steps. At first we need to identify the right unit level task to perform each step: Step 1 and 3 are xmlaccess procedure, we can use <xmlaccess task>. Step 2 file copy is standard ANT procedure, we can use <copy> task
Once you decided the unit level task, we can start writing the ANT integration script using a bottom up approach, i.e. write unit level task first, then you integrate them into a high level task. The benefits of this bottom-up approach of writing ANT script is that we can start testing the script as soon as you write one unit task.
You have already demonstrated xmlaccess task usage in the previous section, so we can follow that example and create the corresponding XML for step 1 and 3.
- : create xmlaccess export task
The xmlaccess export task first loads a portlet.export.xml file which specifies resource names needs to be exported and then connects to the source portal server to execute the export process. The export XML is very similar to the previous example. First you create the ANT xml file itso.deploy.xml with the following unit task. You need to update sourceHost in the sample below with the actual hostname.
<?xml version="1.0"
encoding="UTF-8"?>
<target name="portal-xml-export" >


  <xmlaccess
      user="wpsadmin"
      password="wpsadmin"
      url="http://sourceHost:10038/wps/config"
      srcfile="/portlet.export.xml"
      destfile="/portlet.source.xml" />

</target>
Here /portlet.export.xml is specified as "srcFile", it is a modified from the sample portlet export XML from WebSphere Portal infocenter, update the string portlet.uniquename with the actual portlet war unique name:
<?xml version="1.0" encoding="UTF-8"?>

<request xmlns:xsi="http://www.w3.org/2001/XMLSchema-instance"  xsi:noNamespaceSchemaLocation="PortalConfig_1.4.xsd" type="export">

<portal action="locate">

<web-app action="export" uniquename="portlet.uniquename"/>

</portal>

</request>
After you have created these two xml files, we can unit test the script in ANT to verify it works or not. Because here you used the portal custom ANT task <xmlaccess>, you should either use standard ANT.bat/sh with the jars file containing <xmlaccess> task definition, or use WPSconfig.bat/sh which automatically loads the right custom task jars. Because WPSconfig.bat/sh always loads xmls under ${WPSinstallLocation}/config/includes directory, the most convenient way to develop and test ANT task is to use WPSconfig.sh command instead of standard ANT command, this will require you save the ANT xml file (here will be itso.deploy.xml) under "includes" directory. i.e. ${WPSinstallLocation}/config/includes/itso.deploy.xml
make sure the referred export xmlaccess file is stored as /portlet.export.xml
then we can try the task using WPSconfig.bat/sh as such:
WPSconfig.bat portal-xml-export
WPSconfig.sh will always invoke some initialization tasks prior to executing the portal-xml-export task. Our task execution trace string should be seen toward the end of the execution as shown below.
portal-xml-export: Mon Nov 06 14:59:55 PST 2006
[xmlaccess] EJPXB0006I: Connecting to URL http://localhost:10038/wps/config
[xmlaccess] EJPXB0004I: Writing output file /portlet.source.xml
[xmlaccess] EJPXB0002I: Reading input file /portlet.export.xml
[xmlaccess] EJPXB0020I: The request was processed successfully on the server.

BUILD SUCCESSFULTotal time: 14 seconds
The expected result of portl-xml-export task is the output file portlet.source.xml which we can use during step 3. We can inspect this file to see whether there is any error.
Now that you have verified the export script works, let's move on to copy files and do the import.
- create copy task
In this file copy step, because portal WAR deployment procedure requires the WAR file must be located under ${srcDir}/installableApps, we need to copy the war file from a staging directory, typically pushed by the build process automatically, to the default location. The file copying process can be achieved using <copy> task.
<target name="copy-war">
    <copy todir="${WpsInstallLocation}/installableApps"
    overwrite="true">

 <fileset dir="${srcDir}/installableApps"/> </copy> </target>
We can add this to the xml file itso.deploy.xml and do another unit test. You show the 2nd test till after step3.
- create xmlaccess import task
Step 1 created xmlaccess import xml file through the export process, step 2 prepared the WAR file to the right location, now in step 3 you will use the xmlaccess import process load the generated xmlaccess file from step 1. You don't need to write additional xmlaccess srcfile and you just specify srcfile with the output file from step1 /portlet.source.xml. The destfile is not too much useful other than reporting the status of the import. The key difference between step 1 and step 3 is that the url points to the different server: step 1 uses src server, while step 3 uses tgt server.
<target name="portal-xml-import" >

<xmlaccess
          user="wpsadmin"
          password="wpsadmin"
          url="http://targetHost:10038/wps/config"
          srcfile="/portlet.source.xml"
          destfile="/portlet.importresult.xml" />

</target>
You will need to add the above to itso.deploy.xml, save the change. Now it is the time to do another unit test to verify this task works or not. To that end, you execute the following
wpsconfig.bat portal-xml-import
If the task runs successfully, the command output of the should read like this (toward the end of it), the import process takes longer time than export:
portal-xml-import: Mon Nov 06 15:58:11 PST 2006
[xmlaccess] EJPXB0006I: Connecting to URL http://localhost:10038/wps/config
[xmlaccess] EJPXB0004I: Writing output file /portlet.importresult.xml
[xmlaccess] EJPXB0002I: Reading input file /portlet.source.xml
[xmlaccess] EJPXB0020I: The request was processed successfully on the server.


BUILD SUCCESSFUL Total time: 1 minute 25 seconds
Now that you have all the individual unit task as the building blocks and verified they all worked, the last step is to integrate them in a single high level deploy-war task. The listing below shows the completely integrated XML file.
<?xml version="1.0" encoding="UTF-8"?>

<target name="deploy-war" >
    <antcall target="portal-xml-export">
    </antcall>
    <antcall target="copy-war">
    </antcall>
    <antcall target="portal-xml-import">
    </antcall>

</target>

<target name="copy-war" >
    <copy todir="${WpsInstallLocation}/installableApps"
        overwrite="true">
        <fileset dir="${stageDir}/installableApps"/>  </copy>

</target>

<target name="portal-xml-export" >

 <xmlaccess
    user="wpsadmin"
    password="wpsadmin"
    url="http://sourceHost:10038/wps/config"
    srcfile="portlet.export.xml"
    destfile="portlet.source.xml" />

</target>

<target name="portal-xml-import" >

  <xmlaccess
    user="wpsadmin"
    password="wpsadmin"
    url="http://targetHost:10038/wps/config"
    srcfile="portlet.source.xml"
    destfile="portlet.importresult.xml" />

</target>
We can run an integrated task by specifying "deploy-war" as the target name when you run wpsconfig. It will always connect to the source portal server, export to a local file, copy the necessary portlet war files, and then import to the local target portal server. All of these tasks is now achievable via a single ANT call.
This example demonstrates a case where ANT scripting can be used to simplify the complex deployment process. We can further customize the script to use variables replacing the hard-coded values in the ANT xml file so that the script is reusable.
What's more, because wpsconfig is also the main configuration tool for WebSphere Portal, there are many existing configuration tasks that we can embed in the ANT script so that you don't have to write whole lot of new ANT tasks. For example, in order to fully synchronize the portal cluster, we can use the following task directly.
<antcall target="action-full-sync-nodes"/>
For a complete reference to existing configuration tasks that we can invoke directly, we can go to:
http://publib.boulder.ibm.com/infocenter/wpdoc/v6r0/topic/com.ibm.wp.ent.doc/wpf/i nst_best.htm
Portal 6 Update Installer
This section describes the IBM WebSphere Portal update installer application
Portal 6 Update Installer
This section describes the IBM WebSphere Portal update installer application which can be used to install interim or cumulative fixes and fix packs on the WebSphere Portal v6.0 product. The application can also be used to uninstall fixes.
This section provides examples of the command syntax used by the update installer and an step by step example of a fix installation. Note for latest information on this utility always refer to the fix readme and the PUI readme files. This section is simply a overview of this utility.
Downloading the Portal Update Installer
Download the PortalUpdateInstaller.zip file which contains the Portal Update Installer application.
http://www-1.ibm.com/support/docview.wss?rs=899&uid=swg24006942
The default location from which to unpack the update installer file is the portal_server_root/update directory. Interim fixes can be downloaded to the /update/fixes directory, and fix packs can be downloaded to the portal_server_root/update/fixpacks directory. The location of these directories is arbitrary.
Note: On Microsoft Windows platforms, the pkunzip utility might not decompress the download image correctly. Use another utility (such as WinZip) to unzip the image.
Important: This section is a reference only for the Portal Update Installer. For detailed instructions on using the update installer, always refer to the README file provided with the interim or cumulative fix or fix pack.
Clustering Considerations:
Installing a fix in a clustered Network Deployment environment requires an administrator to perform the following steps:
- Shut down one node. Which node you choose to install the fix on is arbitrary.
- Install the fix the same way as a single server installation
- Bring up the node you just installed the fix on.
- Shut down the next node.
- Bring up the node you just installed the fix on.
For special considerations refer to the fix readme instructions.
Sample Fix Installation
In the following example you will show installation of a Portal 6 WMM fix PK31592:
Link to Fix:
http://www-1.ibm.com/support/docview.wss?rs=688&uid=swg24013740
Installation Steps:
Go over the readme included for the fix to see if there are special considerations.
Open a command line window.
Change directory to the app_server_root/bin directory, where app_server_root is the installation directory of the WAS that is associated with WebSphere Portal.
. ./setupCmdLine.sh
Windows: setupCmdLine.bat
- Launch the updatePortalWizard.bat
- Portal Update Installer welcome screen

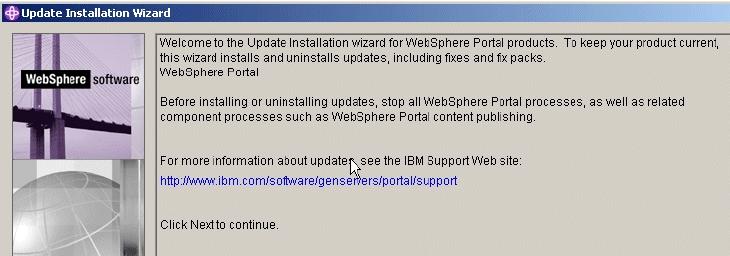
8. Select the Portal Installation
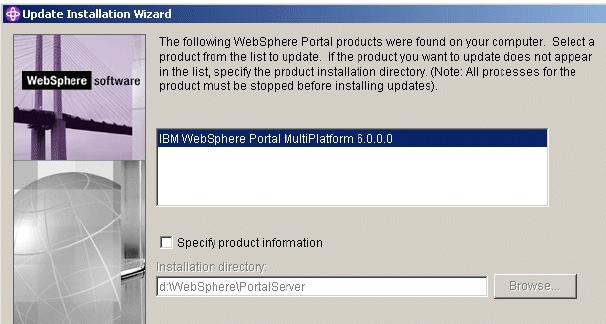
9. At this point the Portal Update Installer does a check to make sure all Application Servers are stopped
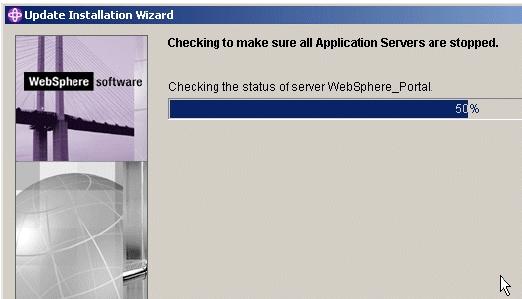
10.Install fixes selection screen
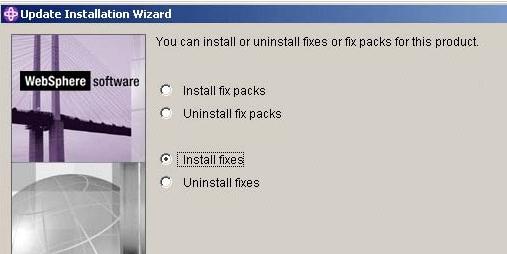
11.Pick the location of the fix
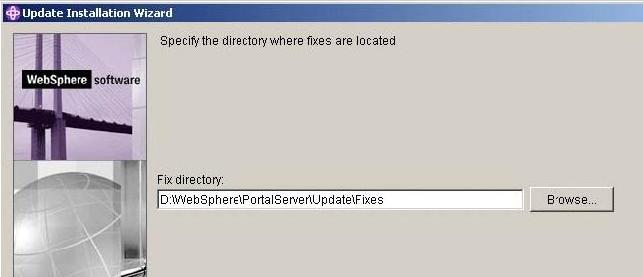
12.Pick the fix you would like to install.
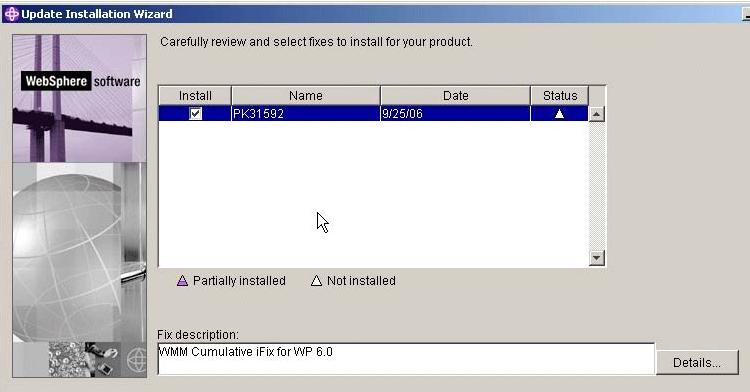
13.Fix summary screen
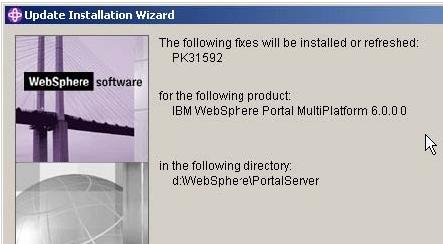
14.Installation successful screen
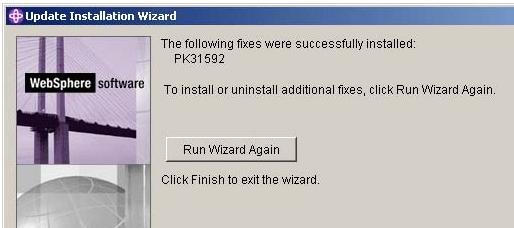
15.Restart WebSphere Portal.
16.The temporary directory may be removed.
Un-Installation:
Important: Fixes must be removed in the order they were applied. Do not remove a fix unless all fixes applied after it have first been removed. You may reapply any removed fix
- Shutdown WebSphere Portal.
- Follow the instructions that are packaged with the Portal Update Installer on how to uninstall the fix.
- Restart WebSphere Portal.
Update Portal Wizard Graphical User Interface Overview
This section describes the updatePortalWizard command and its command-line parameters. After launching the updatePortalWizard, refer to the instructions in the panels for installing or uninstalling fixes and fix packs.
Important: Do not launch multiple copies of the update installer at one time. The update installer cannot be launched concurrently with itself. Performing more than one update at the same time can lead to a failed or faulty installation.
Graphical User Interface Command name
To run the Portal Update Installer use the following command and follow the instructions in the panels of the updatePortalWizard to install or uninstall fixes and fix packs.
updatePortalWizard.{sh|bat}
Note: Follow the instructions in the panels of the updatePortalWizard to install or uninstall fixes and fix packs.
Installation roots
Portal_server_root represents the directory where WebSphere Portal is installed. By default, this varies per product offering and operating system. IBM AIX: /usr/WebSphere/PortalServer UNIX and Linux: /opt/WebSphere/PortalServer Windows: drive:/Program Files/WebSphere/PortalServer
Space requirements
Space requirements vary depending on what you are installing. The size of each download is available on the Support site. After unpacking the ZIP file you download, delete the ZIP file to free space. Space is also required for backup files in the portal_server_root /version/backup directory and the system temp directory.
Prerequisite Java environment setting
Set up the Java environment for the update installer:
- Open a command line window.
- Change directory to the app_server_root/bin directory, where app_server_root is the installation directory of the WAS that is associated with WebSphere Portal.
- Issue the appropriate command:UNIX: .(space)./setupCmdLine.sh
Note: When running this command in a UNIX shell, be sure to use the syntax .(space)./setupCmdLine.sh. If you do not precede the command with the period and space, the Java environment will not be properly set for the active shell.
Linux: source setupCmdLine.sh
Windows: setupCmdLine.bat
Update Portal Command Line Overview
This section describes the updatePortal command and its command-line parameters.
Installation Root
Portal_server_root represents the directory where WebSphere Portal is installed. By default, this varies per product offering and operating system: AIX: /usr/WebSphere/PortalServer UNIX and Linux: /opt/WebSphere/PortalServer Windows: drive:/Program Files/WebSphere/PortalServer
Command parameters
Given certain command parameters, the updatePortal command can:
- Install or uninstall interim or cumulative fixes or fix packs
- Provide information about the update state of applied interim or cumulative fixes or fix packs
The following table describes the parameters that can be used with the updatePortal command. Variables in the parameter column are show italicized, like this.
Table B-1 updatePortal parameters
Parameter Description -? Shows command usage /? Shows command usage on Windows platforms only. Not supported for Linux and UNIX-based platforms. -configProperties propertyFile.properties Specifies an externally supplied properties file containing WebSphere Portal properties and values. Using a properties file enables you to set property values to be used during the installation of the interim or cumulative fix or fix pack. We can also share the properties file across multiple installations of WebSphere Portal, if this is appropriate for the environment. Use the following properties in this file: "Any property in the wpconfig.properties file "WasDM; Use this property when applying interim fixes or fix packs in a clustered environment with WAS's deployment manager When specifying properties in a file, the following conventions should be observed: "Values identified for properties should not have trailing spaces "Do not enclose values in quotation marks "When typing directories, use a forward slash (/) instead of a backward slash (/), regardless of the operating system used -fix Interim fix only. Identifies the update as an interim fix update.
Parameter Description -fixDetails Interim fix only. Displays interim fix detail information. -fixDir Interim fix only. Specifies the fully qualified directory where you download interim fixes. This directory is usually the portal_server_root/update/fixes directory -fixes Interim fix only. Specifies a list of space-delimited interim fixes to install or uninstall. -fixJars Interim fix only. Specifies a list of space-delimited interim fix JAR files to install or uninstall. Each JAR file has one or more interim fixes. -fixpack Fix pack only. Identifies the update as a fix pack update. -fixpackDetails Fix pack only. Displays fix pack detail information. -fixpackDir Fix pack only. Specifies the fully qualified directory where you download and unpack fix packs. By default, this directory is the portal_server_root/update/fixpacks directory. -fixpackID Fix pack only. Specifies the ID of a fix pack to install or uninstall. The value you specify does not include the .jar extension. The value is not the fully qualified package file name, but is the name of the individual fix pack within the JAR file. The current WebSphere Portal strategy for fix pack JAR files is to use one JAR file per fix pack. The fix pack ID is the name of the JAR file before the Jar extension. For example: fix pack ID: WP_PTF_601 fix pack JAR file name: WP_PTF_601.jar fix pack ZIP file name: WP_PTF_601.zip -help Shows command usage /help Shows command usage -includeOptional Fix pack only. Specifies a space-delimited list of features. The installer applies any service for the components, if present in the fix pack. Otherwise, the installer does not apply the service. -install Installs the update, either interim fix or fixpack -installDir Specifies the fully qualified installation root of the WebSphere Portal product -prereqOverride Interim fix only. Overrides any installation and uninstallation prerequisite checking. The update installer does not log missing prerequisites. -skipWPCP Fix pack only. Skips any optional service for WebSphere Portal content publishing that might exist in the fix pack. -uninstall Uninstalls the identified fix -uninstallAll Interim fix only. Specifies to uninstall all applied interim fixes. -usage Shows command usage -wpcpInstallDir Specifies the fully qualified installation root of WebSphere Portal content publishing
Parameter Description -wpcpOnly Fix pack only. Skips the installation of all service except WebSphere Portal content publishing, and applies any service for WebSphere Portal content publishing that might exist in the fix pack. Note: Requires the -wpcpInstallDir parameter.
Examples of useful commands with parameters
The following examples assume that: The installation root is the /usr/WebSphere/PortalServer directory.The fix repository is the /usr/WebSphere/PortalServer/update/fixes directory.The fix pack repository is the /usr/WebSphere/PortalServer/update/fixpacks directory.
Note: The examples are split onto more than one line for visual clarity, but the command and associated parameters would be entered on one line during actual usage.
Installing a collection of interim fixes
portal_root/update> updatePortal -fix -installDir "/usr/WebSphere/PortalServer" -fixDir "/usr/WebSphere/PortalServer/update/fixes" -install -fixes Fix1 Fix2
Installing a collection of interim fixes and displaying interim fix details
portal_root/update> updatePortal -fix -installDir "/usr/WebSphere/PortalServer" -fixDir "/usr/WebSphere/PortalServer/update/fixes" -install -fixes Fix1 Fix2 -fixDetails
Installing a collection of interim fixes and using a separate properties file
portal_root/update> updatePortal -fix -installDir "/usr/WebSphere/PortalServer" -fixDir "/usr/WebSphere/PortalServer/update/fixes" -install -fixes Fix1 Fix2 -configProperties ./myProp.properties
Installing a collection of fixes and overriding prerequisite checking
portal_root/update> updatePortal -fix -installDir "/usr/WebSphere/PortalServer" -fixDir "/usr/WebSphere/PortalServer/update/fixes" -install -fixes Fix1 Fix2 -prereqOverride
Installing interim fixes from a Java archive (JAR) file
portal_root/update> updatePortal -fix -installDir "/usr/WebSphere/PortalServer" -fixDir "/usr/WebSphere/PortalServer/update/fixes" -install -fixJar Fix1
Installing interim fixes from a Java archive (JAR) file and displaying interim fix details
portal_root/update> updatePortal -fix -installDir "/usr/WebSphere/PortalServer" -fixDir "/usr/WebSphere/PortalServer/update/fixes" -install -fixJar Fix1 -fixDetails
Installing interim fixes from a Java archive (JAR) file and overriding prerequisite checking
portal_root/update> updatePortal -fix -installDir "/usr/WebSphere/PortalServer" -fixDir "/usr/WebSphere/PortalServer/update/fixes" -install -fixJar Fix1 -fixDetails
Uninstalling a collection of interim fixes
portal_root/update> updatePortal -fix
-installDir "/usr/WebSphere/PortalServer" -fixDir "/usr/WebSphere/PortalServer/update/fixes" -uninstall -fixes Fix1 Fix2
Uninstalling a collection of interim fixes and displaying interim fix details
portal_root/update> updatePortal -fix -installDir "/usr/WebSphere/PortalServer" -fixDir "/usr/WebSphere/PortalServer/update/fixes" -uninstall -fixes Fix1 Fix2 -fixDetails
Uninstalling a collection of interim fixes using a separate properties file
portal_root/update> updatePortal -fix -installDir "/usr/WebSphere/PortalServer" -fixDir "/usr/WebSphere/PortalServer/update/fixes" -uninstall -fixes Fix1 Fix2 -configProperties ./myProp.properties
Uninstalling a collection of interim fixes and overriding prerequisite checking
portal_root/update> updatePortal -fix -installDir "/usr/WebSphere/PortalServer" -fixDir "/usr/WebSphere/PortalServer/update/fixes" -uninstall -fixes Fix1 Fix2 -prereqOverride
Uninstalling interim fixes in a Java archive (JAR) file
portal_root/update> updatePortal -fix -installDir "/usr/WebSphere/PortalServer" -fixDir "/usr/WebSphere/PortalServer/update/fixes" -uninstall -fixJar Fix1
Uninstalling interim fixes in a Java archive (JAR) file and displaying interim fix details
portal_root/update> updatePortal -fix -installDir "/usr/WebSphere/PortalServer" -fixDir "/usr/WebSphere/PortalServer/update/fixes" -uninstall -fixJar Fix1 -fixDetails
Uninstalling interim fixes in a Java archive (JAR) file and overriding prerequisite checking
portal_root/update> updatePortal -fix -installDir "/usr/WebSphere/PortalServer" -fixDir "/usr/WebSphere/PortalServer/update/fixes" -uninstall -fixJar Fix1 -fixDetails
Viewing a list of installed interim fixes
portal_root/update> updatePortal -fix -installDir "/usr/WebSphere/PortalServer"
Viewing a list of interim fixes available in the repository
portal_root/update> updatePortal -fix -installDir "/usr/WebSphere/PortalServer" -fixDir "/usr/WebSphere/PortalServer/update/fixes"
Installing a fix pack
portal_root/update> updatePortal -fixpack -installDir "/usr/WebSphere/PortalServer" -fixpackDir "/usr/WebSphere/PortalServer/update/fixpacks" -install -fixpackID Fixpack1
Installing a fix pack and displaying fix pack details
portal_root/update> updatePortal -fixpack -installDir "/usr/WebSphere/PortalServer" -fixpackDir "/usr/WebSphere/PortalServer/update/fixpacks" -install -fixpackID Fixpack1 -fixpackDetails
Installing a fix pack and using a separate properties file
portal_root/update> updatePortal -fixpack -installDir "/usr/WebSphere/PortalServer" -fixpackDir "/usr/WebSphere/PortalServer/update/fixpacks" -install -fixpackID Fixpack1 -configProperties ./myProp.properties
Performing a partial installation of a fix pack by choosing to skip the installation of optional service to the WebSphere Portal content publishing feature portal_root/update> updatePortal -fixpack -installDir "/usr/WebSphere/PortalServer" -fixpackDir "/usr/WebSphere/PortalServer/update/fixpacks" -wpcpInstallDir "/usr/WebSphere/PortalServer/wpcp" -install -fixpackID Fixpack1 -skipWPCP Note: The fix pack status shows partial installation.
Uninstalling a fix pack
portal_root/update> updatePortal -fixpack -installDir "/usr/WebSphere/PortalServer" -uninstall -fixpackID Fixpack1
Uninstalling a fix pack and displaying fix pack details
portal_root/update> updatePortal -fixpack -installDir "/usr/WebSphere/PortalServer" -uninstall
-fixpackID Fixpack1 -fixpackDetails
Uninstalling a fix pack and using a separate properties file
portal_root/update> updatePortal -fixpack -installDir "/usr/WebSphere/PortalServer" -uninstall -fixpackID Fixpack1 -configProperties ./myProp.properties
Viewing a list of installed fix packs
portal_root/update> updatePortal -fixpack -installDir "/usr/WebSphere/PortalServer"
Viewing a list of fix packs available in the repository for the WebSphere Portal product
portal_root/update> updatePortal -fixpack -installDir "/usr/WebSphere/PortalServer" -fixpackDir "/usr/WebSphere/PortalServer/update/fixpacks"
Services Oriented Architecture and Portal
Service-oriented architecture (SOA) is a concept specifying that an application can be made up from a set of independent but cooperating subsystems or services. Such a framework isolates each service and exposes only the necessary declared interfaces to other services. This allows architects to organize and reduce dependencies in their products and provides for a tailored mix of services in the deployed environment. This approach can be used to support existing requirements, enterprise application integration, for example, as well as provide a foundation for extending the platform to meet specific business demands, such as rapid solution delivery for e-business.
SOA Definition
A Service is a discoverable software resource which has a service description. The service description is available for searching, binding and invocation by a service consumer. The service description implementation is realized through a service provider who delivers quality of service requirements for the service consumer. Services can be governed by declarative policies.
Any service-oriented architecture contains three roles:
- service requestor
- service provider
- service registry

- A service provider is responsible for...
- Building a useful service
- Creating a service description for it
- Publishing that service description to one or more service registries
- Receiving service invocation messages from one or more service requestors
- A service requestor is responsible for...
- Finding a service description published to one or more service registries
- Using service descriptions to bind to or invoke services hosted by service providers
Any consumer of a service can be considered a service requestor.
- The service registry is responsible for...
- Advertising service descriptions published to it by service providers
- Allowing service requestors to search the collection of service descriptions contained within the service registry.
Once the service registry makes a match between the service requestor and the service provider, the service registry is no longer needed for the interaction.
Any program or network node can play each of these roles. In certain scenarios a single program might fulfill multiple roles; for example, a program could be a service provider providing a service to downstream consumers, as well as a service requestor, itself consuming services provided by others.
SOA also includes three operations:
- publish
- find
- bind
These operations define the contracts between the SOA roles.
- The publish operation is an act of service registration or service advertisement. It acts as the contract between the service registry and the service provider.
- With the find operation the service requestor states one or more search criteria, such as type of service, quality of service, and so forth. The result of the find operation is a list of service descriptions that match the find criteria.
- The bind operation embodies the client-server relationship between the service requestor and the service provider. The bind operation can be dynamic (or late), such as on-the-fly generation of a client-side proxy based on the service description used to invoke the service; or it can be very static (or early), such as a developer hand coding the way a client application invokes a service (that is, during application construction time).
SOA Life Cycle
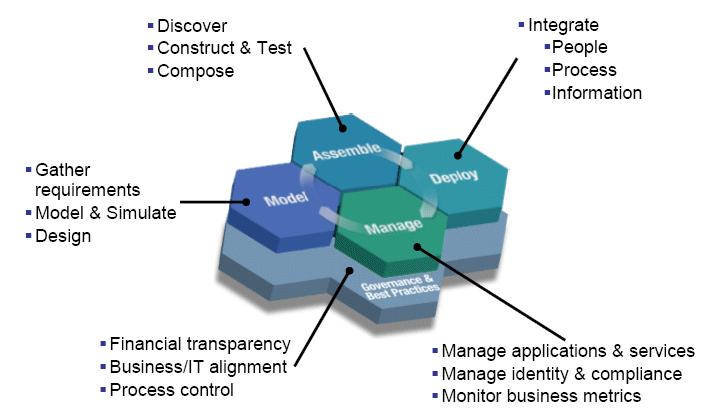
IBM clients have indicated that they think about SOA in terms of a life cycle. The life cycle includes:
- Starting the Model phase by gathering business requirements and designing their business processes
- Optimizing the processes and implementing them by assembling new and existing services to form these business processes
- Deploying these assets into a highly secure and integrated services environment
After the business processes are deployed, IBM clients manage and monitor these business processes from both an IT and a business perspective. Information gathered during the Manage phase is fed back into the life cycle to enable continuous process improvement. Underpinning all of these life-cycle stages are governance and processes that provide guidance and oversight for the SOA project.
Model
The Model phase begins by gathering and analyzing business requirements that you then use to model, simulate, and optimize the business processes. The resulting business processes are used to design associated software services and service levels to support these processes. During this phase a model is used to establish a common understanding between business and IT of:
- business processes
- objectives
- outcomes
The modeling phase will help to ensure that the resulting application meets the defined business requirements. This model also provides a base line from which to measure business performance.
Assemble
During the Assemble phase, you create services out of existing assets, such as enterprise resource planning (ERP) and financial systems, IBM CICS applications, and other solutions that run the business. In many cases, we can search a library of existing services for this functionality. If no functionality exists, we can create and test a service to deliver the functionality required for a particular business process. When the required services are available they are orchestrated to implement a business process.
Deploy
During the Deploy phase, you configure and scale the runtime environment to meet the service levels required by the business processes. After a business process is configured, we can deploy it into a robust, scalable, and highly secure services environment. This services environment is optimized to reliably run mission-critical business processes while providing the flexibility to make updates in response to changing business requirements. This service-oriented approach also reduces the cost and complexity associated with maintaining numerous point-to-point integrations.
Manage
The Manage phase involves establishing and maintaining service availability and response times, as well as managing underlying services assets. We can monitor key performance indicators (KPIs) in real time to get the information prevent, isolate, diagnose, and fix problems. Understanding the real-time performance of the business processes enables you to provide vital feedback to the business-process model to enable continuous improvement. This phase also involves managing and maintaining version control over the services that make up the business processes. The management phase ultimately enables you to make better business decisions sooner than previously possible.
Governance and processes
Governance and processes are critical to the success of any SOA project. SOA governance is the set of solutions, policies, and practices that enable companies to implement and manage an enterprise SOA. Governance defines the processes for directing and controlling the SOA components in order to achieve the enterprise's goals by adding value, while balancing risk versus return. To help ensure success, you might choose to create a center of excellence within the business to implement governance policies and to follow proven international governance standards. Implementing strong governance policies can result in successful SOA projects-and also improve the potential for higher profits and increased shareholder value.
The governance model defines:
- What has to be done
- How it is done
- Who has the authority to do it
- How it is measured
SOA Reference Architecture
The SOA reference architecture is a way of looking at the set of services that go into building an SOA. This architecture is not unique to IBM; these are things that consider when approaching SOA regardless of what products and services are used. These capabilities can be implemented on a build-as-you-go basis allowing capabilities and project level solutions to be added as new requirements are addressed over time. We can see that these services organized along the same lifecycle we've discussed. On the left in is Development Services which is model and assemble, in the middle are the elements of the deployment run-time environment you use and on the right is management. The backbone of the reference architecture is the enterprise service bus which facilitates communication between services. The reference architecture is a great tool for laying out roadmaps for pursuing SOA. Regardless of what kind of project you're undertaking, it makes sense to lay it out on a reference architecture to see how the various services you're designing are going to interact with each other.
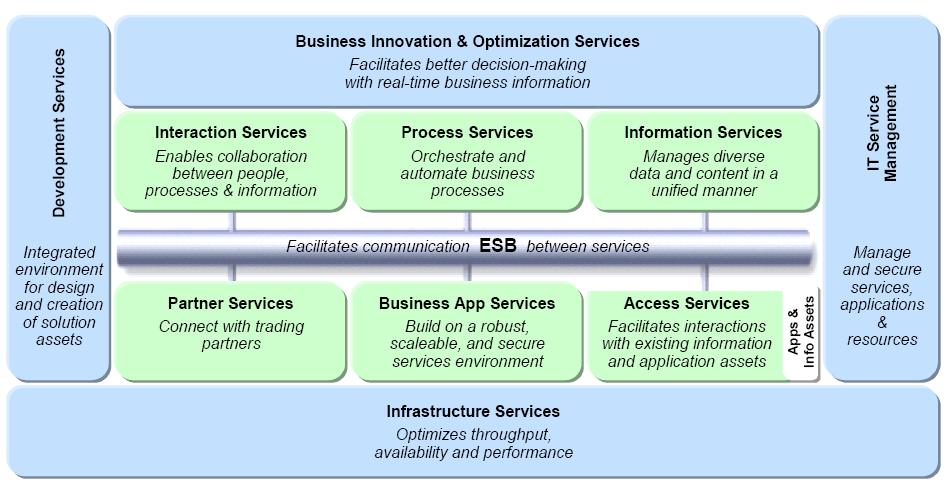
The SOA reference architecture is a way of looking at the set of services that go into building an SOA. This architecture is not unique to IBM; these are things that consider when approaching SOA regardless of what products and services are used. These capabilities can be implemented on a build-as-you-go basis allowing capabilities and project level solutions to be added as new requirements are addressed over time. We can see that these services organized along the same lifecycle we've discussed. On the left in is Development Services which is model and assemble, in the middle are the elements of the deployment run-time environment you use and on the right is management. The backbone of the reference architecture is the enterprise service bus which facilitates communication between services. The reference architecture is a great tool for laying out roadmaps for pursuing SOA. Regardless of what kind of project you're undertaking, it makes sense to lay it out on a reference architecture to see how the various services you're designing are going to interact with each other
The SOA Reference Architecture outlines the key capabilities that are required for comprehensive, enterprise wide SOA solutions. These capabilities can be implemented on a build-as-you-go basis allowing capabilities and project level solutions to be added as new requirements are addressed over time.
Tools are an essential component of any comprehensive integration architecture. The SOA Architecture includes both Development Services which are used to implement custom artifacts that leverage the infrastructure capabilities, and Business Innovation & Optimization Services which are used to monitor and manage the runtime implementations at both the IT and business process levels.
At the core of the SOA Reference Architecture is the Enterprise Service Bus. This delivers all of the inter-connectivity capabilities required to leverage the services implemented across the entire architecture. Transport services, event services, and mediation services are all provided through the ESB.
The SOA Reference Architecture also contains a set of services that are oriented toward the integration of people, processes, and information:
- Interaction Services provide the capabilities required to deliver IT functions and data to end users, meeting the end-user's specific usage preferences.
- Process Services provide the control services required to manage the flow and interactions of multiple services in ways that implement business processes.
- Information Services provide the capabilities required to federate, replicate, and transform data sources that may be implemented in a variety of ways.
Many of the services in an SOA are provided through existing applications; others are provided in newly implemented components; and others are provided through external connections to third party systems.
Existing enterprise applications and enterprise data are accessible from the ESB through a set of Access Services that provide the bridging capabilities between legacy applications, pre-packaged applications, enterprise data stores and the ESB.
The SOA Reference Architecture also contains a set of Partner Services that provide the document, protocol, and partner management capabilities required for business processes that involve inter-actions with outside partners and suppliers.
Business Application Services provide runtime services required for new application components to be included in the integrated system.
Underlying all these capabilities of the SOA Reference Architecture is a set of Infrastructure Services which are used to optimize throughput, availability and performance.
IT Services Management Services include capabilities that relate to scale and performance, for example edge services, clustering services, and virtualization capabilities allow efficient use of computing resources based on load patterns.
The SOA Reference Architecture is a complete and comprehensive architecture that covers all the integration needs of an enterprise. Its services are well integrated and are delivered in a modular way, allowing SOA implementations to start at a small project level. As each additional project is addressed, new functions can be added, incrementally enhancing the scope of integration across the enterprise.
Entry Points to SOA
Determining where to start can be challenging. Approaching today's critical needs with strategic business goals in mind is what SOA is all about. SOA entry points help businesses pursue SOA incrementally.
They take a project-based approach so each project can deliver real business value. IBM has found that many companies approach SOA from entry points of integrating people, processes, information or a combination of all three. IBM offers focused software, services and expertise to help utilize these entry points effectively. SOA entry points provide a business-centric and IT-centric approach to the life cycle. This enables companies to start an SOA project that targets specific business needs to help achieve benefits more rapidly.
Figure C-4
People Entry Point
People-centric collaboration is about enabling human and process interaction with consistent levels of service. Companies that focus on collaboration among people will improve their productivity by giving their employees and trading partners the ability to create a personalized and consolidated way to interact with other people and information in the context of business processes. They need a role-based, intuitive and adaptive user experience. SOA enables this user experience and ensure consistent levels of service are met each step of the way. SOA allows customers to create, deploy, and update composite applications faster with SOA portlets. As application portlets are created or converted to "service-based" portlets, we can aggregate and integrate these portlets faster and more economically to get the collaborative user interface and view into the business that we need.
Process Entry Point
Companies are interested in the ability to optimize their processes, deploy them on-the-fly and monitor how effective the enhanced processes are. This ability drives the ability to create and deploy innovative business models. In order to do this effectively, companies should consider how to "reuse" the components that make up these business processes so they can be reconfigured and economically (rather than created from scratch for every new project) in response to rapidly changing opportunities and threats. For many years companies have wanted to fix, improve, and modify process activity. But IT has been the biggest inhibitor. SOA changes the game in this space by allowing processes to be represented as services and components. As such, the service-based process now becomes re-usable, flexible, and can be modified and re-deployed more . SOA turns processes into parts (called "services) so the specific part of the process can be improved, optimized, and then reassembled with other parts of the process
Information Entry Point
Information delivered as a service provides extensive options to a company to allow for packaging, transformation, and distribution of the information to the right people at the right time. Information as a service, as a part of an SOA:
- Ensures consistency in sources and data rules
- Aligns information with business processes
- Provides business context to information
- Uncovers insightful relationships hidden within information
- Provides a basis for trust in information
- Enables tighter control over information
By implementing the Information Entry point, SOA lower costs by supporting a single federated version of the information. By making existing business functions available to new users or channels, new business opportunities are created that extend value of existing assets through reuse.
Connectivity and Reuse Entry Point
Each of the three entry points discussed is dependent on connectivity that allows services to communicate and interact with other elements of people, process, and information. Connectivity also allows a SOA implementation to connect to existing applications, partners and customers, as well as the new services that are being created to be shared across the enterprise. In order to get the value from the business-focused entry points, one needs an IT infrastructure that delivers this foundation of connectivity, and that enables one to create & reuse services. These are capabilities that need to be considered before moving on to the more advanced states. Also taken into consideration is to build security into every SOA project and to adhere to established SOA Governance best practices ensure oversight and control for the SOA projects.
People Entry Point
To enable efficient real-time decision making, people need to interact and collaborate with other people. They also need to have instant access to information and data from multiple sources. SOA can help people do all of these things -from within the context of their business processes. Companies that focus on people as the entry point to SOA are taking a business-centric approach. This approach maximizes people productivity to enhance business results. IBM Workplace, Portal and Collaboration software from the Lotus family of products enables the people entry point. It delivers the essential people-focused capabilities of the IBM SOA strategy and provides significant value to organizations large and small worldwide. To make use of this entry point, many businesses start at the front end of SOA using IBM WebSphere Portal.
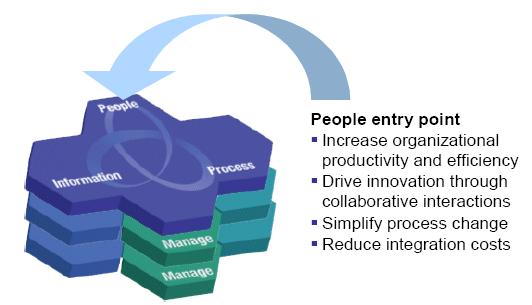
People entry point
- Increase organizational productivity and efficiency
- Drive innovation through collaborative interactions
- Simplify process change
- Reduce integration costs
WebSphere Portal allows one to build a view of a key business process by aggregating information in a way that makes sense for people. This creates an intuitive, role-based user experience-to help people make better decisions. Once the portal foundation of SOA is established, businesses can expand the portal environment and extend people productivity with other Lotus software for SOA. This software can range from pre-built collaborative capabilities and composite applications to alert-driven dashboards. From products that help accelerate composite application development to products that enable people to access those applications from mobile devices. Determining the next step usually depends on whether the objective is to achieve immediate business goals. Or the objective may be to position the business to extend the SOA application environment to respond to changing businesses needs in the future.
Composite Applications
Portals have evolved over recent years as the needs of businesses have become more demanding: starting with personalized access to content and applications, and then to deeper integration with back-end systems. When one considers how applications have evolved within most organizations it is very easy to see a common trend where multiple silos predominate and result in a confusing interfaces with its own site structure and layout that end users must learn to navigate. These are usually designed by lines of businesses within an organization to exposing the departmental model and procedures to end users. The context of the user is totally lost as this is multiplied across the number of different sites the user needs to access. Unfortunately this undermines the success of the systems as it places a significant usability challenge on the user. This results in lack of productivity and lack of adoption. Figure 6 identifies an example of what this would look like.
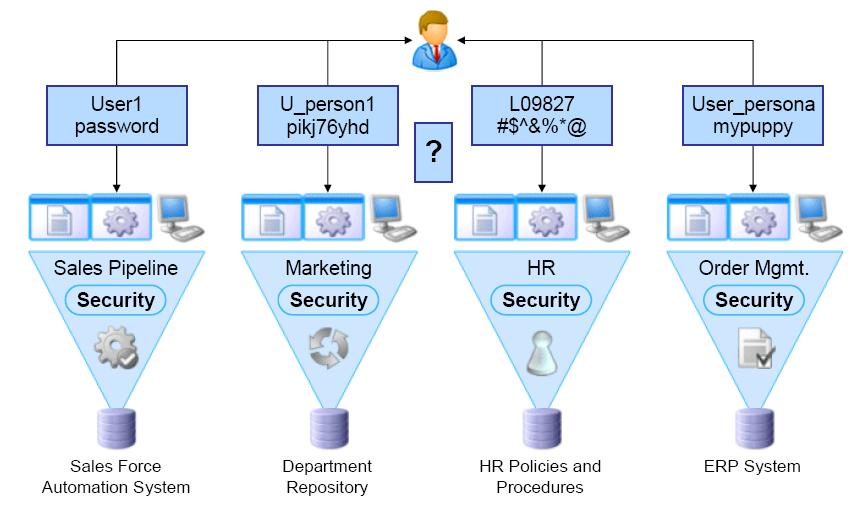
The right approach to solving this problem would be to design a single interface with the user in mind. Understanding the audience means providing the right context within the interface or application and delivering the right content, applications and processes based on the user's role. This approach reduces the burden on the user by hiding the underlying complexity. It adapts to the user's needs and delivers a composite view that allows the user to interact with these multiple back end systems as if they were one. By consolidating access to the content, applications, and processes relevant to the user - all in one view - the common simplifies the users tasks and provide audience value - resulting in improved productivity and adoption of the portal.
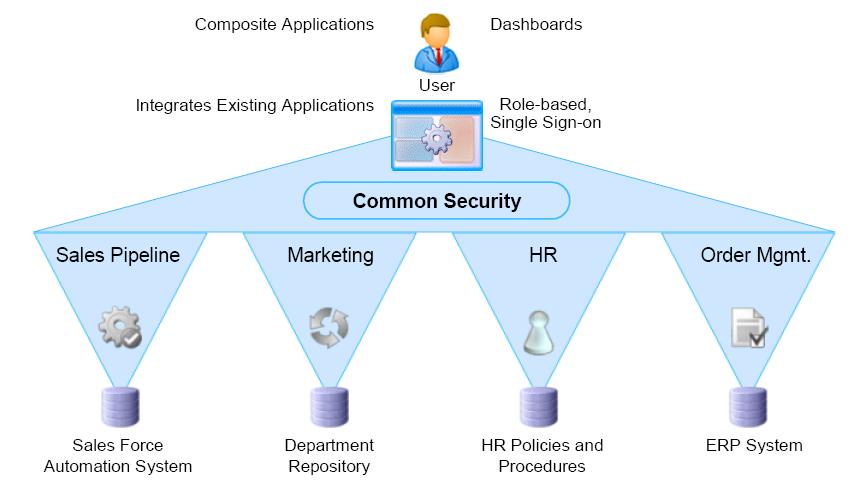
Automation System Repository Procedures
The original Composite Portal Pattern, borrowed from the e-Business Pattern library allows for combining information and applications from multiple sources on the page. Although combining multiple applications and information is a good concept, it is imperative that for reusability should be addressed for composite applications to be successful. Although, IBM's best practice recommendation is to design and implement solutions that are reusable, in reality, many customers find it very difficult to implement a reusable solution that attempts to conform already implemented solutions to standards. Technically this might be a good practice but in reality most customers do not see business value in implementing this approach.
Hence, a more sophisticated approach along the same lines is a composite application. In this case, you assume that the user has to interact with a number of applications simultaneously and by providing a separate layer whose role it is to render a coherent user interface, the user can access a number of disparate back-end applications or services. Although the single access pane is implemented as an application, it allows for other items to the "plugged in" and separates the user interface completely from the different back-end systems. A composite application is often viewed as a key part of a service-oriented architecture where new applications are composed of existing services. This requires, however a solid services infrastructure and a good handle on how to expose the application's business functions as services. Figure 8 illustrates the single interface for a composite application.
MyValue Module
The following are the principles of composite applications:
- Composite applications are more then just combining applications on a page Appendix C. Services Oriented Architecture and Portal 457
- The goal is composing applications, not developing applications
- Composite application should work together and be aware of one another even if developed independently
- Dashboards, Collaboration, and Industry Solutions can achieve some of this goal but are fairly limited in flexibility
- Custom solutions will require good design, and strong standards to ensure interoperability between components.
Related publications
The publications listed in this section are considered particularly suitable for a more detailed discussion of the topics covered in this redbook.
IBM Redbooks
For information about ordering these publications, see "How to get IBM Redbooks" on
page 459. Note that some of the documents referenced here may be available in softcopy only.
- WebSphere Portal V5.0 Production Deployment and Operations Guide, SG24-6391-00
- WAS V6 Scalability and Performance Handbook, SG24-6392-00
Online resources
These Web sites are also relevant as further information sources:
- IBM WebSphere Portal, v6.0 Information Center
- WebSphere Portal Documentation
How to get IBM Redbooks
We can search for, view, or download Redbooks, Redpapers, Hints and Tips, draft publications and Additional materials, as well as order hardcopy Redbooks or CD-ROMs, at this Web site:
Help from IBM
IBM Support and downloads
IBM Global Services