Creating SQLJ files
You can create SQLJ files by using the New SQLJ File wizard. The SQLJ support is automatically added to the project when you use this wizard.
|
Work around: Right-click the ITSOBANKderby connection and select Disconnect. The SQLJ wizard does not show the tables when the connection is active. |
We create a Java project named RAD75SQLJ and then create the SQLJ file in this project:
| Open the Java perspective, select File Ć New Ć Java Project. Enter RAD75SQLJ as the Project name and click Finish. |
| Select File Ć New Ć Other Ć Data Ć SQLJ Applications Ć SQLJ File and click Next. |
| In the SQLJ File page, enter itso.bank.data.sqlj as the package name and CustomerAccountInfo as the file name and click Next (Figure | 1-23). |
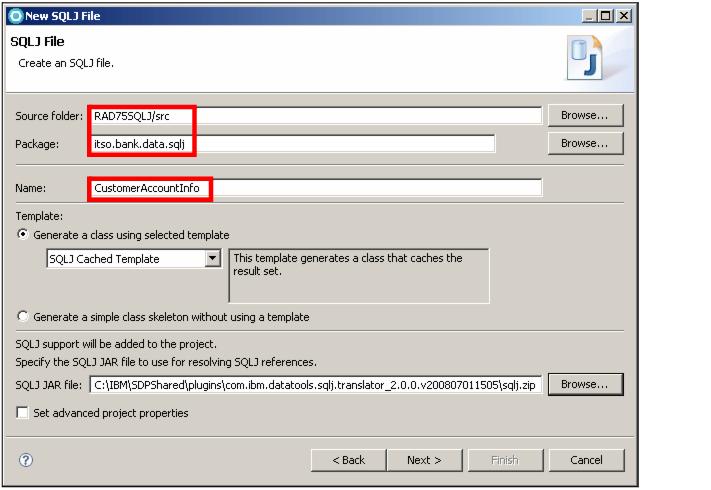
Figure 11-23 New SQLJ File
| In the Select an Existing Statement Saved in Your Workspace page, click Next. We create a new SQL statement. |
| In the Specify SQL Statement Information page, select Be guided through creating an SQL statement, click Next. |
| In the Select Connection page, select the ITSOBANKderby connection that you created in the previous section. Click Reconnect to reconnect to the database if it is disconnected. Click Next. |
| In the Construct an SQL Statement page, we go through several pages: |

|
|
|
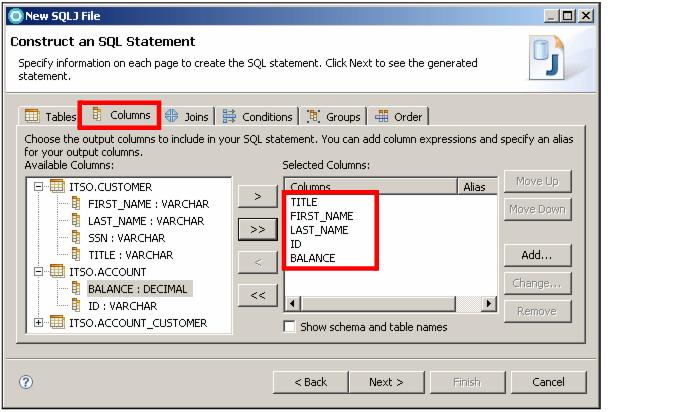
Figure 11-24 Select the output columns
|
|
|
|
|
|
|
|
| In the Change the SQL Statement page, review the generated SQL statement and click Next. |
SELECT ITSO.CUSTOMER.TITLE, ITSO.CUSTOMER.FIRST_NAME, ITSO.CUSTOMER.LAST_NAME, ITSO.ACCOUNT.ID, ITSO.ACCOUNT.BALANCE
FROM ITSO.CUSTOMER JOIN ITSO.ACCOUNT_CUSTOMER ON ITSO.CUSTOMER.SSN =
ITSO.ACCOUNT_CUSTOMER.CUSTOMER_SSN JOIN ITSO.ACCOUNT ON
ITSO.ACCOUNT_CUSTOMER.ACCOUNT_ID = ITSO.ACCOUNT.ID
WHERE ITSO.ACCOUNT.BALANCE >= :BALANCE
ORDER BY BALANCE DESC
| In the Specify Runtime Database Connection Information page, select Use DriverManager Connection (Figure | 1-25). Derby does not use authentication. Select Variables inside of method and leave the user ID as itso and the password empty. |
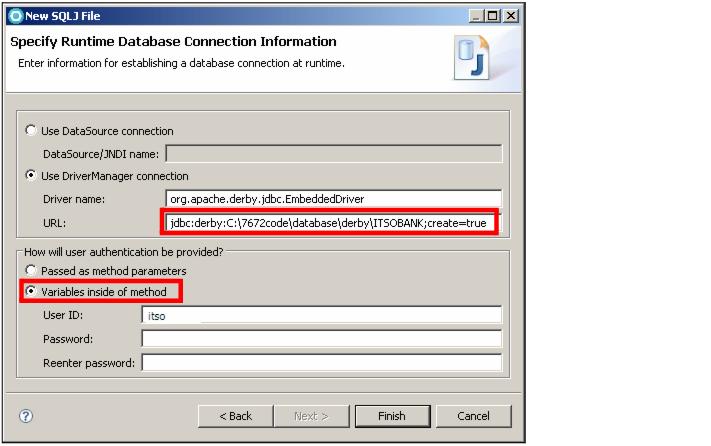
Figure 11-25 Specify Runtime Database Connection Information
| Click Finish. The SQLJ file is generated. |
|
ibm.com/redbooks |