How the macro runtime processes a macro screen
This section describes the activities that occur when the macro runtime processes a macro screen. Although this topic is tedious to read about, it is important, and sooner or later you are likely to have a question about it. You might want to read through the first part of this chapter (the Overview) now and skip the remaining parts until you have a specific question.
Overview
Scenario used as an example
As an example, this chapter uses a scenario from a macro. This macro contains only two macro screens, Screen1 and Screen2.
The scenario begins at the point at which the macro runtime has performed all the actions in Screen1 and is ready to search for the next macro screen to be processed.
Screen1 is the macro screen that handles the ISPF Primary Option Menu (see Figure 12).
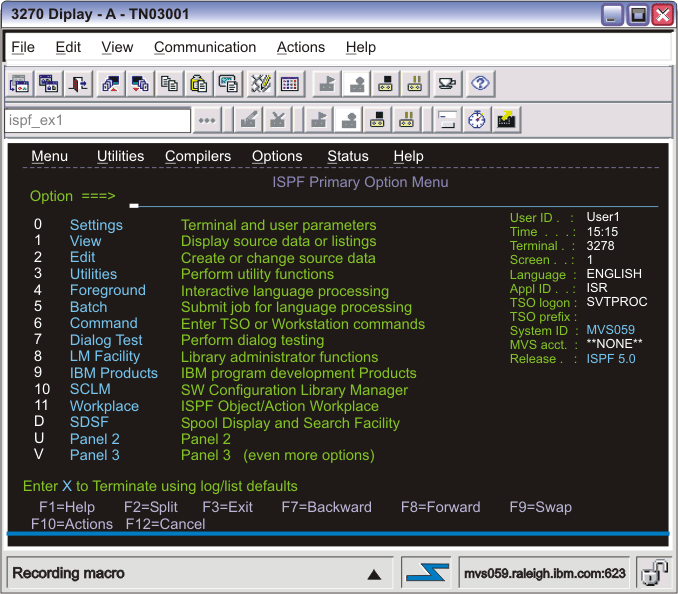
Table 8 shows a conceptual view of the contents of Screen1:
| XML element contained in <screen> element Screen1: | Contents of XML element: |
|---|---|
| <description> | Descriptors:
|
| <actions> | Actions:
|
| <nextscreens> | Names of macro screens that can validly occur after
this macro screen:
|
Screen2 is the macro screen that handles the Utility Selection Panel (see Figure 13.
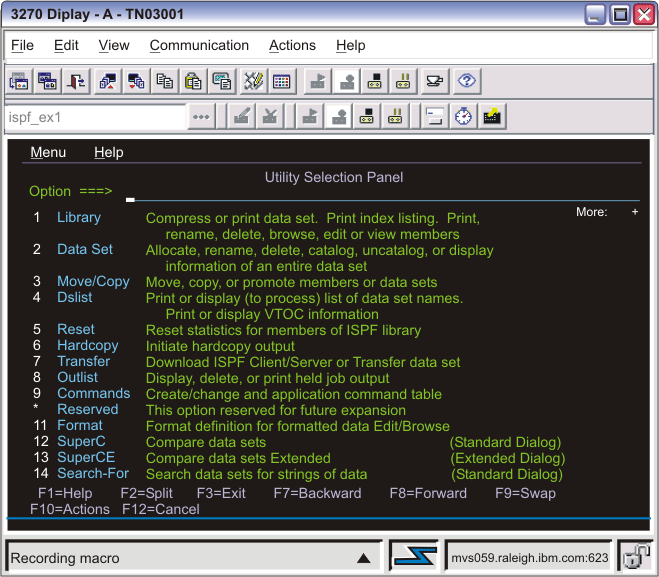
Table 9 shows a conceptual view of the contents of Screen2:
| XML element contained in <screen> element Screen2: | Contents of XML element: |
|---|---|
| <description> | Descriptors:
|
| <actions> | Actions (the host application pre-positions the text
cursor in the correct input field):
|
| <nextscreens> | Names of macro screens that can validly occur after
this macro screen:
|
Stages in processing a macro screen
During macro playback the macro runtime loops through the same three stages of activity again and again until the macro terminates:
- Determine the next macro screen to be processed.
- Make the selected macro screen the new current macro screen.
- Perform the actions in the new current macro screen's <actions> element.
Closer look at stage 1
Stage 1 requires a more detailed explanation than stage 2 or 3. Stage 1 itself contains three steps:
- 1(a) Add the names of candidate macro screens to the list of valid next screens.
- 1(b) Do screen recognition to match one of the candidate macro screens to the actual application screen that is currently displayed in the host terminal .
- 1(c) Remove the names of candidate macro screens from the list of valid next screens.
Each of these steps involves the list of valid next screens.
The list of valid next screens is just a list that can hold macro screen names. The macro runtime creates this list at the beginning of macro playback (before playing back the first macro screen), and discards this list after macro playback is complete. Initially the list is empty (except possibly for transient screens, which are described later in this chapter).
During macro playback, each time the macro runtime needs to determine the next macro screen to be processed, it performs the three steps 1(a), 1(b), and 1(c) using the list of valid next screens.
Overview of the entire process (all 3 stages)
In stage 1 the macro runtime determines the next macro screen to be processed. As stated in the previous section, stage 1 includes three steps.
In step 1(a) the macro runtime collects the names of macro screens that can occur after the current macro screen, and adds these names to the list of valid next screens. There may be just one such screen in the list or several. In the example scenario, the macro runtime would look in the <nextscreens> element of Screen1, find one name (Screen2), and add that name to the list (see Table 8).
In step 1(b), the macro runtime periodically checks each macro screen on the list to determine whether it matches the application screen.
There is a time factor here. Because of an action that the macro runtime has just performed in the current macro screen (in Screen1, typing '3[enter]' as the last action of the <actions> element), the host application is in the process of changing the host terminal so that it displays the new application screen (the Utility Selection Panel) instead of the old application screen (ISPF Primary Option Menu). However, this change does not occur immediately or all at once. The change takes some hundreds of milliseconds and may require several packets of data from the host.
Therefore, during step 1(b), every time the OIA line or the host terminal's presentation space is updated, the macro runtime again checks the macro screen (or screens) named in the list of valid next screens to determine whether one of them matches the application screen in its current state.
Eventually the host terminal is updated to the extent that the macro runtime is able to match one of the macro screens on the list to the application screen.
In step 1(c), the macro runtime removes all the macro screen names from the list of valid next screens (except transient screens if any).
In stage 2, the macro runtime makes the selected macro screen (the one that matched the application screen in step 1(b)) the new current macro screen.
Finally, in stage 3, the macro runtime performs the actions in the <actions> element of Screen2.
Conclusion of the overview
At this point, if you are reading this book for the first time, you might want to skip the rest of this chapter and begin the next chapter. Later, if you have a question about how the macro runtime processes a macro screen, you can return to this chapter to learn more.
The rest of this chapter describes the same processing sequence as in the overview but provides more information about each step.
Stage 1: Determining the next macro screen to be processed
As stated earlier, stage 1 contains three steps: adding macro screen names to the list of valid next screens, doing screen recognition, and removing the macro screen names from the list of valid next screens.
Adding macro screen names to the list of valid next screens (step 1(a))
In this step the macro runtime places the names of candidate macro screens on the list of valid next screens.
Valid next screens
When a host application has displayed an application screen in the host terminal, and a user input has occurred, then usually only a few application screens (frequently just one) can occur next.
In the example scenario, the current macro screen is Screen1, the current application screen is the ISPF Primary Option menu, and the input is '3' plus the enter key (see Table 8). In this context, only one application screen can occur next, the Utility Selection Panel. Therefore the name of only one macro screen needs to be added to the list of valid next screens: Screen2.
But wait a minute, you say. The ISPF Primary Option Menu has about 30 different possible inputs (15 options, 6 menu selections, and 8 function keys). There should be 30 names of macro screens on the list, not just 1.
The reason that the list of valid next screens usually has only one or a few names on it is that the macro is executing a series of instructions that are aimed at accomplishing some specific task. In Screen1, the instructions are aimed at getting from the ISPF Primary Option Menu to the Utility Selection Panel. The necessary actions have been performed to make this transition occur ('3[enter]'), and the macro screen is now just waiting for the expected application screen to appear.
How the macro runtime selects the names of candidate macro screens
This section describes how the macro runtime selects the macro screen names that it places on the list of valid next screens. There are two cases:
- For the very first macro screen to be played back, the macro runtime selects the name of any macro screen in the macro that is marked as an entry screen.
- For all subsequent macro screens being played back, the macro runtime uses the names that it finds in the <nextscreens> element of the current macro screen.
First macro screen
When macro playback begins, the list of valid next screens is empty (except possibly for transient screens, see Transient screens).
To get candidates for the first macro screen to be processed, the macro runtime searches the entire macro, finds each macro screen that is marked as an entry screen, and adds the names of these macro screens to the list.
The entry screen setting (an attribute of the <screen> element) exists for exactly this purpose, to mark macro screens that can occur as the first screen to be processed.
When a macro is recorded, the Macro object by default marks just the first macro screen to be recorded as an entry screen. After recording is complete, the macro developer can mark (or unmark) any macro screen as an entry screen, and there can be multiple entry screens.
Entry screens are described in more detail in Entry screens.
If no macro screen is marked as an entry screen, then the macro runtime uses all the macro screens in the macro as candidates for the first macro screen to be processed.
Subsequent macro screens
For subsequent macro screens (including the one immediately after the first macro screen), the macro runtime finds the names of the candidate macro screens listed in the <nextscreens> element of the current macro screen.
In the example scenario, Screen1 is the current macro screen, and its <nextscreens> element contains the name of one macro screen, Screen2 (see Table 8). Therefore the macro runtime adds Screen2 to the list.
However many macro screen names are listed in the <nextscreens> element, the macro runtime adds all of them to the list of valid next screens.
During macro recording, when the Macro object begins to record a new macro screen, it stores the name of that new macro screen (such as Screen2) in the <nextscreens> element of the macro screen that it has just finished recording (such as Screen1). Therefore each macro screen (except the last) of a recorded macro has the name of one macro screen stored in its <nextscreens> element.
Subsequently a macro developer can add or delete the name of any macro screen in the macro to or from the <nextscreens> element of any macro screen.
The <nextscreens> element is described in more detail in Valid next screens.
Transient screens
A transient screen is a screen that can occur at any point in the macro, that occurs unpredictably, and that always needs to be cleared. An example of a transient screen is an error screen that appears in response to invalid input.
The Macro object does not mark any macro screen as a transient screen during macro recording. However, subsequently the macro developer can mark any macro screen as a transient screen.
When macro playback begins, the macro runtime searches the macro, finds each macro screen that is marked as a transient screen, and adds the name of each transient macro screen to the list of valid next screens. These names remain on the list for the duration of the macro playback.
For more information on transient screens see Transient screens.
Screen recognition (step 1(b))
In this step the macro runtime matches one of the macro screens named in the list of valid next screens to the current application screen.
This process is called screen recognition because the macro runtime recognizes one of the macro screens on the list as corresponding to the application screen that is currently displayed in the host terminal .
Overview of evaluation
The macro runtime evaluates the candidate macro screens in the order in which their names appear in the list of valid next screens.
If the macro runtime finds that one of the candidates matches the application screen, then the macro runtime immediately stops evaluating and goes on to the next step of removing the candidate names from the list (step 1(c)). The matching screen becomes the next macro screen to be processed (stage 2).
However, if the macro runtime evaluates each macro screen named in the list without finding a match, then the macro runtime stops evaluating, temporarily, and does nothing further until the host terminal is updated.
Re-doing the evaluation
While the macro runtime is working on screen recognition, the host application is working on updating the host terminal with the new application screen. In the example scenario, the host application is updating the host terminal so that it displays the Utility Selection Panel (see Table 8 and Table 9). This process takes some hundreds of milliseconds and may require several packets of data from the host.
This situation explains why the macro runtime temporarily stops working on screen recognition until the screen is updated. If screen recognition has failed, the reason may be that the new application screen is incomplete. Therefore the macro runtime waits.
Each time that the OIA line is updated or the presentation space of the host terminal is updated, the macro runtime again makes a pass through the list of valid next screens, trying to find a match to the current application screen. If no match occurs then the macro runtime waits again.
The macro runtime may go through several cycles of waiting and re-evaluating before screen recognition succeeds.
Eventually enough of the new application screen arrives so that the macro runtime can match one of the macro screens named in the list to the new application screen.
Determining whether a macro screen matches the application screen
The macro runtime determines whether a macro screen matches the current application screen by comparing individual descriptors in the macro screen to the current host terminal screen.
In the example scenario, the macro runtime find the name Screen2 on the list of valid next screens, retrieves Screen2, looks at its descriptors, and compares the descriptors with the host terminal.
Each macro screen contains a <description> element that itself contains one or more descriptors. A descriptor is a statement of fact about the host terminal (application screen in its current state) that can be either true or false. In the example scenario, Screen2 contains three descriptors:
- The input inhibited indicator is cleared (input is not inhibited).
- There are 80 fields in the host terminal.
- There are 3 input fields in the host terminal.
When there are several descriptors in a <description> element, as here, the method that the macro runtime uses to evaluate the descriptors (as boolean true or false) and to combine their results into a single result (true or false) depends on some additional configuration information that is not described here. See Evaluation of descriptors for the configuration information.
However, in the example scenario, Screen2 is configured in the default manner, so that the macro runtime evaluates each of the three descriptors in turn. If all three are true, then the macro runtime concludes that the overall result is true, and that Screen2 matches the current application screen.
For more information about evaluating descriptors see Evaluation of descriptors.
Two recognition features
Timeout setting for screen recognition
You can set a timeout value that causes the macro runtime to terminate the macro if screen recognition does not occur before the timer expires (see Timeout settings for screen recognition).
Recognition limit
You can set a recognition count that causes the macro runtime to terminate the macro or to jump to a specified macro screen if the macro runtime recognizes a macro screen, such as ScreenA, a number of times equal to the count (see Recognition limit (General tab of the Screens tab)).
Removing the names of candidate macro screens from the list of valid next screens (step 1(c))
After screen recognition has succeeded, the macro runtime immediately begins its next task, which is cleaning up the list of valid next screens (step 1(c)).
This is a simple step. The macro runtime removes the names of all the candidate macro screens, whether recognized or not, from the list of valid next screens.
If the list contains the names of transient screens, those names remain on the list (see Transient screens).
Stage 2: Making the successful candidate the new current macro screen
Stage 2 is simple. In stage 2, the macro runtime makes the successful candidate macro screen the new current macro screen.
In the example scenario, the macro runtime makes Screen2 the new current macro screen. The host terminal displays the new application screen, the Utility Selection Panel (see Table 8 and Table 9).
The macro runtime immediately begins stage 3.
Stage 3: Performing the actions in the new current macro screen
In stage 3, the macro runtime performs the actions in the new current macro screen's <actions> element. If the new current macro screen does not contain an <actions> element or if the <actions> element is empty, then the macro runtime skips this stage.
Each macro screen typically contains an <actions> element that contains one or more actions to be performed. An action is an instruction that causes some type of activity, such as sending a sequence of keys to the host, displaying a prompt in a popup window for the user, capturing a block of text from the screen, or some other activity.
In the example scenario, Screen2 contains only one action:
- Type '4' followed by the enter key.
Screen2 does not need an action to position the text cursor in the correct input field because the Utility Selection Panel automatically positions the text cursor there.
If the <actions> element contains multiple actions, the macro run time performs each macro action in turn in the order in which it occurs in the <actions> element.
For more information on actions see Macro actions.
Inserting a delay after an action
Because the macro runtime executes actions much more quickly than a human user does, unforeseen problems can occur during macro playback that cause an action not to perform as expected, because of a dependency on a previous action.
To avoid this type of problem, the macro runtime, by default, inserts a delay of 150 milliseconds after every Input action or Prompt action in every macro screen, and a delay of 300 milliseconds after the last action of every macro screen (see Pause Between Actions (Macro tab)).
You should leave this feature enabled, although you can disable it if you want. You can change the delays from 150 milliseconds and 300 milliseconds to other values.
If you want to change the duration of the delay for a particular macro screen, you can do so (see Set Pause Time (General tab of the Screens tab)).
Also, for any particular action, you can increase the delay by adding a Pause action after the action (see Pause action (<pause> element)).
Repeating the processing cycle
After the macro runtime has performed all the actions in the <actions> element of the current macro screen, the macro runtime immediately begins the processing cycle again, starting with step 1(a), and using the candidate macro screens listed in the <nextscreens> element of the new current macro screen.
Terminating the macro
The macro runtime terminates the macro when it finishes processing a macro screen that is marked as an exit screen (because it has no next screens).
In the example scenario Screen2 is marked as an exit screen (see Table 9).
The exit screen setting, an attribute of the <screen> element, exists for exactly this purpose, to mark macro screens that terminate the macro.
When a macro is recorded, the Macro object, by default, marks the last recorded macro screen as an exit screen. After recording is complete, the macro developer can mark (or unmark) any macro screen as an exit screen, and there can be multiple exit screens.
Exit screens are described in more detail in Exit screens.