Home
Creating a data source in the enhanced EAR
The data sources that support EJB entity beans must be specified before the application can be started. There are several ways to do it, but the easiest is to use the Enhanced EAR editor.
For an example of configuring the enhanced EAR against the Derby database, refer to Configuring the data source for the ITSOBANK. In this section, we demonstrate how to create a data source for a DB2 database using enhanced EAR settings:

| In the Enterprise Explorer, right-click RAD7EJBEAR and select Java EE Æ Open WebSphere Application Server Deployment.
|
|
| Scroll down the page until you find the Authentication section. This allows you to define a login configuration used by JAAS.
|
Figure 22-15 JAAS Authentication Entry
|
| Type dbuser as the Alias, and the appropriate user ID and password for your configuration. Click OK to complete the creation of the configuration.
|
|
| In the Enhanced EAR editor scroll back up to the Data Sources, JDBC provider list section. By default, the Derby JDBC Provider (XA) is predefined.
|
|
| Because we are using DB2 for this example, we have to add a DB2 JDBC provider by clicking Add next to the provider list.
|

 Select IBM DB2 as the database type.
|
|
Then select DB2 Universal JDBC Driver Provider (XA) as the provider type.
|
|
Click Next.
|

Figure 22-16 Creating a JDBC provider (page 1)
|
Note: Note that for our development purposes, the DB2 Universal JDBC Driver Provider (non-XA) would work fine, because we do not require XA (two-phase commit) capabilities.
|
|
Type DB2 XA JDBC Provider as the name.
|
|
Notice the variables that are used to locate the JDBC driver:
|
${DB2UNIVERSAL_JDBC_DRIVER_PATH}
${UNIVERSAL_JDBC_DRIVER_PATH}
${DB2UNIVERSAL_JDBC_DRIVER_NATIVEPATH}
If these variables are not set globally for the WebSphere Application Server, we can set them under Substitution Variables.
|
Click Finish.
|
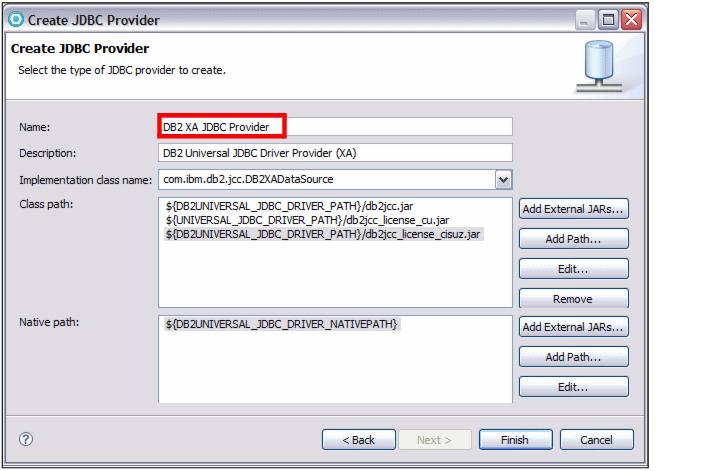
Figure 22-17 Creating a JDBC provider (page 2)
|
| With the new DB2 provider selected, click Add next to the defined data sources list. In the Create Data Source dialog (Figure | 2-18):
|
|
Select DB2 Universal JDBC Driver Provider (XA) from the JDBC provider type list.
|
|
Select Version 5.0 data source.
|
|
Click Next.
|
Figure 22-18 Create a data source (1)
|
Type RAD75DS as the data source name and jdbc/itsobankdb2 as the JNDI name.
|
|
Select the dbuser alias for Component-managed authentication alias.
|
|
Clear Use this data source in container manager persistence (CMP). We are using JPA entities and not EJB 2.1 entity beans.
|
|
Click Next.
|
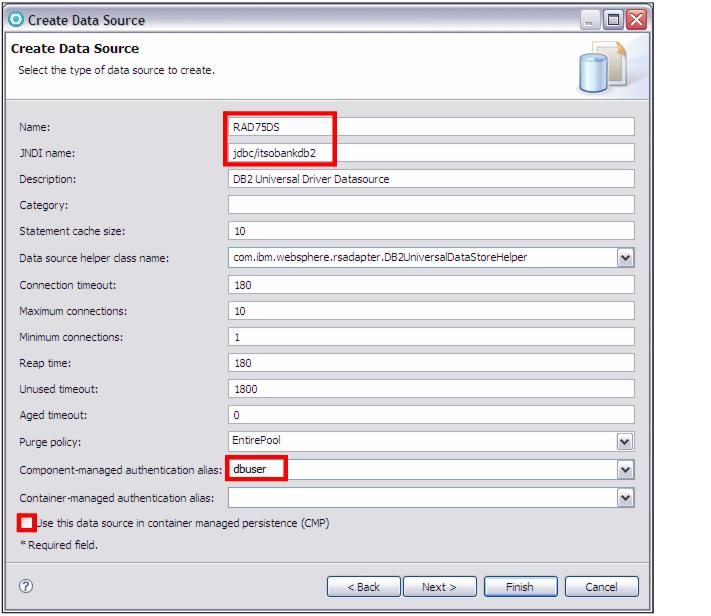
Figure 22-19 Create a data source (2)
|
Set the databaseName property value to ITSOBANK.
|
|
Click Finish to conclude the wizard.
|
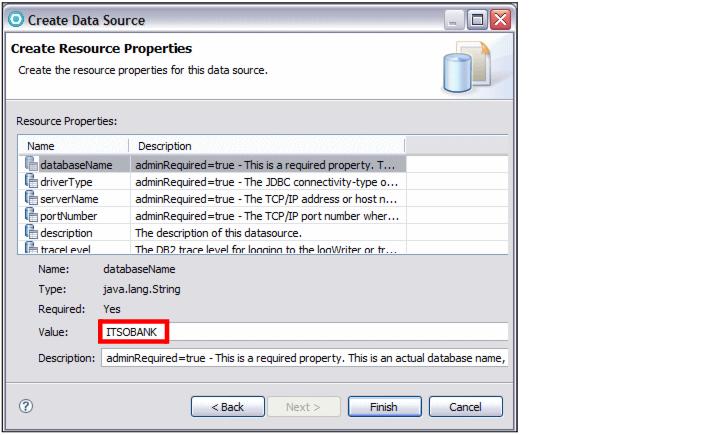
Figure 22-20 Create a data source (3)