Creating a new profile using the WebSphere Profile wizard
To create a new WebSphere Application Server v7.0 profile using the WebSphere Profile Management Tool, do the following steps from within the Rational Application Developer environment:

| In the workbench, select Window Ć Preferences.
|
|
| In the Preferences window, expand Server Ć WebSphere Application Server.
|
|
| Under the WebSphere Application Server local server profile management list, select WebSphere Application Server v7.0 (Figure | 2-3).
|
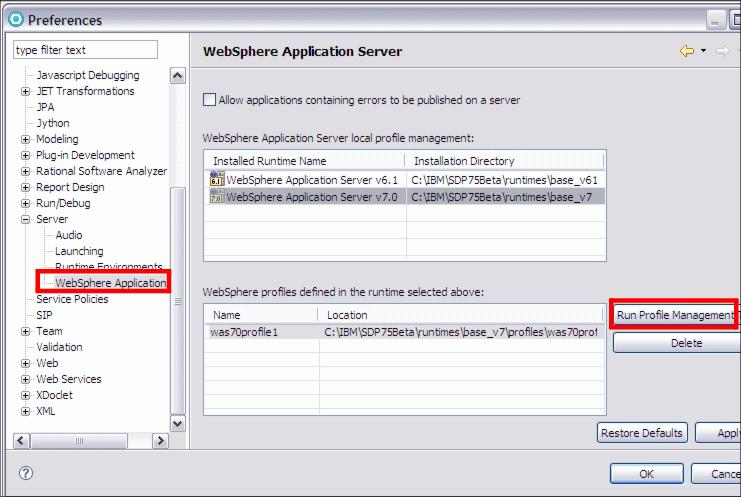
Figure 22-3 Server Preferences page
|
| Click Run Profile Management Tool next to the WebSphere profiles defined in the runtime selected above list, which lists all the profiles defined for the runtime environment selected in the previous step.
|
|
| In the Profile Management Tool window, click Profile Management Tool.
|
|
| The existing profile (was70profile1) is listed. Click Create (Figure | 2-4).
|
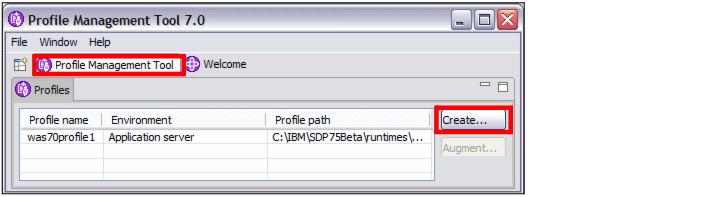
Figure 22-4 Profile Management Tool window
|
| In the Environment selection page, WebSphere Application Server is preselected. Click Next.
|
|
| In the Profile Creation Options page, select Typical profile creation and click Next (Figure | 2-5).
|
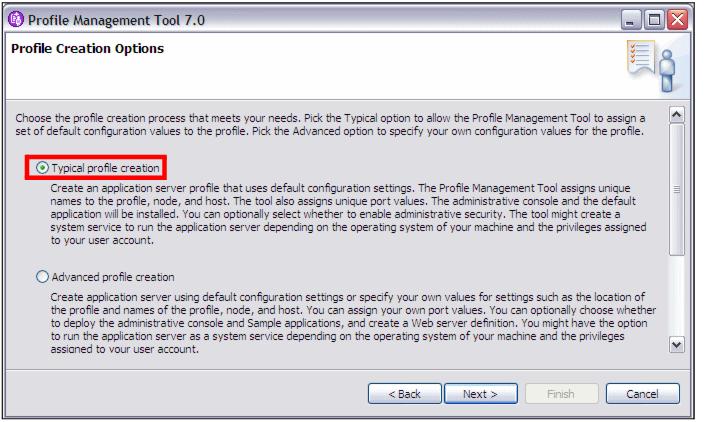
Figure 22-5 Profile options
|
| In the Administrative Security page, clear Enable administrative security and click Next. Alternatively, select Enable administrative security and enter a user name and password (for example, admin).
|
|
| In the Profile Creation Summary page, review the profile settings. You can see that the ports are incremented by 1 for the new profile you are creating so that the new profile does not conflict with an existing profile. Click Create.
|
|
| In the Profile Creation Complete page, clear Launch the First steps console, and click Finish.
|
|
| Notice that you can start the Profile Management Tool using the pmt command in the <app_server_root>/bin/ProfileManagement directory (<rad-home>/runtimes/base_v7/bin/ProfileManagement).
|
|
| Back in the Profile Management Tool window, you can see the new profile is present in the Profiles list with the name AppSrv01.
|
|
| When you close the Profile Management tool window and return to the Preferences window, you can also see that the new profile is listed under the WebSphere profiles defined in the runtime selected above list.
|
|
Note: The new server is installed as a Windows service that is started automatically. You might want to edit the service in the Windows Services dialog and set the Startup Type to Manual.
|