Creating the data source
We create the data source for the ITSOBANK database for the selected JDBC provider:

| Select Derby JDBC Provider (XA) for Derby or DB2 Universal JDBC Driver Provider (XA) for DB2.
|
|
| Under Additional Properties (right-hand side of page), click Data sources.
|
|
| In the Data source page, click New.
|
|
| Enter the basic configuration for the new Data source.
|

Figure 26-14 Basic configuration for the data source

 Name: RAD75DS for ITSOBANK (this can be anything).
|
If you already configured a data source with the JNDI name jdbc/itsobank, use another name, such as jdbc/itsobank1.
|
| In the next page, enter the database name.
|
|
Make sure that you enter the complete path of the database file. For example, in our case this value is:
|
C:\7672code\database\derby\ITSOBANK
|
Clear Use this data source in container managed persistence (CMP). This is for EJB 2.x only.
|
|
Click Next.
|

Figure 26-15 Enter the database path or name
|
| Leave the next page blank (no authentication aliases are required for Derby) and click Next.
|
|
| In the summary page, verify the configuration information you entered for the data source and click Finish.
|
|
| Click Save to the master configuration.
|
|
| Verify the database connection for the new data source:
|
|
Select the data source (check box)
|
|
Click Test connection and a message indicates success or failure.
|
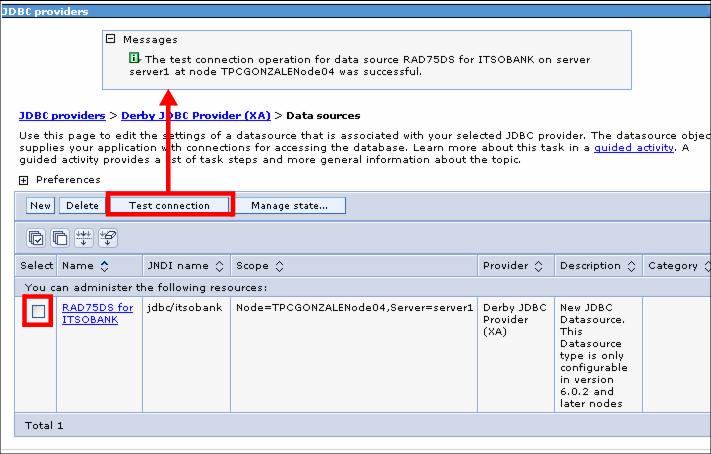
Figure 26-16 Test connection of the data source
|
Tip: If the connection fails, make sure that no connection is active from Application Developer (in the Data perspective disconnect from ITSOBANK).
|