Basic HATS Portlet
Overview
Example
- In Portal, create a Portal Vault Slot named "iSeries520 yourhost HATSPortlet"
- Start HATS Studio
HATS Studio | Start | Programs | IBM WebSphere HATS | HATS Studio
- In the white space area of HATS Project View, right-click and select New HATS Project.
- In the Create a Project panel, for Name, use HATSPortlet. Select Create as Portlet. Click Next to continue.

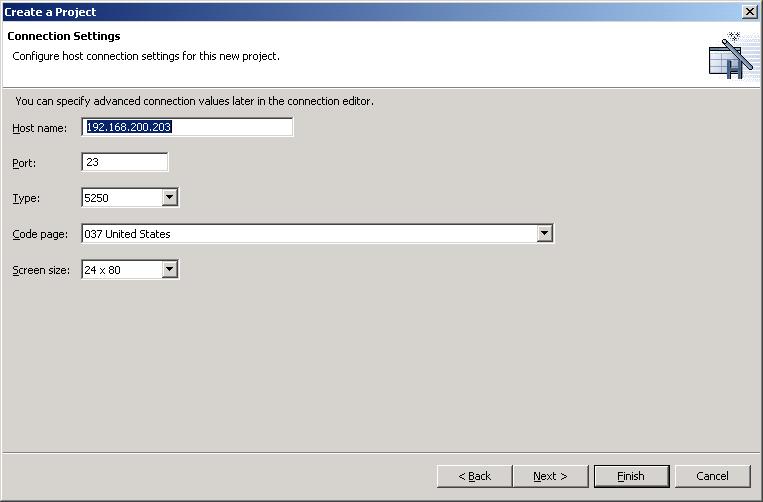
- In the Connect Settings panel, for Host name, insert the hostname or ip address for your machine. For Type, select 5250. Click Next to continue.
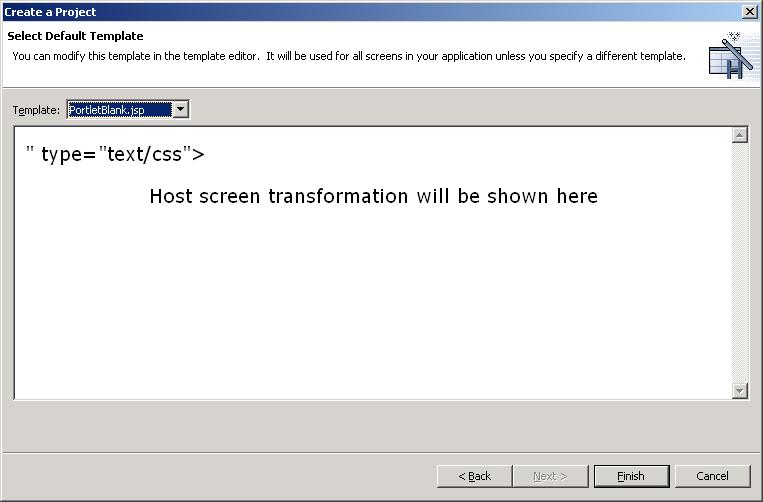
- In the Select Default Template panel, select PortletBlank.jsp and click Finish to finish creating the project.
- In the HATS Project View, click through...
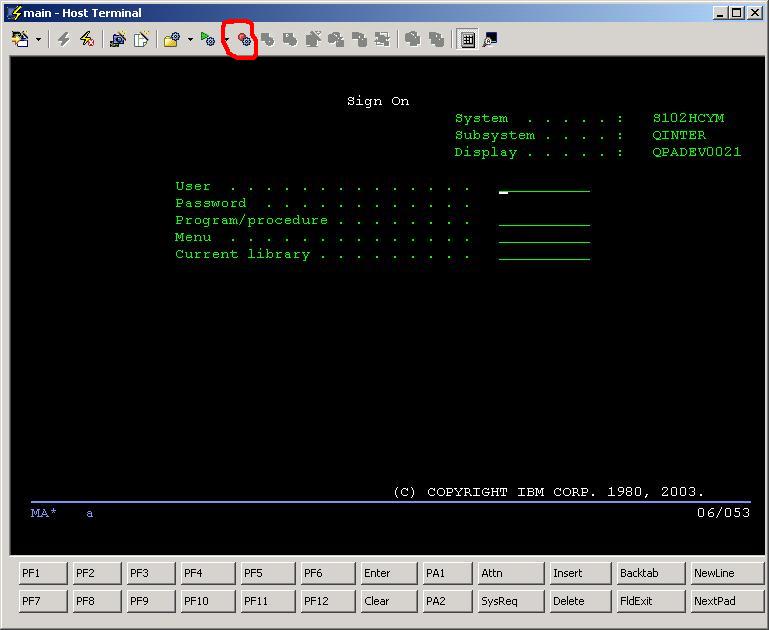
HATSPortlet (right-click) | Open Host Terminal | main
- In the open Host Terminal window, click the Create HATS screen customization icon.

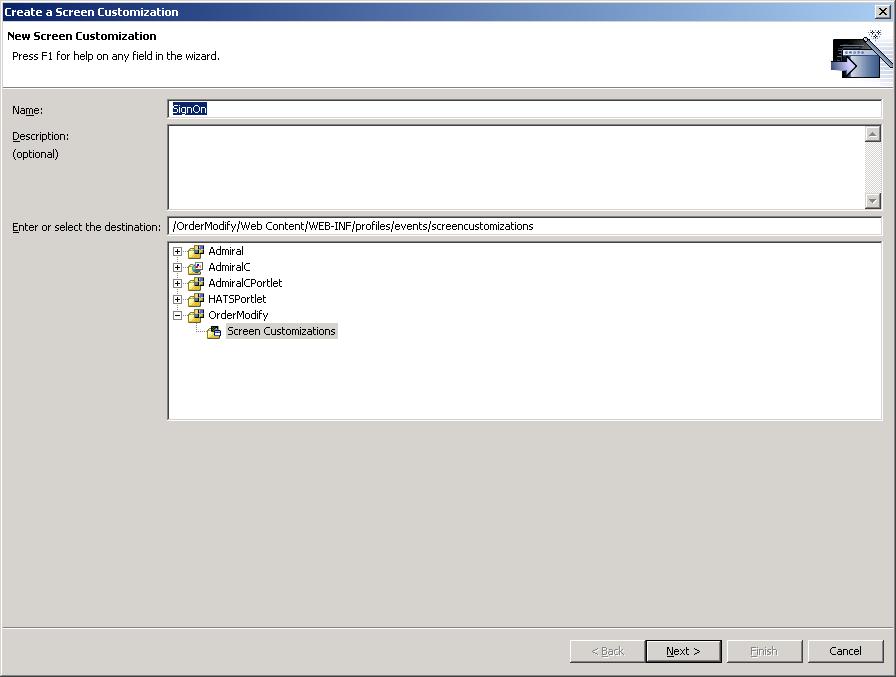
- Enter a name for this screen customization in the Create a Screen Customization window. Click Next to continue.
-
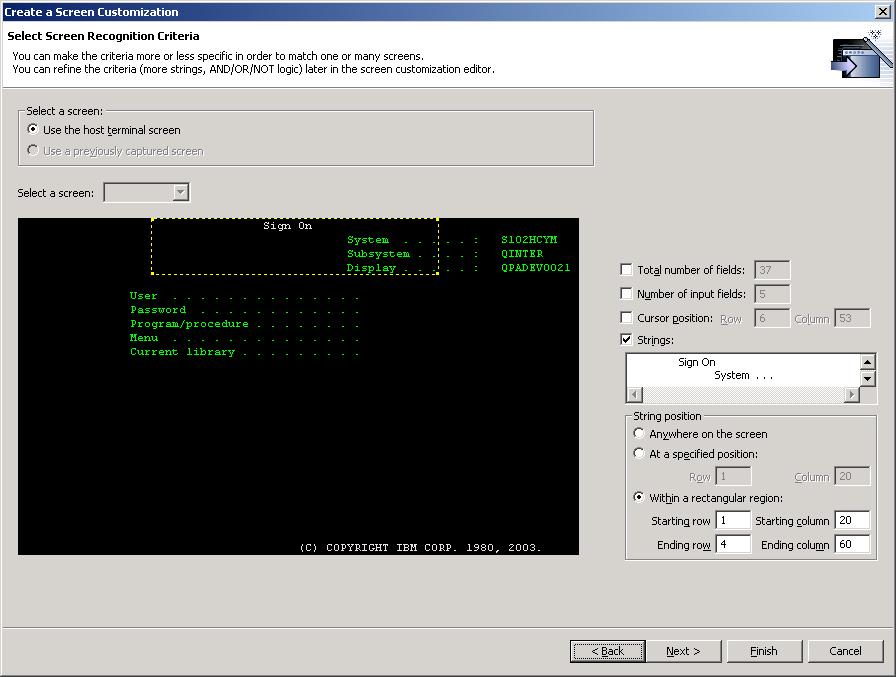
In the Select Screen Recognition Criteria panel, in the terminal window, select an area by clicking and dragging your mouse.
Select the Within a rectangular region option. Click Next to continue.
-
In the Select Action panel, deselect the Apply a transformation option and select Add advanced actions. Click Next to continue.

-
In the Advanced Action panel, click Add
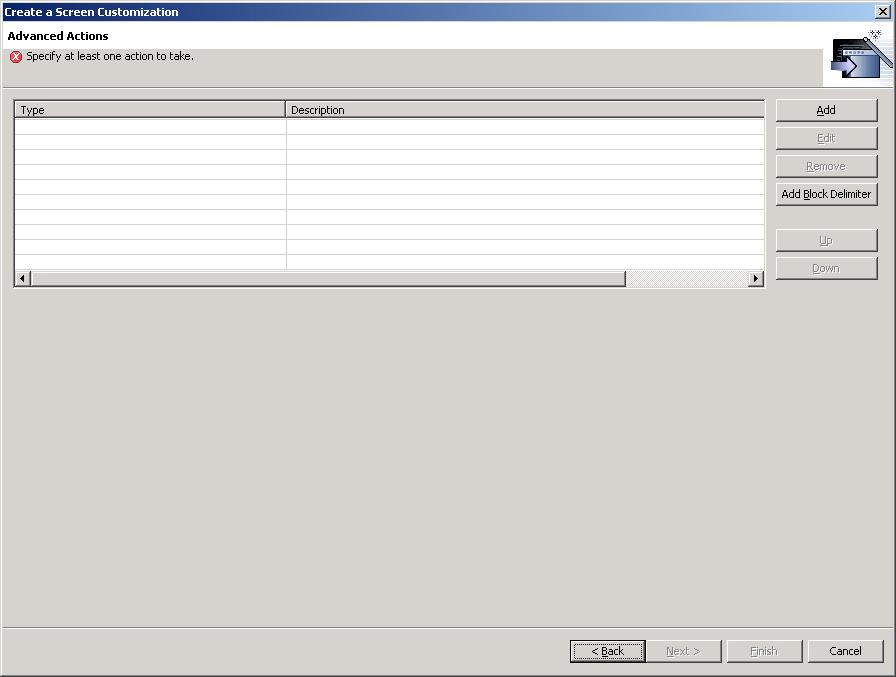
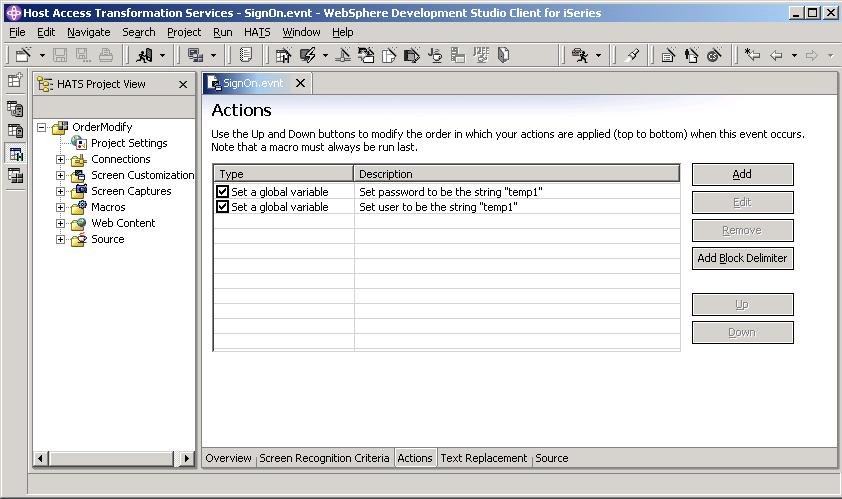
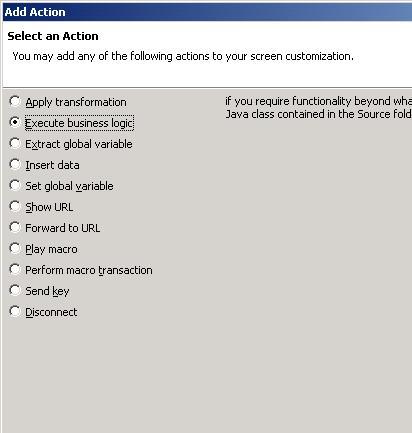
- In the Select an Action panel, select Set global variable. Click Next.

-
In the Define Action Properties panel, for Name, type user. Select the Set to a fixed value option and specify YourUser in the field. Click Finish.
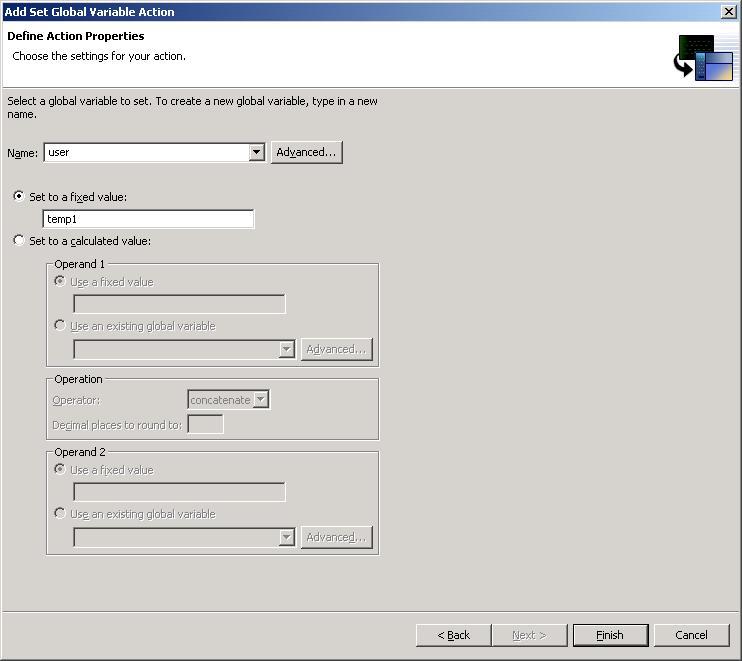
- Add another global variable with the name of password and value of YourPassword.
- On the Advanced Action panel, click Finish.

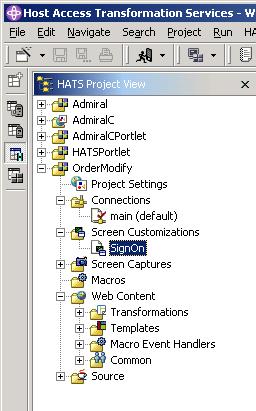
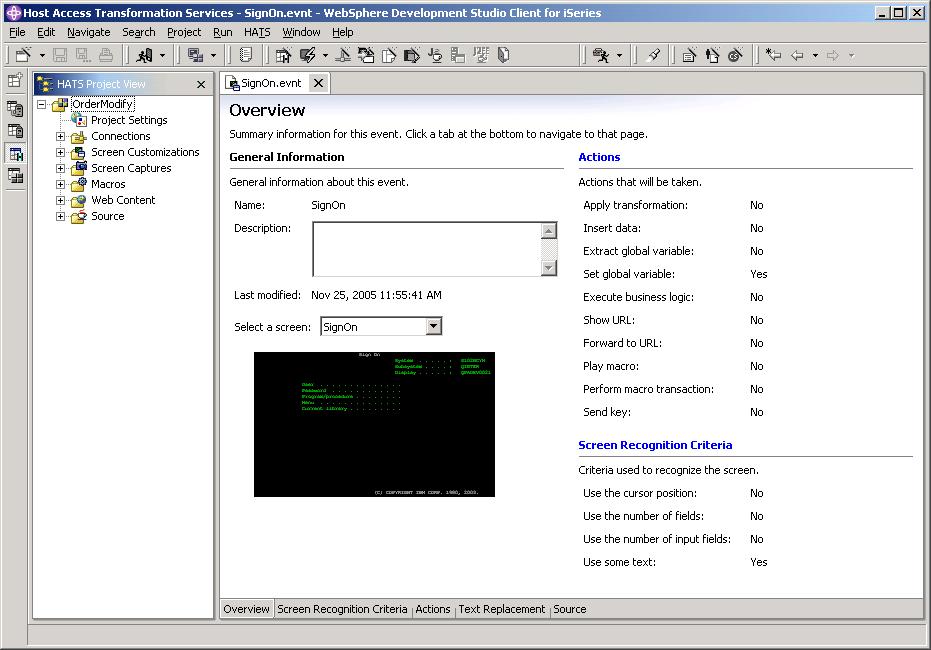
- SignOn should now be part of Screen Customizations in the HATS Project View.
- In the HATS Project view, click...
HATSPortlet (right-click) | New HATS | Business logic
- In the Create a Java class panel, enter the class name blCredential and the package name com.itso.hats respectively. Select Get global variable, Set global variable, and Credential Vault samples. Click Finish.

- In the Java edit window create an execute method that looks like the following...
    public static void execute(BusinessLogicInfo blInfo)
    {
        String [] cred = null;

        System.out.println("Verify value: global variable init value is "
                          + blInfo.getGlobalVariable("user")
                          + " "
                          + blInfo.getGlobalVariable("password"));

        cred = getUserCredential(blInfo,"iSeries520","192.168.200.203","HATSPortlet");

        if (cred != null )
        {
            setGlobalVariable(blInfo,"user",cred[0]);
            setGlobalVariable(blInfo,"password",cred[1]);
        }

        System.out.println("Verify value: user credential is "
                          + cred[0]+ " " + cred[1]);

        System.out.println("Verify value: global variable is "
                          + blInfo.getGlobalVariable("user")
                          + " "
                          + blInfo.getGlobalVariable("password"));
    }
Use your hostname / IP address instead of the one above.
- Press Control-S to save changes.
- In the HATS Project View, click through...
HATSPortlet (right-click) | Open Host Terminal | main
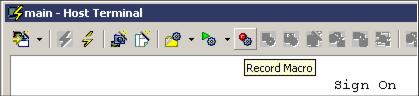
- In the Host Terminal window, click the Record Macro button to begin recording
- In the Record Macro window, for Name, keep the default value of SignOn and click Finish.
- In the Define Screen Recognition Criteria screen
- Change Screen Name to Sign On Screen.
- Click and drag to draw a rectangular region in the screen.
- Under String position, select At a specific position as recognition criteria.
- Click Finish to complete defining the sign-on screen.

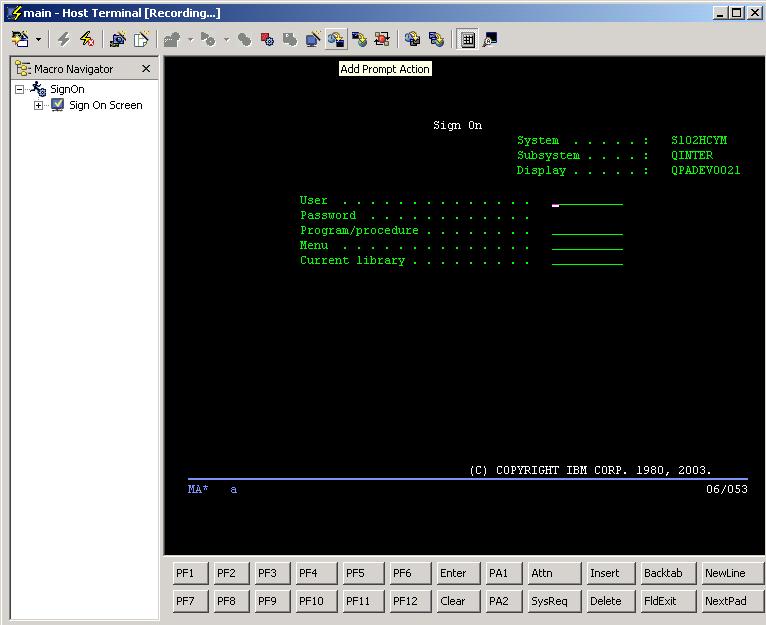
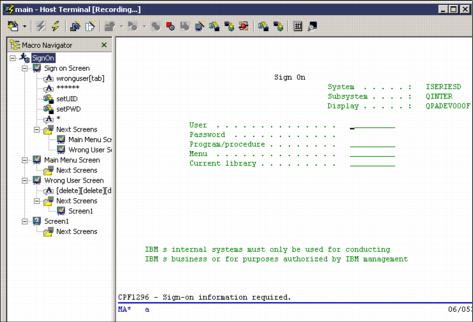
- Verify that your cursor is in the same location as shown in the figure (User field). In the Host Terminal window, click the Add Prompt Action button in the toolbar.
- In the Add Prompt Action window...
- For Name, type setUID.
- For Default value, type user4boats.
- Under Handle Macro Prompt, select Set prompt to global variable.
- For Global variable, select user.
- Click OK to add this action.

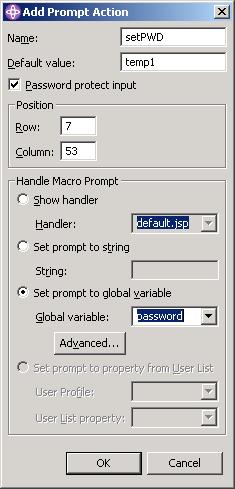
- Add another prompt action. This time, place your cursor at the beginning of the password field shown. Click the Add Prompt Action button.
- In the Add Prompt Action window...
- For Name, type setPWD
- For Default value, type password.
- Under Handle Macro Prompt, select Set prompt to global variable.
- For Global variable, select password.
- Click OK to add this action.
- On the return to the HATS terminal screen, press Enter to log on to the AS/400.
- The OS/400 Main Menu screen is displayed in the HATS Terminal. Click the Define Screen Recognition Criteria button in the toolbar.
- On the Define Screen Recognition Criteria window...
- For Screen Name, type Main Menu Screen.
- Click and drag to draw a rectangular region.
- Under String position, select At a specified position.
- Click Finish to complete the screen definition.
- In the Host Terminal window, click the Stop Macro button to end the macro recording.
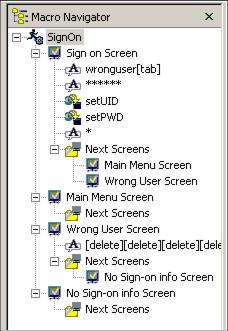
- Your macro should look like the following:

If it does not, delete macro actions until it does.
- Click the Save Macro icon to save the macro. Then close the terminal window.
- Verify the file named commons-logging.properties contains the following:
org.apache.commons.logging.LogFactory=org.apache.commons.logging.LogFactory=org.apache.commons.logging.impl.Log4jFactory
- Verify that ../WEB-INF/lib/commons-logging.jar contains the updated commons-logging.properties file at the root level. Run...
jar xvf commons-logging.jar
...and verify that it contains commons-logging.properties at the root level. If not, copy commons-logging.properties to root level of jar file and reconstitute...
rm commons-logging.jar jar cvf commons-logging.jar *
- Export project into a WAR file and deploy to your Portal.
- After deploying your application, pull up the WAS console and go to...
Applications | Enterprise Applications | MyApplication | Web Modules | MyWarModule
...and set PARENT_LAST from the Classloader Mode drop-down list.
- Cycle the server to make changes take effect.
- Test your portlet.
Create an enabled signon macro
- Close the HATS terminal window if it is opened.
- Open the HATS terminal window for SignOn macro. In the left pane of terminal window, select SignOn. Click the Record Macro button.
- Click Append in the the Record New Macro or Append window.

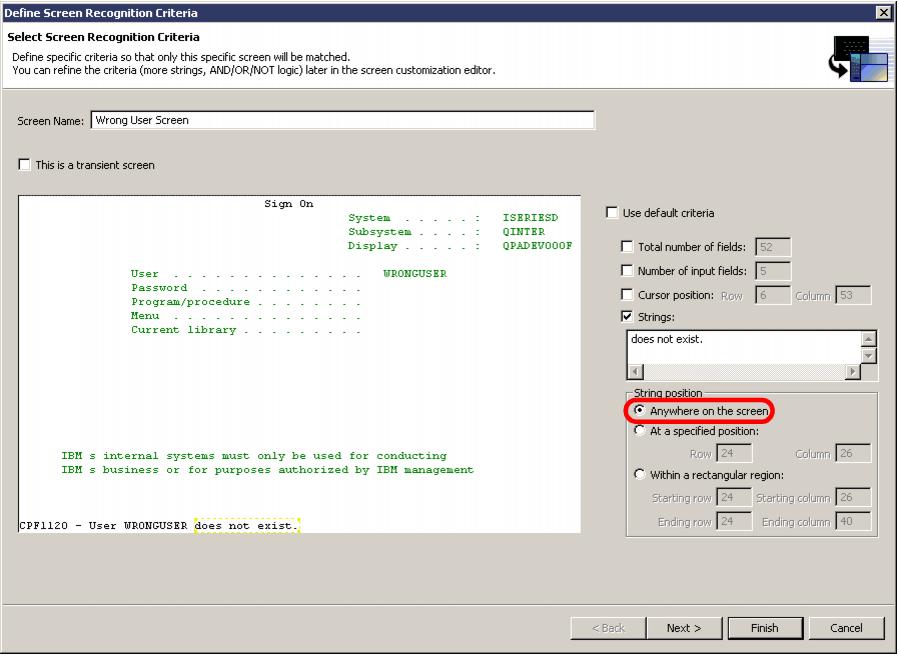
- In the Host Terminal window, for User, type WRONGUSER. For Password, type a password. Press Enter to sign on. A wrong user message is displayed at the bottom of the screen.

- Click the Define Screen Recognition Criteria button.

- On the Define Screen Recognition Criteria window...
- For Screen Name, type Wrong User Screen.
- Click and drag a box on the screen area.
- Under String position, select Anywhere on the screen.
- Click Finish.
- The macro view should look like the example below...

Return to the right pane of the HATS terminal and delete the wrong user name. Press Enter to sign on without any user information.
- You see the screen below....
- Click the Define Screen Recognition Criteria button.
- On the Define Screen Recognition Criteria window, follow these steps:
- For Screen Name, type No Sign-on info Screen.
- Click and drag a box.
- Under String position, select Anywhere on the screen.
- Click Finish to complete this wizard.

- Now the macro view should look like the example below....
Return to the right pane of HATS Terminal. Enter the correct user name and password. Then press Enter to sign on.
- Now you see the screen shown below...

- Click the Define Screen Recognition Criteria button.
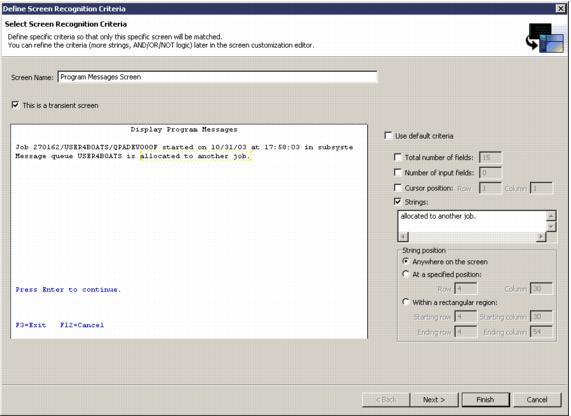
- One the Define Screen Recognition Criteria window, complete these steps:
- For Screen Name, type Program Messages Screen.
- Click and drag a box.
- Click "This is a transient screen"
- Under String position, select Anywhere on the screen.
- Click Finish.
- In the HATS Terminal window, press Enter to proceed to the next screen.
- In the Host Terminal window, click the Stop Macro button to end macro recording. Click the Save Macro button to save the macro. Don't forget to type 90 in the terminal screen to sign off the AS/400 system.
Now the HATS Terminal window looks like the example below...

- In the Macro Navigator view, select and delete all of the useless actions recorded during previous steps. Press and hold the Ctrl key and click all of the useless actions in the navigator view. Press the Delete key to delete these selections.
Make sure your screen looks the example in shown on the right. If some items are not deleted, repeat this step to delete them.

- Edit the macro path. In the Macro Navigator, select Sign on Screen | Next Screens. Right-click and select Edit.
- The Edit Next Screens for Sign on Screen window opens. Click the >> and << buttons to move the screens between the Available Screens and Next Screens panes until you see the results shown in the example. Click OK to close this window.

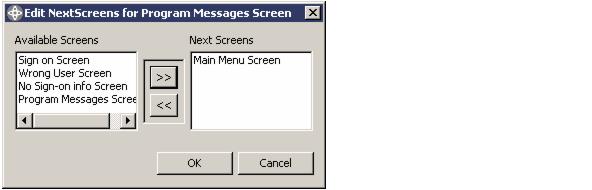
- In the Macro Navigator, select Program Message Screen | Next Screens. Right-click and select Edit.
- In the Edit Next Screens for Program Messages Screen window, click the >> and << buttons to move the screens between the Available Screens and Next Screens panes until you see the results shown in the example. Click OK to close this window.
- Click the Save Macro button to save the changes and close the terminal window.
- In the HATS Studio, double-click the SignOn macro to open the view page. Click the Advanced Editor button

- Make changes to the macro using the editor as shown below. Click Save to save the changes.
Screen name Entry screen Exit screen Transient screen Sign On Screen True False False Main Menu Screen False True False Wrong User Screen False True False No Sign-on info Screen False True False Program Message Screen False False True 
We have now finished the sign-on macro supporting different execution paths. You may test the new macro using the HATS terminal following the steps in Problems in a simple signon macro.
Actually, the new macro still does not handle all of the logon execution paths. For example, if you enter the correct user name but wrong password to log on to the AS/400, you receive the Wrong User Profile screen. We leave it as an exercise for you.
You may add an extra screen recognition criteria to include this scenario.
Complete the signon screen customization
- In the HATS Project View, select Screen Customizations. Double-click SignOn. In the right pane, click Actions
- On the Actions screen, click Add.
- On the Add Action window, select Execute business logic and click Next to continue.
- In the Add Execute Business Logic Action - Define Action Properties window (Figure 3-108), for Class name, specify com.itso.hats.blCredential. Click Finish to close the window.

- Repeat steps 1 through step 4 to add the SignOn macro to the action list.


- Make sure that the final action list is in the same order as shown below. Save the changes.

Home