4.1.1 Install WXS on top of WAS
- Run...
cd eXtreme_Scale_root
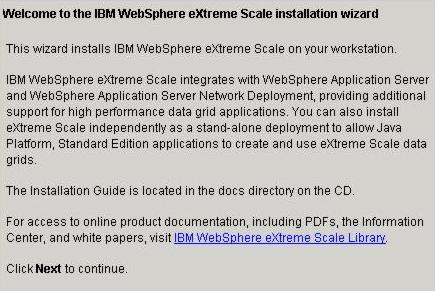
./ install.bat/shOn the welcome page of the Installation Wizard click Next.
- Accept software license agreement page.
Verify necessary licenses are in place before installing.
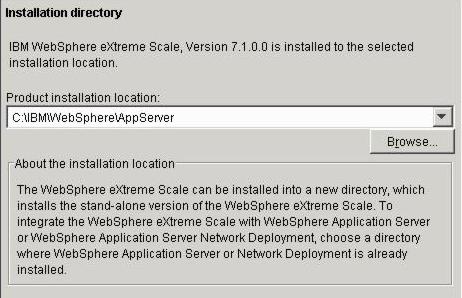
- Specify the installation directory of the previously installed base WAS.
/opt/isv/WAS70/AppServer
You can also install a stand-alone. In this example, we are installing WXS on an existing WebSphere Portal Server installation.
Click Next.
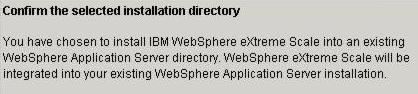
- Confirm that you are installing WXS on an existing WAS environment by clicking Next.
- Select optional features you can select.
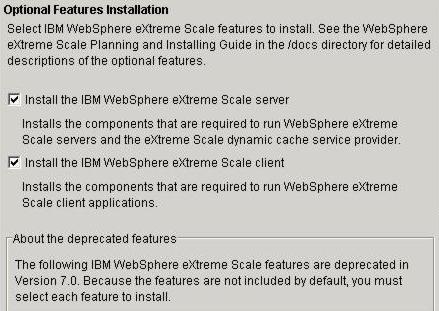
- Select the type of installation:
Install the IBM WebSphere eXtreme Scale server
Performing a server installation makes the underlying WAS JVM act as a grid container. Select this option if you are planning to host the ObjectGrid maps in this JVM.
Choosing this option will automatically enable the client feature as well.
eXtreme Scale client installation
If you are planning to use this installation only as a client and not as a grid container, then choose the client installation. This type of installation reduces the memory footprint of the WebSphere Application JVM.
The option you select will be determined by the role the node will play in the topology.
- If the application uses either of the following deprecated APIs, select the appropriate API to install:
In the Integration scenarios, we are not using any of the deprecated features.
Click Next.
- Select the type of installation:
- Fill out profile augmentation page
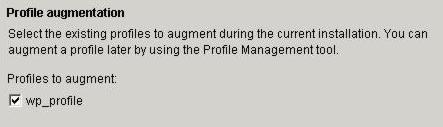
The Installation wizard automatically detects existing profiles in the installation and prompts you on whether you require an augmentation or not. Augmentation can also be performed after the product binary installation using PMT.
In this case, we are proceeding with the augmentation of our WebSphere Portal Server profile, wp_profile as part of the installation.
If you have multiple profiles, the wizard allows you to augment all the profiles with a single click.
Click Next.
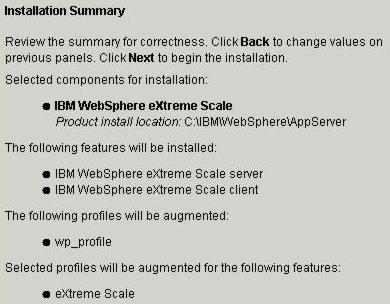
- On the summary page click Back to revisit previous pages to change any of the selections.
Click Next to complete the installation.
- The next window shows the installation progress. When the installation is complete, click Next.
- The final page of the process informs you of the success or failure of the installation.
In the case of a failure, review the logs in...
WAS_HOME/logs/wxs/install

- Click Finish.